Business Management x Customer Experience x Data Visualisation: 1st prototype

In the current digital era, Customer Experience has evolved with multichannel support, chatbots, self-care, and virtual assistants to reduce customer effort, driving the development of Customer Relationship Management tools. However, while significant investments have focused on empowering AI-assisted agents, the role of managers has been largely underserved.​

I’m designing a solution to empower the “Augmented Manager”, equipping leaders with advanced tools and analytics to optimize real-time-onsite–remote-team performances and deliver outstanding results in an increasingly complex, tech-driven customer experience ecosystem.

Beside.you is a Software As A Service (SaaS) solution, is developed to simplify decision-making and boost efficiency for managers.

By solving the biggest business challenges, with intuitive functionalities simplifying Steering, Performance management, and resources’ Growth, it is shaping a future whereall business tools work seamlessly together, unlocking unmatched operational excellence for organizations everywhere.

This small demo showcases some parts of the product experience that is offered beginning with Steering on its macro micro levels:

#5 Exponat-Konzept

Die Frage “wen und wieso soll die Webseite jemanden interessieren” aufgekommen ist, tendiere ich etwas dazu, aus dem Projekt ein interaktives Exponat zu machen. Es wäre super, wenn das Teil einer Ausstellung sein könnte, in der feministische Themen einen Platz haben. Wie auch immer ich eine Ausstellung in Graz so ca im Juli-September 2026 finde, die genau meine Arbeit mit ausstellen wollen würden. Ich denke, dass Menschen die zu solchen Ausstellungen kommen, ohnehin schon ein Interesse an einer Arbeit für dieses Thema mitbringen und daher auch motiviert sind, Informationen zu den Künstlerinnen zu erhalten.

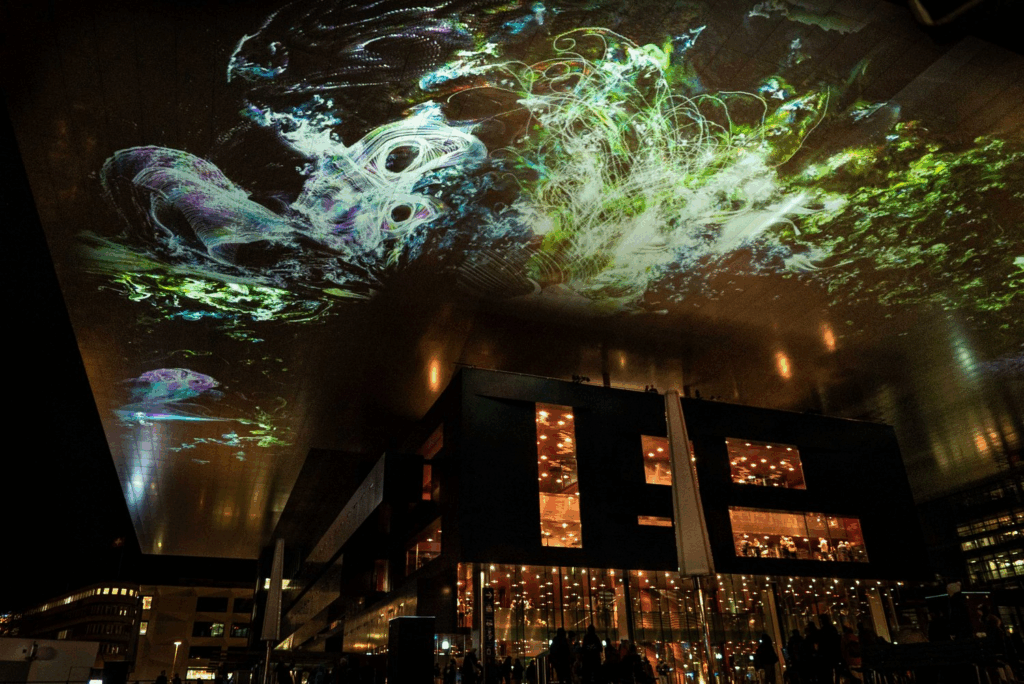
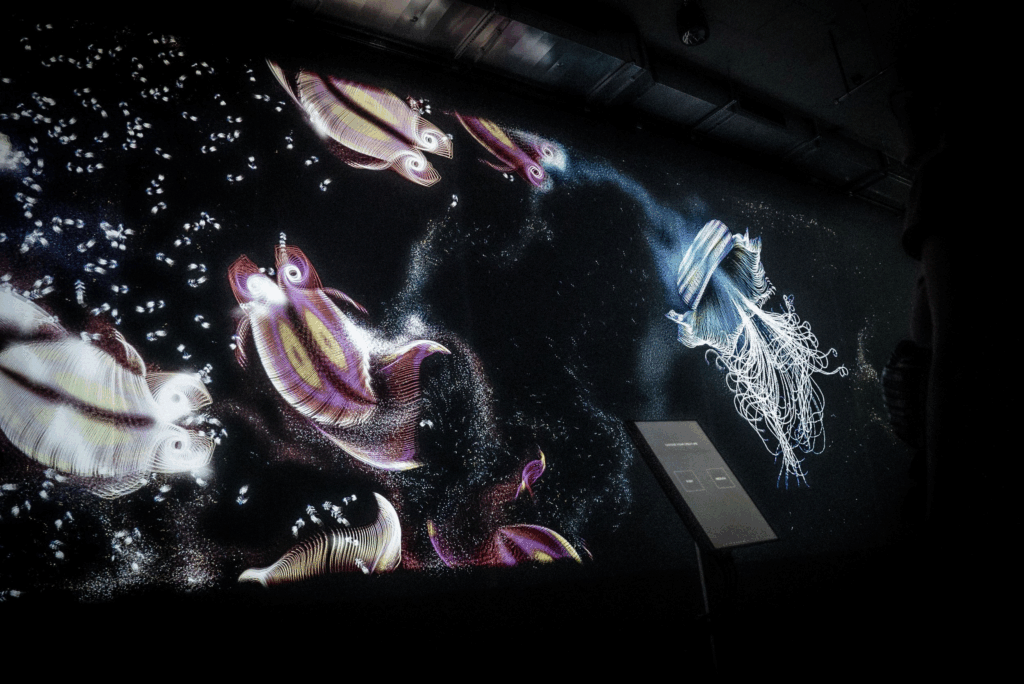
Ich finde zum Beispiel die Arbeiten von Phillipp Artus immer ziemlich beeindruckend. Er ist ein audio-visueller Künstler aus Berlin. Das erste mal habe ich vor 2 Jahren seine Arbeit Aquatics in Berlin gesehen und letztes Jahr bei Klanglicht habe ich die Arbeit Flora gesehen. Hier mehr zu seinen Arbeiten: https://philippartus.com/work

Ich finde Phillipp Artus schafft es immer sehr elegant, einen User Input über ein Interface zu abstrahieren und in eine abstrakte Weise in Form von Kunst wiederzugeben.

So könnte das Exponat aussehen

  • Intro
    ein Vogel­schwarm aus etwas Partikel ähnlichen (aber vielleicht keine Partikel weil schon so viel gesehen) formt sich langsam zu dem Schriftzug „Beklaute Frauen“, der Autorin des Buches und mich als Visualisiererin – begleitet von einem sanften, atmosphärischen Sound­scape.
  • Touch-Stele: Auswahl einer Biografie
    Auf der Stele erscheinen Porträts ausgewählter Frauen aus dem Buch als kleine Karten (wie so Spielkarten oder tarot karten? Blöde idee?).
    Ein Antippen lässt:
    • Titel und Kurz-Anekdote (1–2 Sätze) aufklappen
    • Eine generative Illustration daneben auf der Wand animieren
  • Generatives Storytelling an der Wand
    Jede Frau bekommt ein eigenes “Key Visual” – mit Infos zu:
    • ihren Lebensdaten (Jahr, Ort, Beruf)
    • einem charakteristischen Zitat
    • Durch Streichen auf der Stele kann man Parameter verändern:
      • Farbe (z. B. Pastelltöne für Schrift­stellerinnen, dunkle Töne für Wissenschaftlerinnen)
      • Bewegungsgeschwindigkeit (ruhige vs. dynamische Animationen)
  • Interaktive Timeline
    Unten an der Wand läuft automatisch eine Zeit­linie aller Protagonistinnen ab. Beim Drüberfahren hält der Zeitstrahl für die jeweilige Person an und spielt ein 15-Sekunden-Audio­snippet (Voice-Over oder O-Ton), in dem ein kurzer Lebens­abschnitt erzählt wird.

Das waren jetzt meine ersten Gedanken zur Ausstellung, es ist aber noch sehr roh und ich muss da noch viel drüber nachdenken. Bzw. wäre ich auch dankbar für die Info, ob das überhaupt realisierbar wäre. Ob es denn eine potentielle Ausstellung dafür gäbe. Klanglicht wär natürlich fetzig, aber kann mir nicht vorstellen, dass die da eine Studentin eine so große Installation machen lassen.

Hier noch ein Foto von mir mit dem Buch:

#2.06 Final Video

In this final post, I’m sharing a short video documenting the process behind the first prototype of the Focus Lamp. I started with a quick proof of concept to explore the core interaction: placing the phone in a dock to trigger a shift in light and attention. From there, I moved on to a more refined version, improving both the physical design and the technical setup.

This is still just the beginning. The prototype is far from finished, but it marks an important step in translating abstract ideas, about distraction, focus, and calm technology, into something tangible. There’s a long way to go, but I’m excited to continue exploring how physical objects can gently support more mindful and intentional use of technology.

Blogpost #5 – Prototype

In my previous blog post (#3), I explored the value of tangible interfaces and embodied interaction, especially when applied to scientific concepts. I took a look at constructivist and kinesthetic learning theories and discussed how meaningful, hands-on engagement can help people and especially children understand and retain information more effectively than traditional textbook-based approaches. Building on this I tinkered around with a lo-fi tangible prototype: an interactive chemistry simulation that allows users (kids) to explore real chemical reactions in a safe, accessible, and playful way.

One of the challenges in kinesthetic learning (or hands-on learning in general), especially in the context of science education, are the physical restrictions: there is messiness, the danger of working with certain substances, and the financial or spatial limitations of traditional labs. The prototypes approach is to offer a digital-physical hybrid that provides the sensory and experiential engagement of a real experiment without the need for actual chemicals or laboratory space. Of course this is really stripped down to the most basic parts, but the bigger idea is to use technology to make knowledge tangible and engaging and not just shift everything from a textbook to a screen – because where’s the fun in that?

Making the prototype

I started by developing the concept of my prototype. I knew I wanted it to deal with some kind of scientific topic and while reading the paper about kinesthetic learning I figured that making experiments with chemicals more accessible could be an interesting starting point, since that is something that I always found most interesting in chemistry class and would have wanted to do more. The idea is to simulate the feeling of experimenting through look, sound and haptics. I chose a simple experiment where different substances react with water and started by creating my digital setup for which I created some simple visuals in processing. I initially wanted to trigger the sounds with Max9. This worked great, however I ran into the problem, that I couldn’t simultaneously trigger the MaxPatch and the Processing sketch. So I decided to add the sound directly into processing with a sound library, which worked really nicely. I then did some more experimenting with the visuals and sounds and added some information text for each chemical reaction for more context as to what is happening (it is still about education after all, even if the shapes and colors are a lot of fun to look at). I then hooked the whole thing up to a MakeyMakey and crafted really simple physical representations out of paper for the chemical substances I was simulating. To make them conductive I used tinfoil and after a bit of experimenting I was able to make my own little Natrium-Explosion in my room without dying – how cool!

Conclusion

It was really interesting diving into prototyping with a vague idea at this point in the project, as this is not an approach I am used to. I liked that it pushed me to just start, try things and experiment. This really helped me get rid of high standards for this early stage. While I think I do enjoy the topic, I might have to still dabble in my other two ideas just to figure out where I see the most potential and have the most fun. I think I will need a lot more experimenting to see what I want to do, but this is definitely a good start.

11 Qs with Interactive Room

For the final post, I decided to take a different approach: instead of showing the prototype in a typical documentation style, I drew inspiration from Vogue’s “73 Questions” video series. In those videos, celebrities are followed through their homes, answering rapid-fire questions while casually interacting with their environment. I thought it would be the perfect format to bring my interactive miniature room to life, showcasing the interactions while answering questions about the process in a fun and natural way.

This prototype has turned out to be so much more than I expected. I started this project without any prior experience with Arduino. What made this experience truly special was the freedom to experiment, to learn by doing, failing, fixing, and discovering. Because of that openness, I was able to explore Arduino, coding, and wiring not through dry instructions or rigid tutorials, but through play. It felt more like crafting a story than building a circuit. Each interaction I created, each sensor I connected, was a small moment of delight, a joyful, hands-on way to learn a technology that once felt intimidating.

There was something incredibly satisfying and poetic about weaving together the personal and the technical. Bringing this tiny room to life, with all its miniature details and hidden mechanisms, felt like a blend of magic and logic. It was both cute and clever, intimate and inventive and in the process, I discovered how technology can be not only functional but also deeply expressive.

What surprised me most was how well everything worked in the end. I was fully prepared for a “messy but functional” result, but instead, I got a cute, working, magical little room that I’m genuinely proud of, both technically and visually.

This video is both a demonstration and a little celebration of everything that came together in this project. I hope you enjoy it as much as I enjoyed making it.

#4 Erste User-Research-Insights

Kontext & Ziel

In Vorbereitung auf meinen Prototypen habe ich ein erstes Interview mit einer Testperson durchgeführt, um ein besseres Gespür für Bedürfnisse, Vorbehalte und Erwartungen an ein digitales Format zur Präsentation unterrepräsentierter Künstlerinnen zu bekommen. Mein Interviewpartner ist 27 Jahre alt, interessiert sich gelegentlich für Kunst, sieht sich selbst aber eher als „casual enjoyer“.

Methodik

Format: Halbstrukturiertes Leitfaden-Interview (auf Englisch)
Dauer: ca. 20 Minuten
Kernfragen:

  • Interesse an Kunst und Vorerfahrungen
  • Einstellung zu Feminismus
  • Wissen über Frauen in der Kunstgeschichte
  • Wahrnehmung von Repräsentationslücken
  • Potenzial digitaler Formate
  • Einstellung zu Biopics und interaktiven Webseiten als Biografie-Form

Transcript vom Interview

Hi – my name is Tanja.
My interview today is part of the research for my Master’s thesis, which focuses on an art-related topic. Thank you in advance for taking your time. I would like to start with some questions:

Are you interested in art? And if so, what is your experience with art?

Yes, I’d say I’m definitely interested in art, especially in digital forms and also when visiting art museums. I wouldn’t call myself an expert or anything like that, more of a general enthusiast. I enjoy art and find it inspiring, but I’d describe myself more as a “basic enjoyer”, someone who appreciates it without diving too deeply into theory. I tend to be drawn to 20th-century art, and I really like artists like Monet.

Do you consider yourself a feminist?

Yes, I would consider myself a feminist. Over time, I’ve realized that many of the thoughts or assumptions I have are shaped by the way I was raised and educated. Sometimes I even catch myself being surprised when women do something that breaks those expectations, which shows me how deeply ingrained some of these patterns are. So I’d say I’m quite aware of these things and try to reflect on them.

How advanced is your knowledge about women in art history?

To be honest, not very advanced. I know that around 90% of the artists commonly talked about in art history are men, so my knowledge is mostly limited to those male-dominated narratives. I know a few women artists, like Marina Abramović, but overall, I’d say I haven’t been exposed to a lot of female artists or their stories.

Do you think there is a lack of representation of women in art history?

Yes, absolutely. There’s a significant underrepresentation of women in art history. I think many women artists have been overlooked or neglected entirely. The art world has long focused on male figures. From what I’ve seen, the ratio of male to female artists being talked about might be something like six to one — which really says a lot.

How do you think representation of women in art could look like in a digital context?

I think it’s important to create platforms that highlight the stories of women who’ve been forgotten or never recognized. Something like a digital archive, a website, or even a game could work — maybe something where you try to guess if a painting was done by a man or a woman. The key, I think, is not to focus only on some unknown names. People often lose interest if they don’t recognize someone. So instead, you could tell personal stories or present artworks in a way that makes the person behind them relatable or focus on their work.

Do you like movie biographies, such as biopics? And if yes, what do you enjoy about them — or why not?

Yes, I enjoy biopics. I think they’re a great way to learn about people’s lives and creative journeys. But I do sometimes wonder how accurate they are. For me, it’s important that there’s a level of scientific or historical accuracy — otherwise it can feel a bit misleading. Still, when done well, they can be both inspiring and informative.

Could you imagine a website functioning as a kind of biopic?

I think it could work, especially if it’s tailored to a specific target group. A more interactive or visual format, like videos or animations, could make the content appealing to a wider audience. A well-designed information website could definitely serve as a kind of digital biopic.

Thats all. Thank you so much for taking the time to speak with me – I really appreciate your thoughts! Goodbye!

Zusammenfassung

Er sagte, er interessiere sich grundsätzlich für Kunst, besonders für digitale Kunst und Museumsbesuche, sehe sich selbst aber eher als „casual enjoyer“. Er bezeichnet sich als Feminist und erwähnte, dass ihm bewusst sei, wie bestimmte Gedankengänge oder Reaktionen durch Erziehung und gesellschaftliche Normen geprägt sind – etwa, dass man überrascht ist, wenn Frauen Dinge tun, die den üblichen Erwartungen widersprechen. Sein Wissen über Frauen in der Kunstgeschichte sei eher begrenzt, und er habe erkannt, dass das meiste, was wir lernen, sich auf männliche Künstler konzentriert. Er ist jedoch überzeugt, dass Frauen in der Kunst klar unterrepräsentiert sind, und schlägt vor, dass digitale Plattformen wie Websites, Spiele oder Dokumentationen dazu beitragen könnten, weniger bekannte Künstlerinnen ins Rampenlicht zu rücken – vorausgesetzt, sie werden so präsentiert, dass die Menschen eine Verbindung herstellen und sich wirklich dafür interessieren können. Dort sieht er auch die Problematik bei dem Projekt: Warum sollte man sich dafür interessieren. Eine Frage, die sich sicher lohnt nachzugehen.

Learnings für die Gestaltung

  1. Interesse wecken: Wichtig ist, dass sich Leute auch wirklich für mein Projekt interessieren. Warum sollte man die Webseite besuchen? Wer besucht sie? Zielgruppenanalyse. Vielleicht ist es eher als Exponat geeignet für eine interaktive Ausstellung. Auf welche Art und Weise? Möglicherweise auch beides zugänglich machen. Welche Aspekte funktionieren wo und wie besser?
  2. Narrative Verankerung: Kleine biografische Geschichten („mini-Anekdoten“) als emotionaler Aufhänger.
  3. Interaktive Elemente im Web: Quiz- und Gamification-Module, um Neugierde zu wecken und aktives Erkunden zu fördern.
  4. Medienmix: Kombination aus Text, Bild, kurzen Videos und Animationen – für unterschiedliche Lern- und Rezeptionsstile.
  5. Transparenz & Korrektheit: Quellenhinweise und weiterführende Links, um wissenschaftliche Genauigkeit sicherzustellen.

Forschungspunkte

Best Practices im Digital Storytelling

  • Analyse von preisgekrönten Web-Dokumentationen
  • Welche Micro-Interactions und Narration-Patterns (Voice-Over, Progress-Markers) funktionieren besonders gut?

Visuelle Empathie & Emotional Design

  • Theorien zu „Emotional Engagement“ (z. B. Don Norman’s Emotional Design).
  • Wie Farbe, Typografie und Bildsprache Empathie für marginalisierte Biografien können fördern.
#4 Alright… Now What?

So far, I’ve soldered things together (mentally, not literally), tested sensors, debugged serial communication, and got Arduino and Processing talking to each other. That in itself feels like a win. But now comes the real work: What do I actually do with this setup?

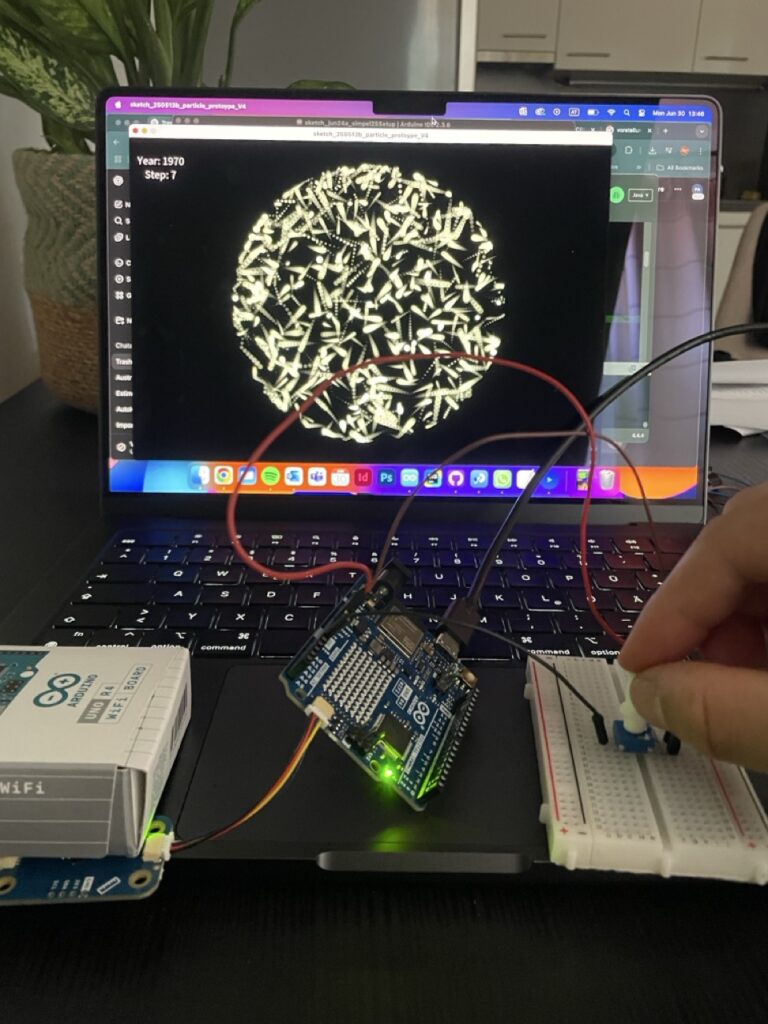
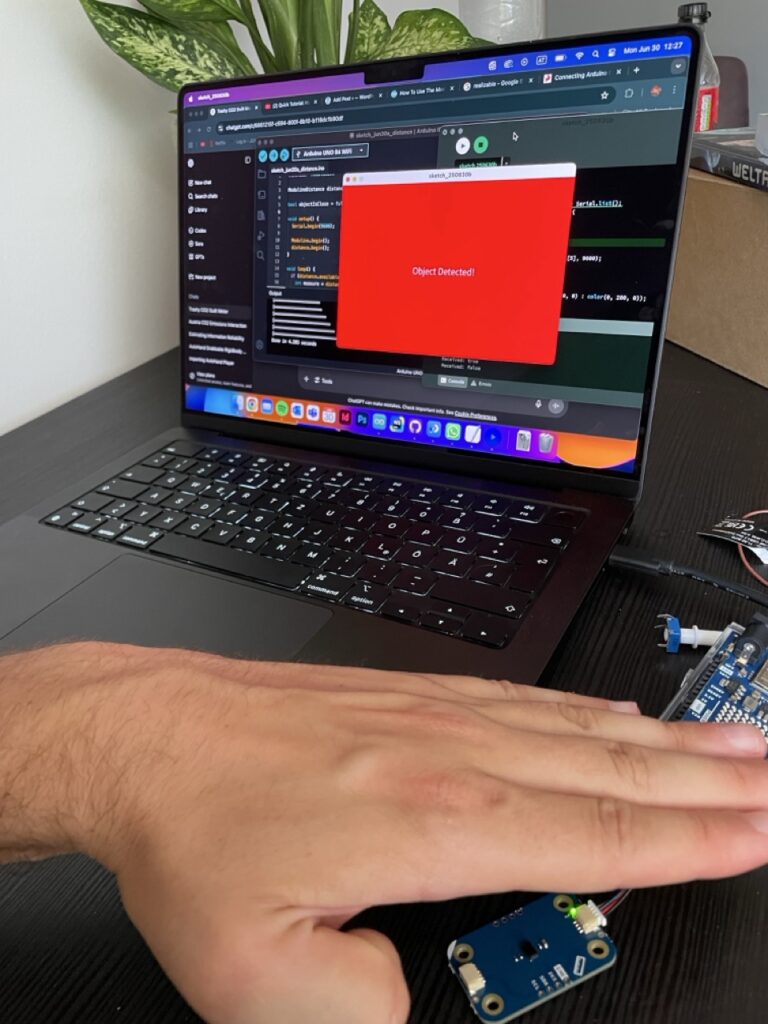
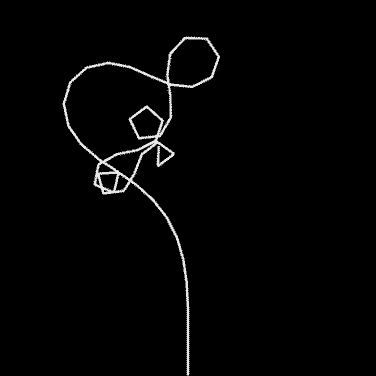
At this stage, I started combining the two main inputs—the proximity sensor and the potentiometer into a single, working system. The potentiometer became a kind of manual timeline scrubber, letting me move through 13 steps that represent a line, which should be a test for a potential timeline? The proximity sensor added a sense of presence, acting like a trigger that wakes the system up when someone approaches. Together, they formed a simple but functional prototype of a prototype, a rough sketch of the interaction I’m aiming for. It helped me think through how the data might be explored, not just visually, but physically, with gestures and motion. This phase was more about testing interaction metaphors than polishing visuals—trying to understand how something as abstract as historical emissions can be felt through everyday components like a knob and a distance sensor. This task pointed out to me, how important testing and the ideation of your ideas can be, to get a better understanding of your own thoughts and to form a more precise imagination of your plan.

Small Prototype to connect sensors in one file

Things about to get serious

Building on the knowledge I gained during the ideation phase, I connected my working sensor system, a potentiometer and proximity sensor to the Processing sketch I had developed during design week. That earlier version already included interaction through Makey Makey and homemade aluminum foil buttons, which made for a playful and tactile experience. In my opinion, the transfer to Arduino technology made the whole setup easier to handle and much cleaner—fewer cables, more direct control, and better integration with the Processing environment. The potentiometer now controls the timeline of Austria’s CO2 emissions, while the proximity sensor acts as a simple trigger to activate the visualization. This transition from foil to microcontroller reflects how the project evolved from rough experimentation into a more stable, cohesive prototype.

#3 Serial Communication Between Arduino and Processing

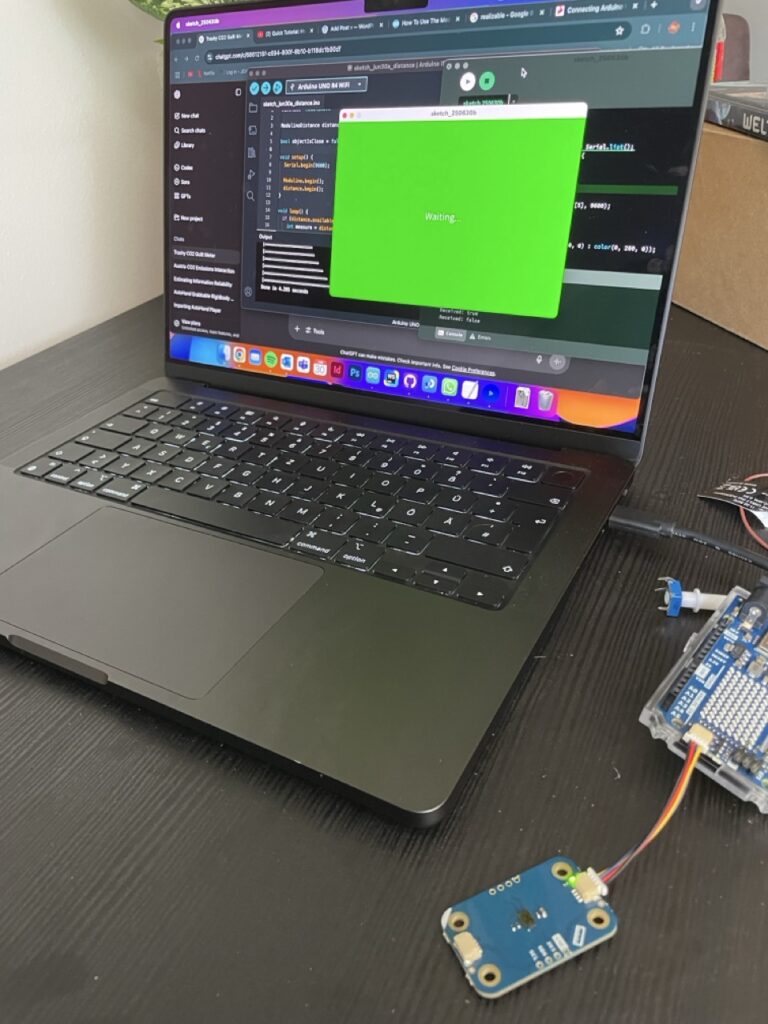
By this point, I had some sensors hooked up and was starting to imagine how my prototype might interact with Processing. But getting data from the physical world into my visuals? That’s where serial communication came in! On the Arduino side, I used “Serial.begin(9600)” to start the connection, and “Serial.println()” to send sensor values. In my case, it was messages like “true” when a hand moved close to the distance sensor, and “false” when it moved away. On the Processing side, I used the Serial library to open the port and listen for data. Every time a new message came in, I could check if it was “true” or “false”, and change what was being shown on screen — red background, green background, whatever. So I was prototyping the prototype, you could say.

Why this is so fascinating and helpful 🤯

I wanted to build something quick, easy to use and reactive—and serial communication made it possible to prototype fast without diving into WiFi, Bluetooth, or custom protocols. It lets me test ideas in minutes: turn a knob, wave a hand, watch the screen respond. And for something as conceptual and messy as visualizing CO2 history with simple and fast coding, that immediacy is everything.

Imagine you’re at an interactive museum exhibit about climate change. As a visitor approaches a screen, a hidden distance sensor detects their presence. The Arduino sends “true” to Processing, which triggers a cinematic fade-in of historical CO2 data and a narration starts playing. When the visitor steps away, the system fades back into a passive state, waiting for the next interaction. That whole experience? Driven by serial communication. One cable. A few lines of code. Huge impact.

Some helpful links for those who are interested in serial communication:

https://learn.sparkfun.com/tutorials/connecting-arduino-to-processing/all

2.6 Final Video: Prototyping Calm with the Breathing Circle

In this final blog post, I’m presenting a short video that showcases the development and insight behind my analog prototype, the Breathing Circle. Designed as a screen-free, tactile tool for guided breathing, this project explores how physical interaction can support emotional regulation in everyday life. From early sketches to laser-cut textures and user testing, the process revealed how simplicity, materiality, and intuitive design can foster moments of calm. The video summarizes my journey, shares user reactions, and reflects on what future iterations could look like.