Title image: Luis Miehlich, “Cartographies – Ein Halbschlafkonzert (2023) – Pieces for Ensemble, Electronics & Video,” luismiehlich, accessed May 25, 2025, https://luismiehlich.com/.
In addition to developing the idea of a technical tool-set, I’ve started to dig a little bit deeper into the research part of my project, trying to better understand the evolving field the creative and technical work inhabits. What started as an effort to clarify the conceptual underpinnings of my practical project turned into a broader exploration of a field that is, in many ways, still defining itself: concert design.
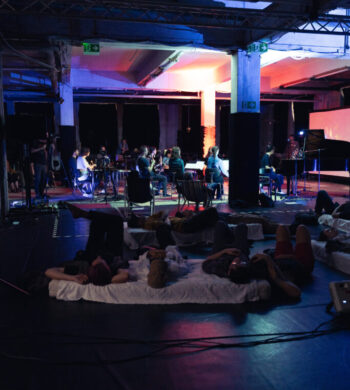
This term may sound straightforward, but its scope is definitively not. Concert design is not just about programming a setlist or choosing a venue;it’s about crafting the entire experiential and spatial context of a performance. It treats every element of the concert, starting from basic things like the seating arrangements (or why not just laying down for example?) to interactivity, from sonic spatialization to the architecture of the space. Everything is understood as part of the creative material designers can work with.
A Field Still Taking Shape
What struck me early on is how fragmented this field still is, even though there are of course some technical resources in more specific aspects like e.g. stage lighting. But there are only a handful of academic sources that explicitly use the term concert design, understanding it as a more holistic view and even fewer that attempt to define it systematically. Among them, people like Martin Tröndle stand out for their efforts to create a structured framework through the emerging field of Concert Studies. Another name, more in the field of practical work, is Folkert Uhde.
Yet, when looking beyond academic texts, I found countless artistic projects that embody the principles of concert design even if their creators never labeled them as such. Here I want to point out the ambient scene with early experiments and even non-scientific reflections from Brian Eno up until very recent formats from Luis Miehlich for example. This suggests a noticeable gap: while practice is vibrant and evolving, theoretical reflection and shared language are still catching up.
Research Process
To navigate this space, I tried out different keywords relating disciplinary intersections; terms like “immersive performance,” “audience interaction,” “spatial dramaturgy”.
With that I found other fields that may offer interesting works, that are worth getting into:
Theater studies turned out to be a goldmine offering both practical and theoretical insights into spatial and participatory performance. There seems to be a howl tradition featuring big names like Berthold Brecht.
But what really surprised me, even though it might seem obvious, was the relevance of game design. The inherent interactive nature impacts of course the work with sound and music. The spaces were players interact with it might be of virtual nature, still the interaction of recipients with there surrounding has to be thought of during the design process. I think there might be a huge potential to examine as well, though it opens the frame to an extend that exceeds this project.
Future Steps: From Reflection to Contribution
The more I researched, the clearer it became that it is hard to just rely on existing research. A way to deal with that can be to contribute to the field as both a designer and researcher. This could be in the following ways:
Provide an overview of the evolving field, both as a practical discipline and as an academic field. This may be a starting point.
Reach out to leading voices in the field (e.g., Martin Tröndle, Experimental Concert Research) for interviews. This may lead to the following observations.
Identify needs and gaps, from the perspective of practitioners and researchers: What do they lack? What could help them frame, evaluate, or communicate their work?
Ultimately, this could lead to the development of a manual or evaluation guid; something that can serve as a conceptual and practical tool for artists and designers, help them providing to the exploration performative spatial sound and the field of concert design.
From Sound Design to Concert Design
This research journey runs in parallel to my technical development of a spatial sound toolkit (→ previous blog entry), but it also stands on its own. It’s an interesting experience for me, locating my work within a broader context and trying to build some kind of bridge between my individual artistic practice and shared disciplinary structures. This might not be my future field of work, still I have the feeling, I can take this locating approach as a strategy with me and implement in future projects, to elevate them and for better communication towards outsiders.
Sources:
Martin Tröndle, ed., Das Konzert II: Beiträge zum Forschungsfeld der Concert Studies (Bielefeld: transcript Verlag, 2018), https://doi.org/10.1515/9783839443156.
Brian Eno, “Ambient Music,” in Audio Culture: Readings in Modern Music, ed. Christoph Cox and Daniel Warner (New York: Continuum, 2004).
Luis Miehlich, “Cartographies – Ein Halbschlafkonzert (2023) – Pieces for Ensemble, Electronics & Video,” luismiehlich, accessed May 25, 2025, https://luismiehlich.com/.
When I first planned my project “Sounds of the Joanneum Quarter”, the goal was ambitious: a site-specific ambient music installation, deeply integrated into the architectural and acoustic landscape of the Joanneum Quarter in Graz. Inspired by these unique sounding conical glass funnels and spatial openness of the site, I imagined turning the piazza into a dynamic concert space; one where the audience’s movement and the physical structures would shape the sonic experience.
However, during this semester a certain “reality check” demanded a shift in direction. Logistical constraints, timing and access issues meant that the Joanneum setting wouldn’t be possible for this phase of the project. Still, this place holds a special place in my heart, because it gave me a lot of inspiration to dig deeper into this topic. Together with my supervisor I brainstormed about re-approaching the topic: how could I scale the core ideas of spatial interaction, site-responsiveness, and ambient composition down to a format that’s more flexible, portable, and even testable at home?
A Scaled-Down Version with Broader Potential
The new direction retains the essence of the original project – interaction, spatial sound, resonance, and ambience – but re-frames it within a more universally accessible framework. Instead of relying on a single, monumental site, the project now aims to create a tool-set for composers and installation-makers, enabling them to transform any room or environment into a site-specific sound installation.
This smaller-scale approach not only makes the concept more versatile regarding the adaptability for different locations, but also supports a hands-on, iterative development process. I can now begin building, testing, and refining the tools at home and FH, implementing a workflow that builds a bridge between research and practice.
Building the Infrastructure: Tools for Room-Scale Sound Art
At the heart of this shift is a technical infrastructure that turns any kind everyday objects within a room into potential sound objects. The toolkit consists of both hardware and software components:
Hardware: Contact microphones or measuring microphones as input, and transducers as output
Software: A modular environment built in Max/MSP within the Max4Live framework, tailored to site-specific sound creation.
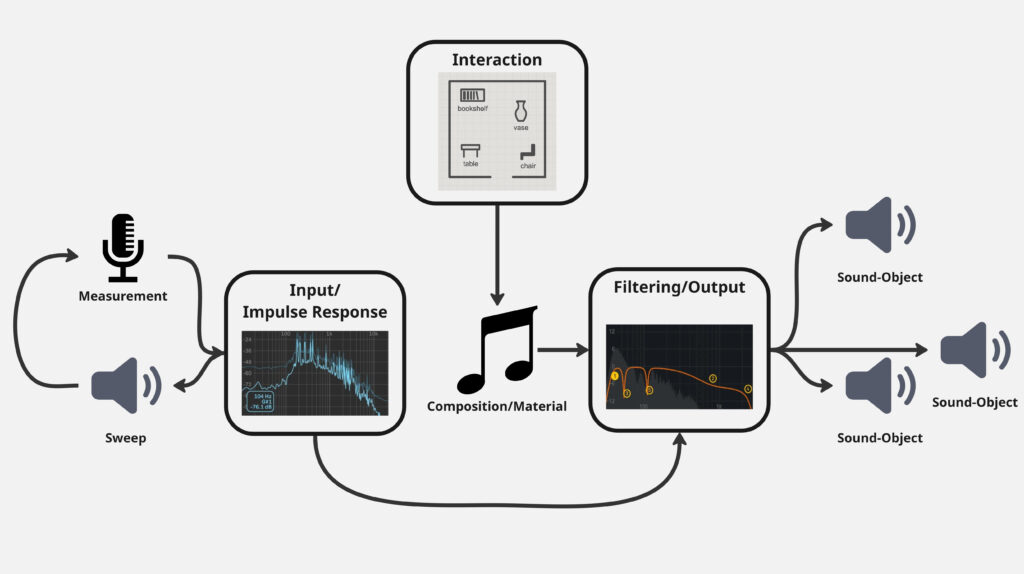
One of the tool-kit’s key features is its ability to identify an object’s natural resonances via impulse response measurements (input). These measurements inform the creation of custom filter curves that can be used to excite those resonances musically (output). In this way, a bookshelf, table, a metal lamp or even a trash-can becomes a playable, resonant sound object.
Interactive Soundscapes in Everyday Spaces
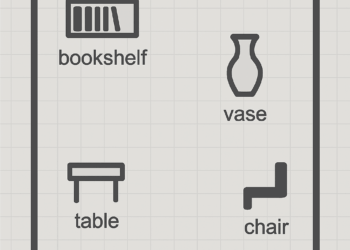
A third component of the tool-set introduces basic interaction mechanics, allowing potential users or audiences to engage with the sound installation. These control objects can be mapped to a digital version of the room (upload of a literal map) and may include for examples:
Panners that move sound from object to object.
One-shot triggers that activate specific objects.
With these tools, rooms become navigable soundscapes, where UI interaction can influence sonic outcomes, echoing the spatial interactivity originally imagined for the Joanneum Quarter, but within reach of smaller spaces.
schematic view of the framework
From Site to System
While the grand setting of the original concept served as a powerful starting point, the shift toward a modular, adaptable toolkit has opened up new creative and technical possibilities. What began as a site-specific composition approach can now be framed maybe as a site-adaptive system; one that gives myself or others the opportunity to explore the relation between sound, space, and interaction in their own settings.
The essence remains: redefining how music and sound inhabit space. But now, instead of building for one site, I’m building a foundation that others can use in many.
Continuing development on the Image Extender project, I’ve been exploring how to improve the connection between recognized visual elements and the sounds selected to represent them. A key question in this phase has been: How do we determine if a sound actually fits an image, not just technically but meaningfully?
Testing the Possibilities
I initially looked into using large language models to evaluate the fit between sound descriptions and the visual content of an image. Various API-based models showed potential in theory, particularly for generating a numerical score representing how well a sound matched the image content. However, many of these options required paid access or more complex setup than suited this early prototyping phase. I also explored frameworks like LangChain to help with integration, but these too proved a bit unstable for the lightweight, quick feedback loops I was aiming for.
A More Practical Approach: Semantic Comparison
To keep things moving forward, I’ve shifted toward a simpler method using semantic comparison between the image content and the sound description. In this system, the objects recognized in an image are merged into a combined tag string, which is then compared against the sound’s description using a classifier that evaluates their semantic relatedness.
Rather than returning a simple yes or no, this method provides a score that reflects how well the description aligns with the image’s content. If the score falls below a certain threshold, the sound is skipped — keeping the results focused and relevant without needing manual curation.
Why It Works (for Now)
This tag-based comparison system is easy to implement, doesn’t rely on external APIs, and integrates cleanly into the current audio selection pipeline. It allows for quick iteration, which is key during the early design and testing stages. While it doesn’t offer the nuanced understanding of a full-scale LLM, it provides a surprisingly effective filter to catch mismatches between sounds and images.
In the future, I may revisit the idea of using larger models once a more stable or affordable setup is in place. But for this phase, the focus is on building a clear and functional base — and semantic tag matching gives just enough structure to support that.
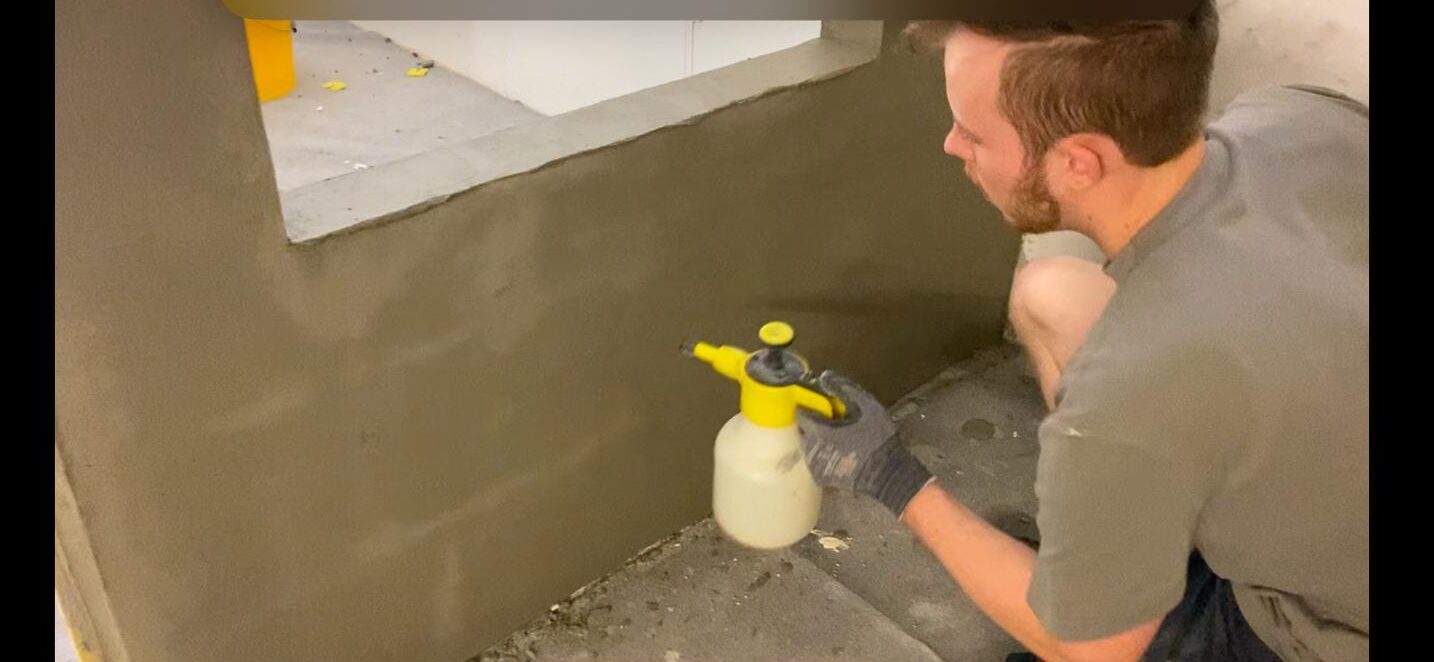
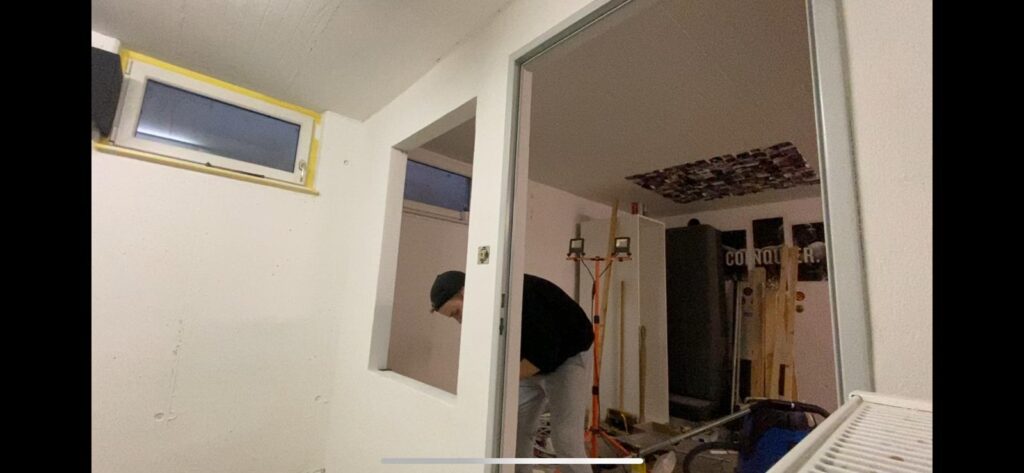
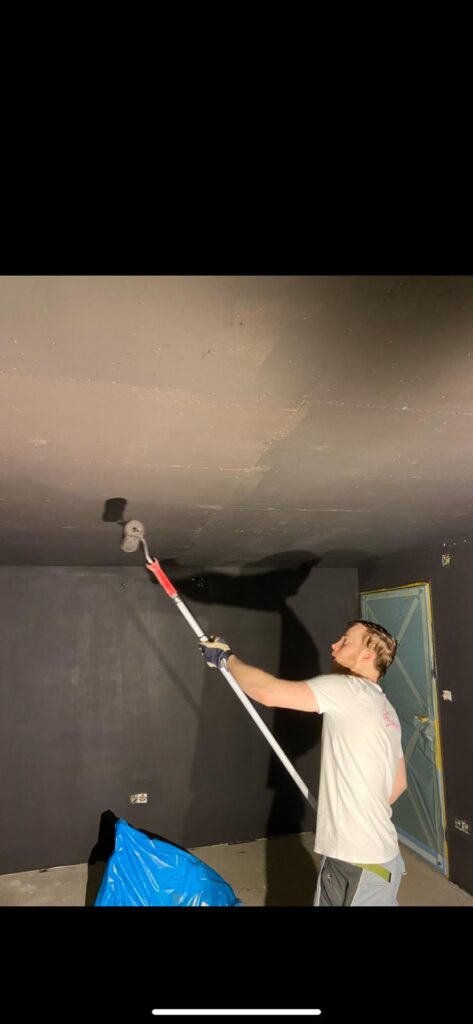
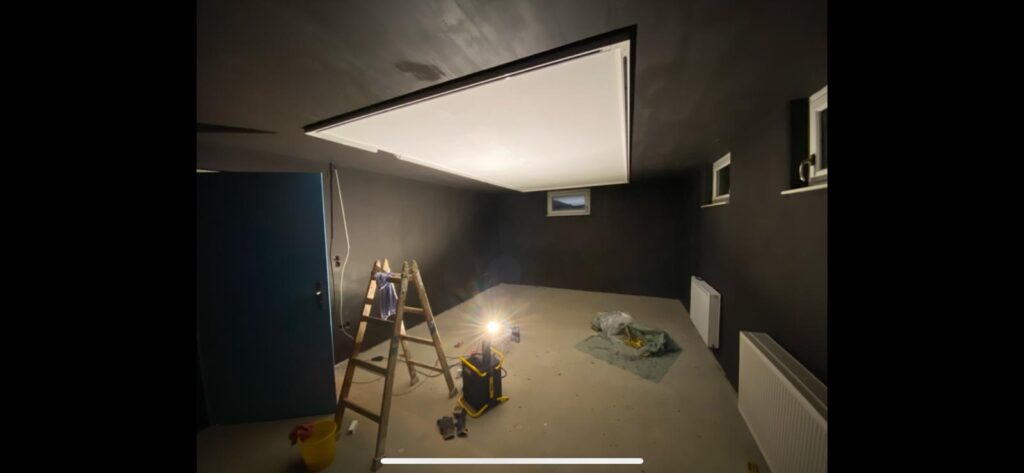
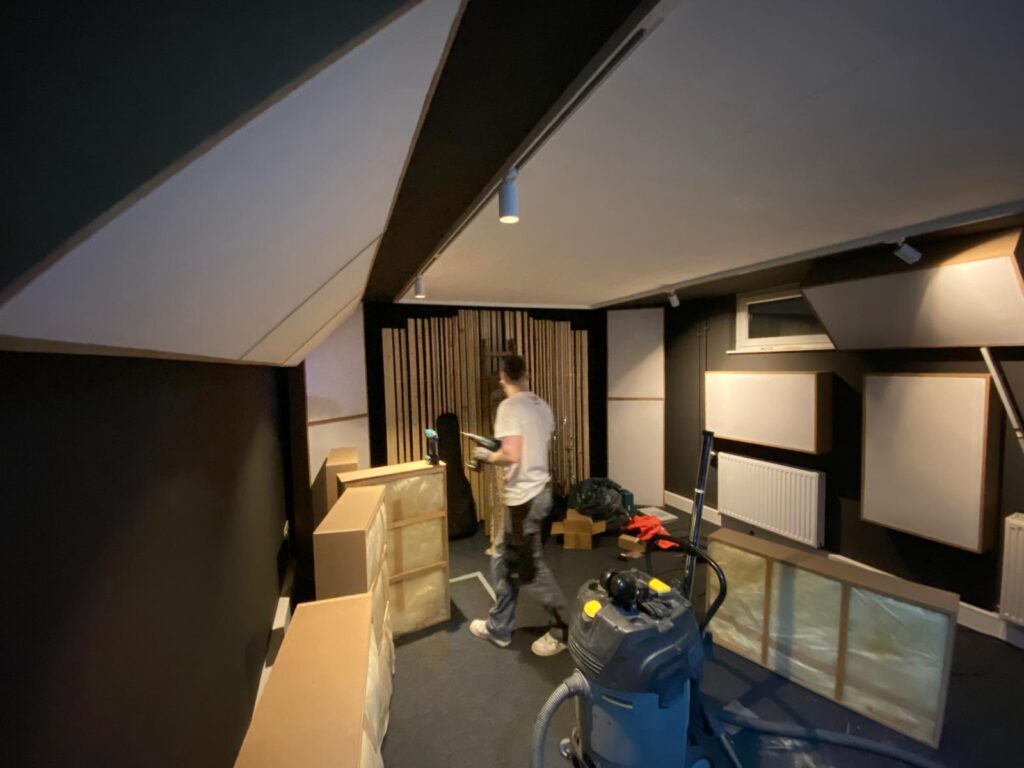
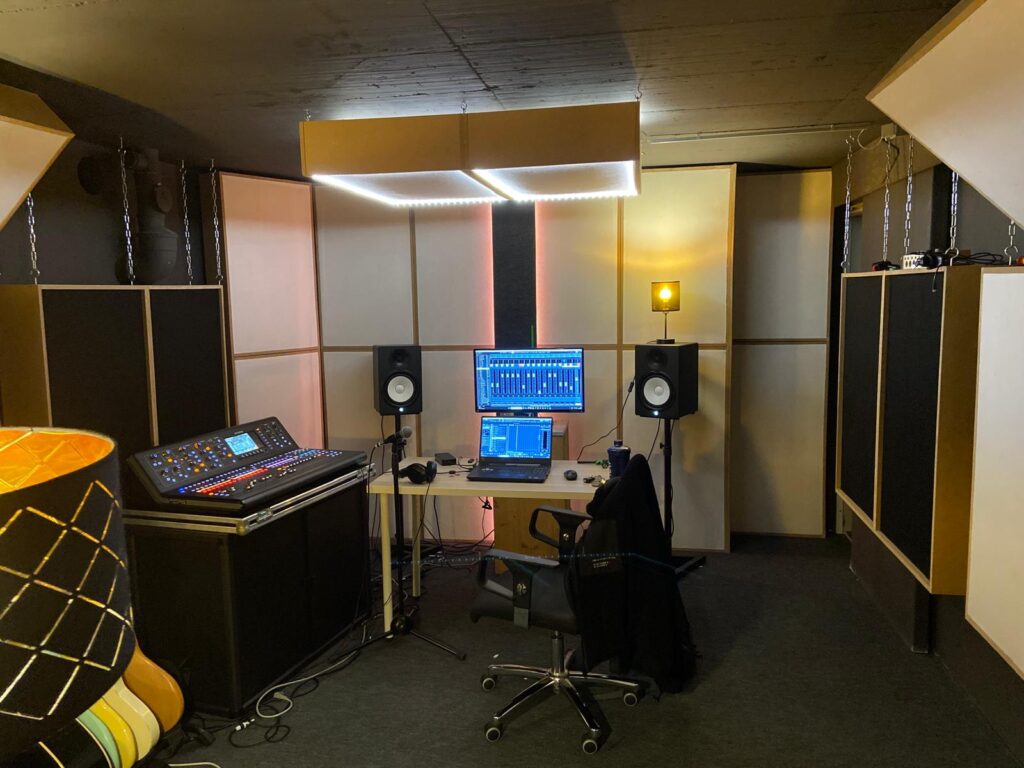
My individual project deals with the creation of a 3D audio concept album in the genre of rock – on the topics of addiction and dependency. Logically, we are also confronted with the problem of high production costs. In order to be able to realize the project to the extent planned, it was therefore important to create a recording and mixing environment ourselves – to reduce costs and at the same time improve the quality of the project. Since the beginning of 2024, we have been able to take over the former warehouse premises of our drummer’s parents (they run a floristry business). Here we have just under 80 m² at our disposal, which we have converted into a small office, a rehearsal/recording room and a mixing room on our own initiative. We took care of the building work (putting up walls, pouring screed, electricity, etc.) in the course of 2024. We and our trainee were already able to use the office together with our intern during the planning of our festival Bock auf Rock in summer 2024 – however, the control and rehearsal room could only be used to a limited extent due to the lack of room acoustics optimization.
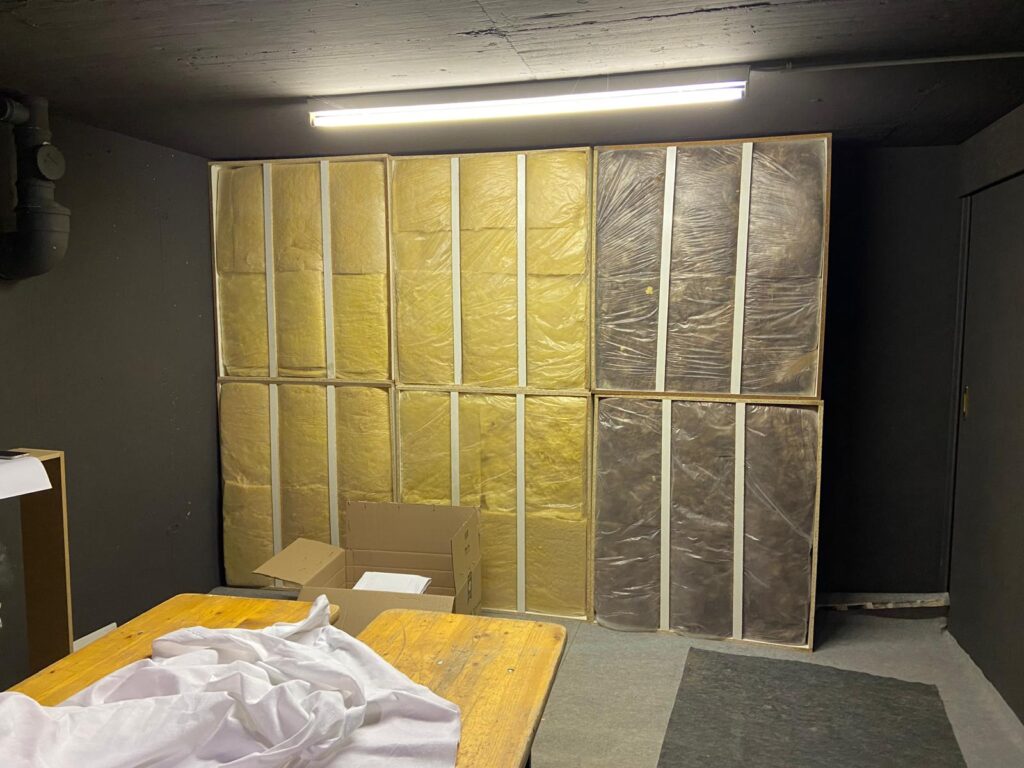
Empty room (first setup)
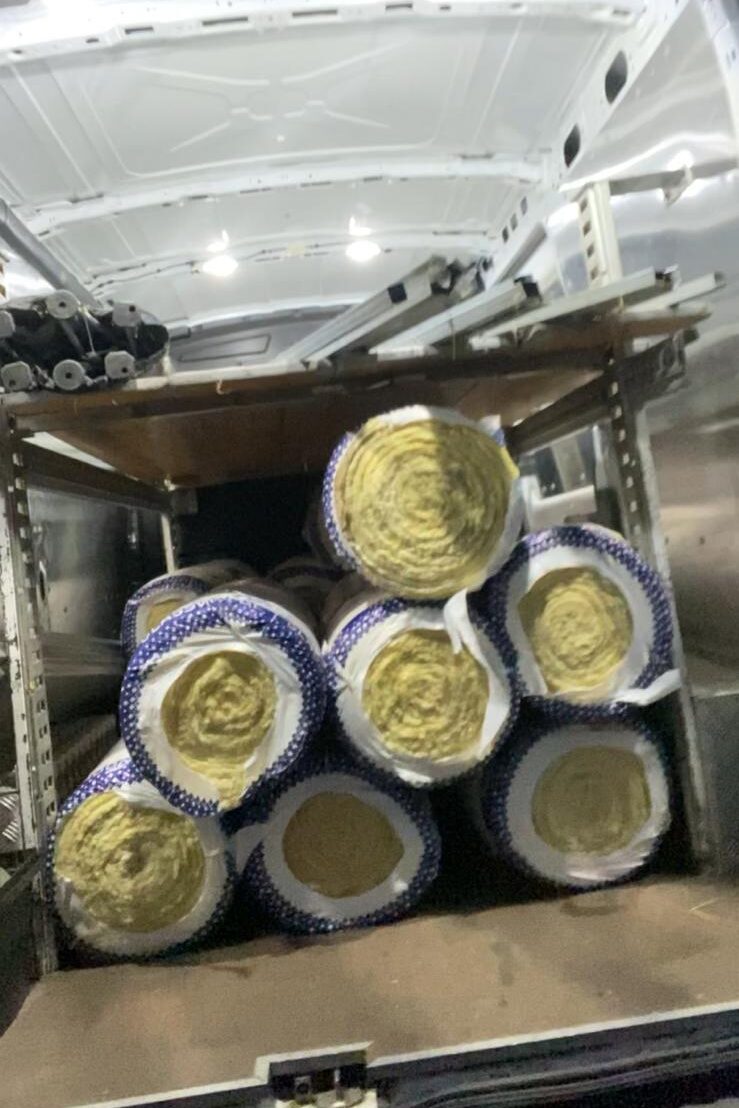
In February 2025, the time had finally come: a suitable recording and mixing environment had to be created for the start of the project. Our drummer is studying civil engineering, so we had the necessary knowledge to implement this project ourselves. The aim was to build a recording and control room with the best possible acoustics (in terms of room dimensions and budget). We wanted to create a very good stereo monitoring situation in the control room. It was important for us to have the opportunity to pre-produce as much as possible, as time in the 3D audio-compatible studios at the IEM is limited. We finally started our construction project in mid-February. We had already organized insulation wool and other building materials via Willhaben over the last few months. In total, we used around 15 m³ of insulation wool (mostly Ursa DF39 Dual).
We spent a long time researching what was the cheapest option for the frames of the absorbers and what will fit for our purpose (Will it crack when you screw it together? How will the cut look like? … ). We tested a lot of different wood types.
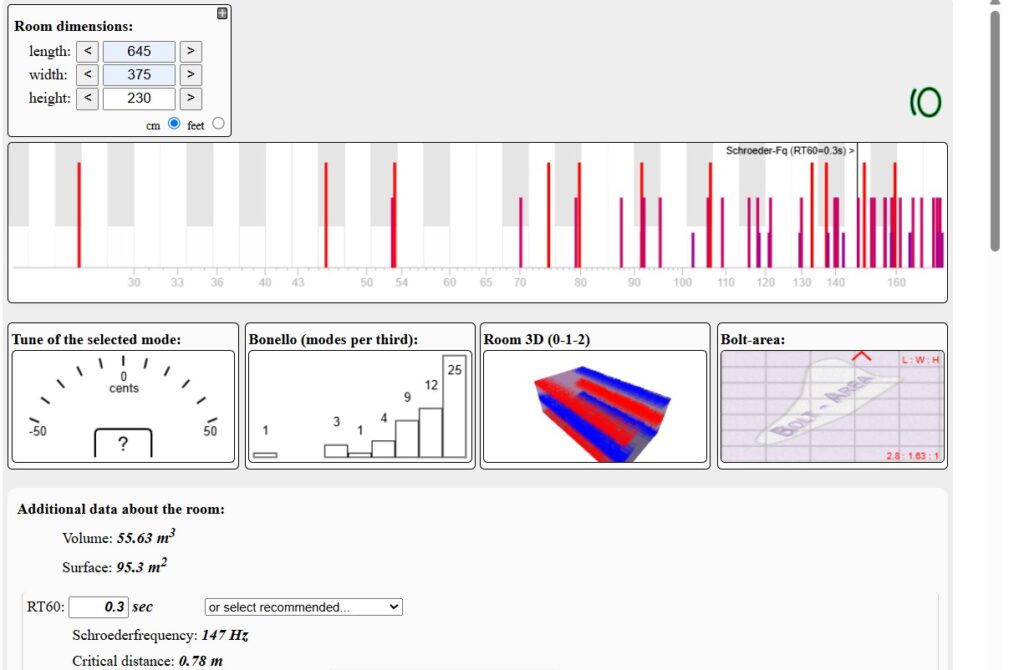
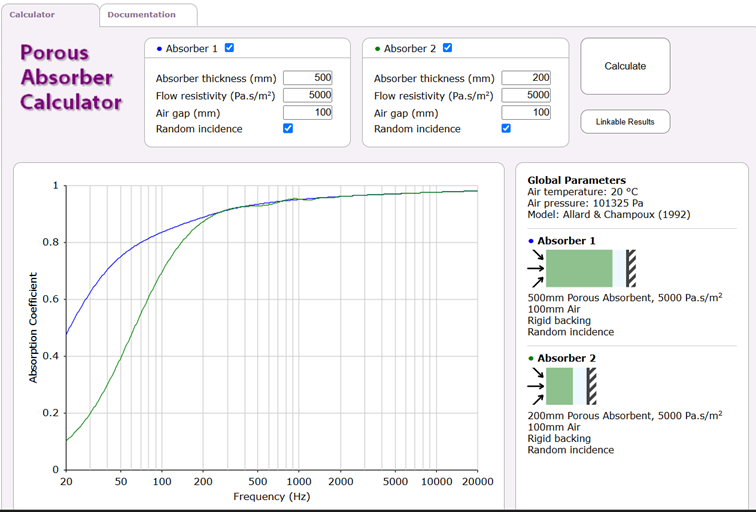
In the end, we opted for MDF plates – these are much cheaper than solid wood and still offer the necessary stability. We had the plates (3 m x 2.10 m x 1.6 mm = in total we bought about 45m²) which we bought through a local carpeter. Before we started the installation, we planned as precisely as possible where and how many absorbers should be placed and how many we would need in total. We mainly worked with the Trikustik room mode calculator and the Porous Absorber Calculator.
We built the absorbers according to the course-plan of a Berlin acoustician called Jesco (Acoustic Insider). He offers an online course for the professional expansion of home studios: Jesco is the founder of Acoustics Insider, where he teaches practical acoustic treatment techniques for audio professionals—without the voodoo. With over 12 years of experience mixing records and treating studios in Berlin, he knows exactly how to turn almost any room into a reliable creative space. His approach has helped him reduce his average mix time to just 4 hours and earn a platinum record for mixing Ofenbach’s “Be Mine.”
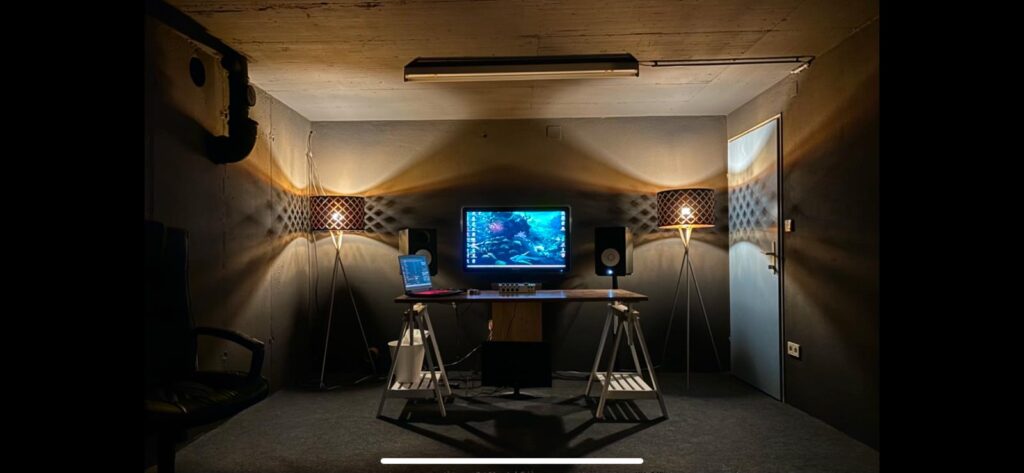
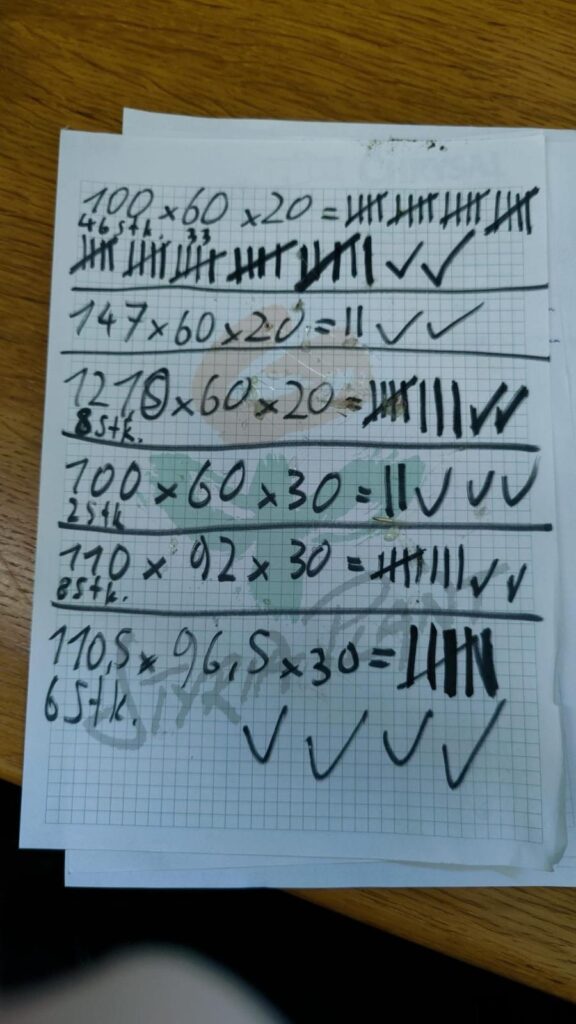
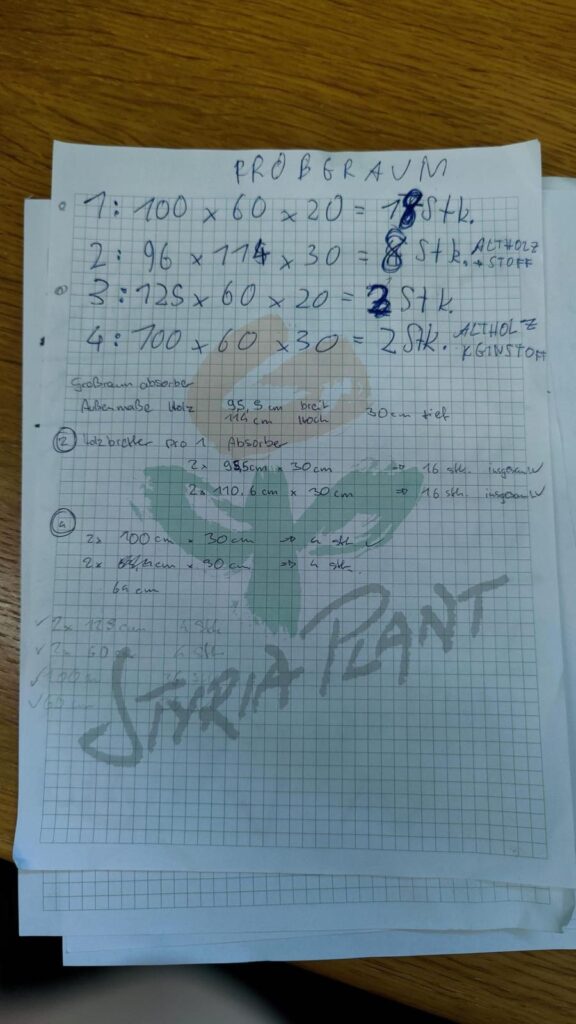
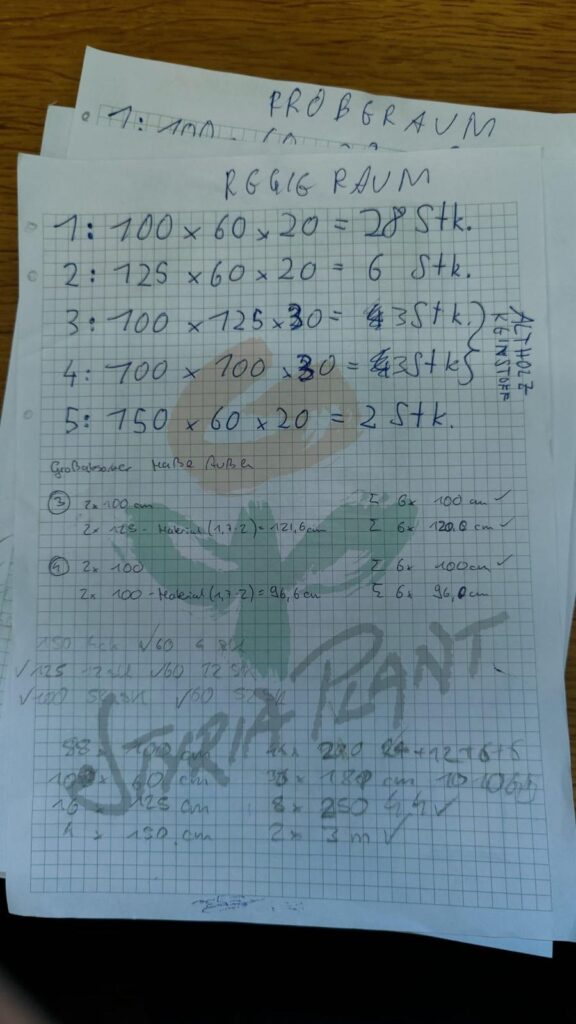
His program was the perfect basis for us, because it’s all about achieving the best possible result with the available resources – that’s the reality of small bands, young audio engineers and students. It really helped us in terms of the placement of speakers, building bass traps & absorbers and where to place them. And as you can see from the results – it worked great! Now it got serious: the construction of the !70 absorbers! could begin. In total, we built two different “absorber categories”, which we divided into further models:
large room absorbers (110 cm x 110 cm x 30 cm) – not visible (e.g. behind other absorbers or diffusers). We need them to catch the low frequencies (we have 50cm material & 10cm air behind it on the front wall – in the corners we have about 70cm).
normal absorbers (standard size: 100 cm x 62.5 cm x 20 cm). There were special dimensions in special places to control the absorption more specifically (150 cm x 62.5 cm x 20 cm; 100 cm x 62.5 cm x 30 cm; 125 cm x 62.5 cm x 20 cm). Diffusion slats are also screwed onto 7 of the normal absorbers (covered with black fabric) – we will do it this summer when we have time to do that.
Everything was planned, the wooden panels ordered – we were ready to go. Of course, not everything went according to plan, and things got off to a difficult start:
The MDF boards were incredibly heavy and flexible – transporting the huge boards (approx. 6 m²) was a real HORROR (I really hurt me knee while transporting them…).
Once we had picked up the boards, we started cutting them to size. Unfortunately, the weather was anything but helpful: it was snowing and we spent most of the three days cutting the panels outside in 3 degree temperatures.
In addition to the MDF boards, we also used waste wood (hopefully without woodworm…) that we were allowed to collect from a good friend’s farm. We used this waste wood to build the inner frames of the absorbers and the large absorbers (1 m x 1 m x 30 cm – 14 pieces), which were not visible later anyway.
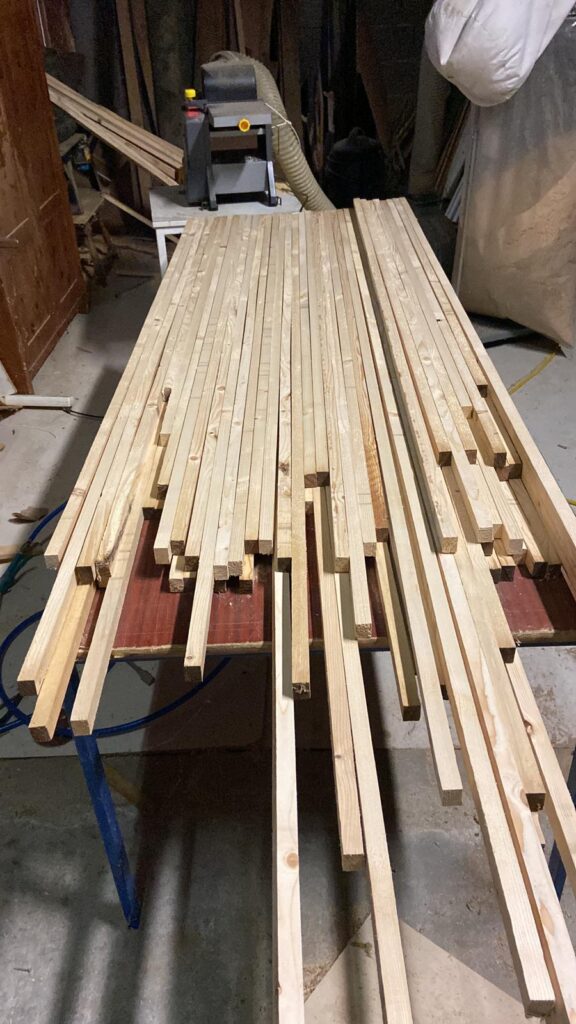
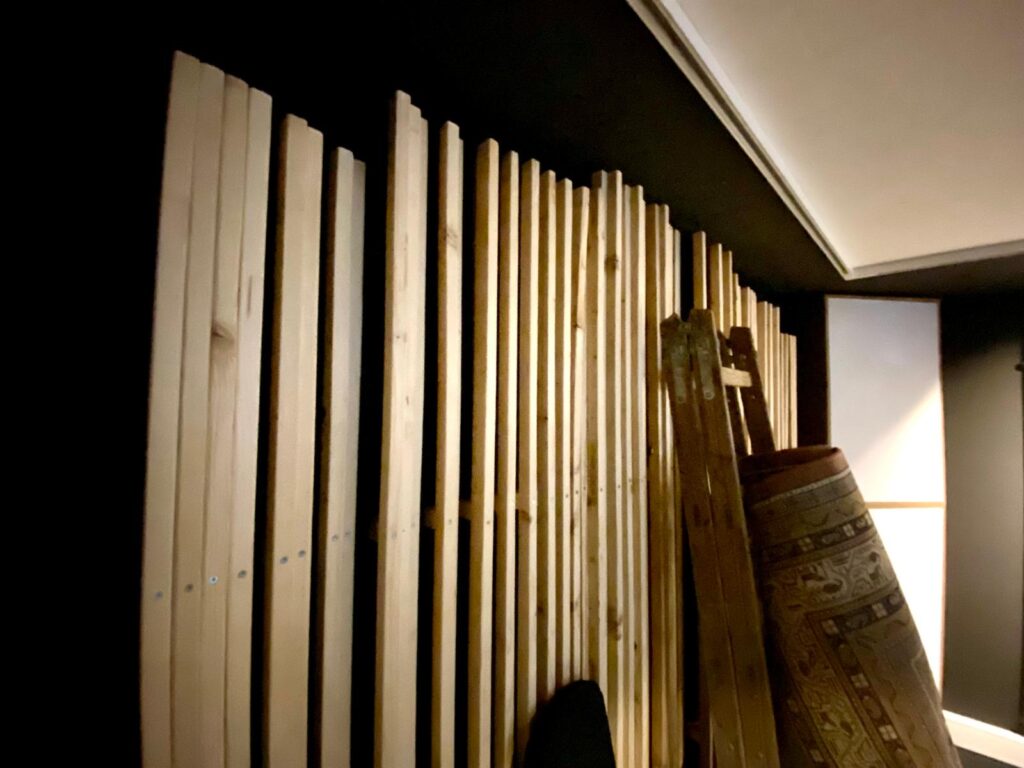
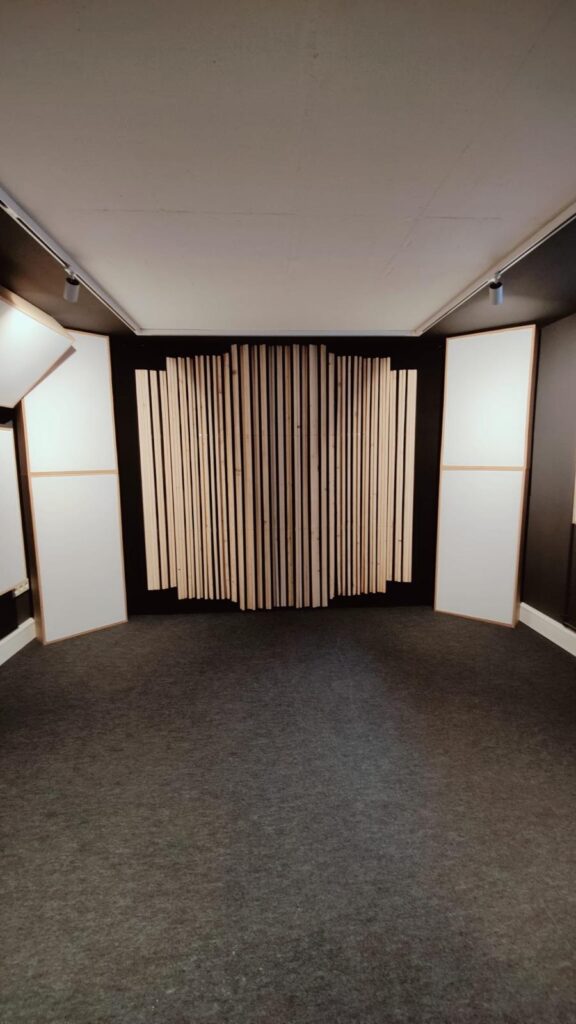
At the same time, I was already working on the rear wall of the recording room. A large 1D diffuser was to be installed here.
Due to the enormous price of wood, I organized the required wood myself: I was able to cut and then plane boards in a good friend’s wood workshop – it took me a whole day, but the result was great and we saved a lot of money in the process.
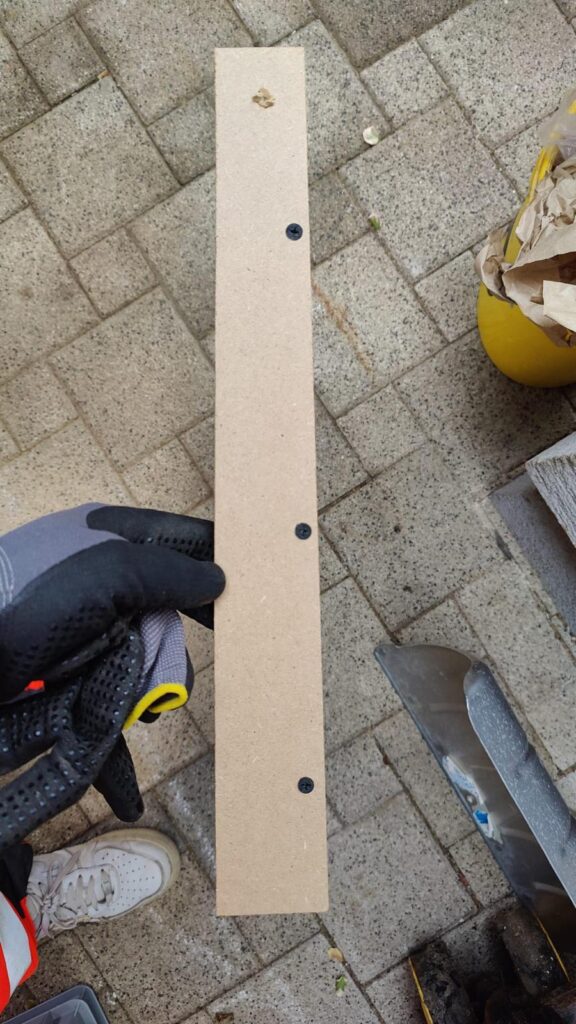
While we were cutting the wood, we also made a drilling template for the holes in the wooden panels. This allowed us to quickly prepare all the panels and make a countersink for the screw heads.
At the same time, we prepared the cutting of the insulation wool. For health reasons, we immediately wrapped the cut insulation wool in foil (painter’s foil, 0.2mm thick). Fortunately, we did this indoors – we had simply cleared out the future control room. Fortunately, we also got help from my parents and our friends – without this support, the whole thing would have taken much longer.
After everything was cut and prepared, we took a weekend break as we had gigs in Vienna and Brno (Czech Republic) ahead of us. After that we went straight back to work.
Although university had started again, we used every free minute to continue working on our studio. We started by screwing the frames together. After the outer frames came the inner frames – unfortunately, this work was much more time-consuming than expected. Nevertheless, we decided to continue consistently, as we wanted to maintain a uniform construction method. After building the inner frames, we took care of covering them with fabric. We searched for a long time for a suitable fabric that was sound-permeable and didn’t exceed our budget. In the end, we opted for stage molton (160 g/m²). We bought a total of almost 60 m² – the cutting alone took two of us a whole 12 hours.
The molton was then stapled onto the inner frames and carefully stretched. We screwed these inner frames to the outer frames, inserted the insulating wool and attached two struts at the back.
At the same time, we took care of the large room absorbers – these were only partially covered with fabric (not at all in the control room and over a large area in the recording room), as they are not visible anyway.
Once the absorbers were finished, we got straight down to installing them. We attached them with screw hooks, chains or normal screws (via the rear struts of the absorbers).
There were also numerous other tasks to complete, the scope of which I don’t want to describe in detail here. In addition, some unexpected problems arose during the installation. The main challenges of the entire project were
Installation: In some places, installation was much more difficult than expected. Individual and creative solutions were required.
Door in the corner of the control room (blue door you can see in the first pictures) (= missing absorber in the corner of the room; we bought an old sliding door from an elderly lady via Willhaben – rebuilt it, covered it with plasterboard and finally installed it). We have built four additional ‘mobile’ absorber what we can use for this purpose (or for drum recording e.g.).
Cutting to size (we’d rather not talk about the working conditions, times and weather…) – the boards were extremely unwieldy and almost impossible to transport even with the van. They bent a lot and were very difficult to carry.
Simultaneous use of the premises: The longer the fit-out dragged on, the longer we were unable to use the space for rehearsals. In addition, the entire entrance was blocked with absorbers – this also had to be resolved as quickly as possible.
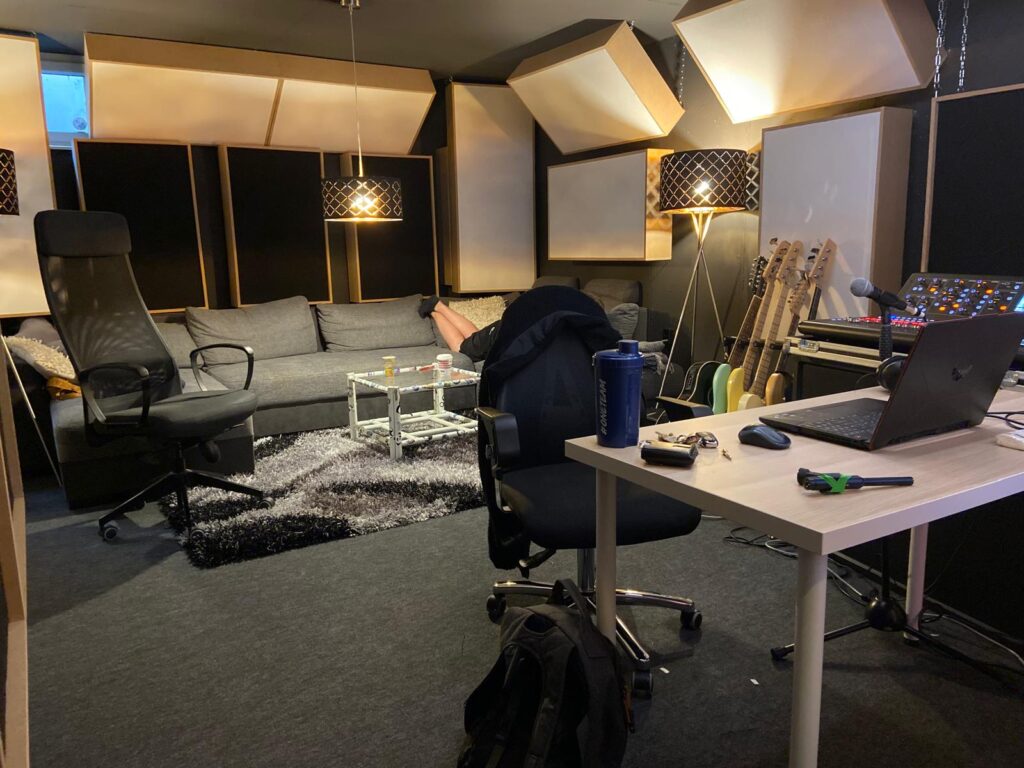
Despite everything, we are really very satisfied with the end result – precise acoustic measurements of the rooms will follow in the near future.
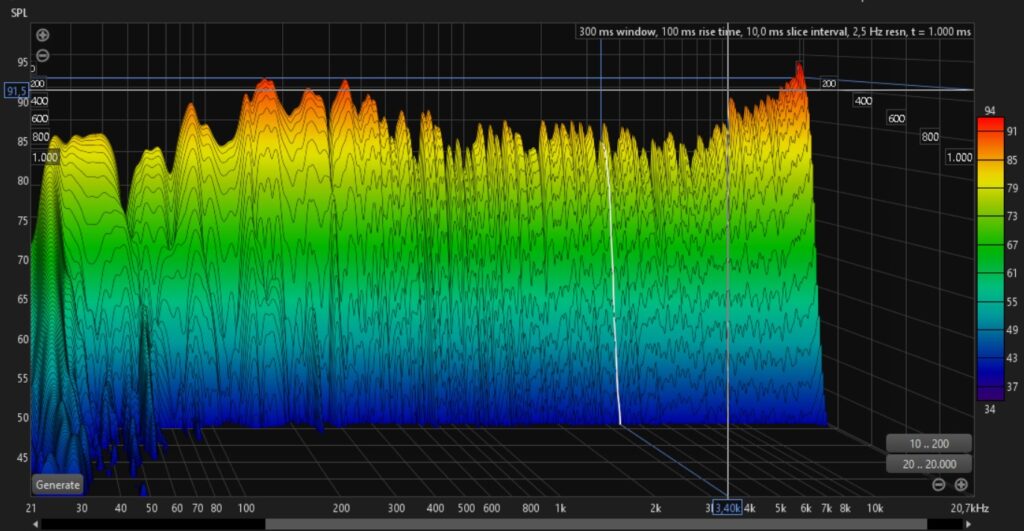
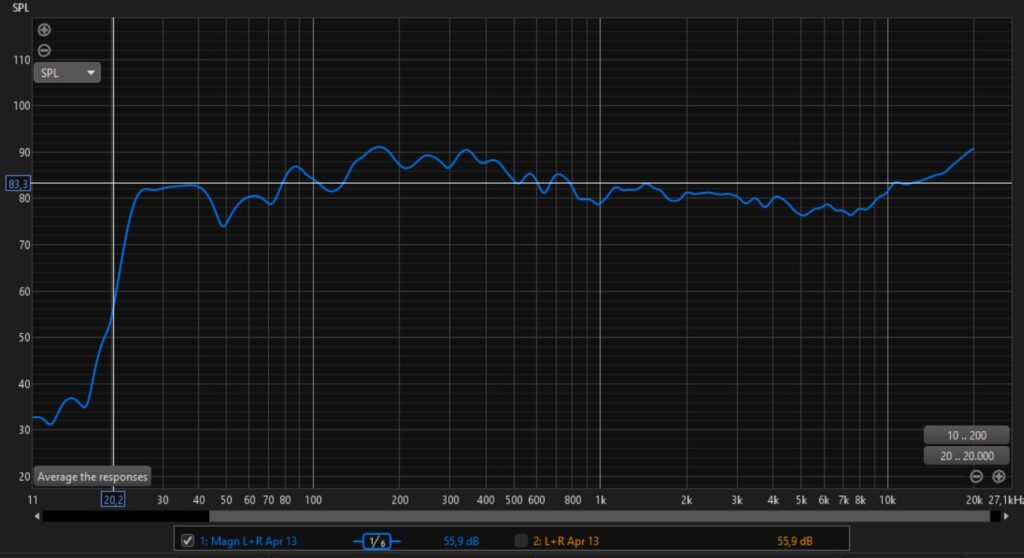
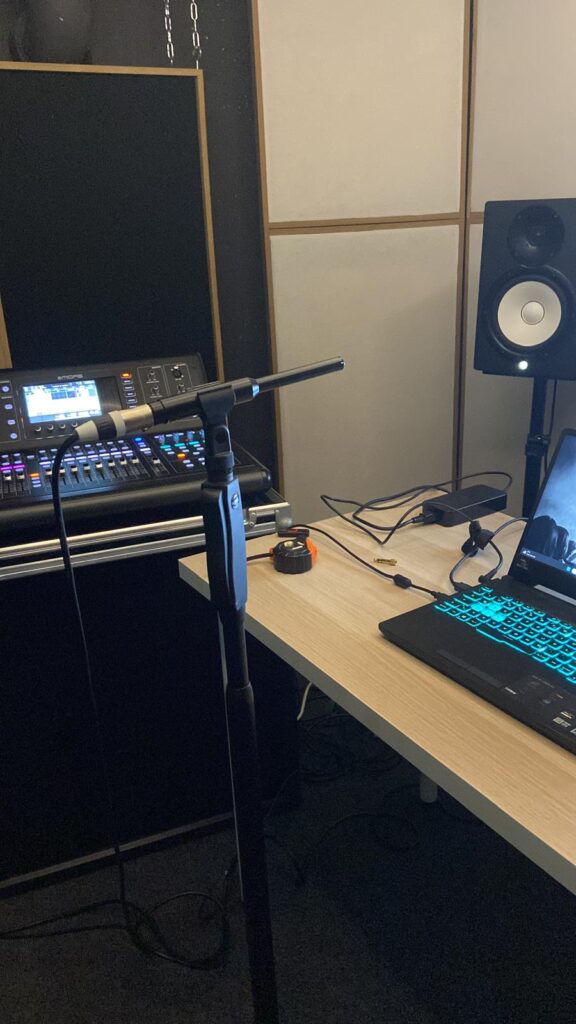
I have already carried out a first provisional measurement of the control room with my measuring microphone (Superlux ECM999) – here are a few screenshots.
The results are – measured against our do-it-yourself approach – outstanding. The room simply sounds fantastic. I am 100% happy with the results we achieved.
I want to be fully transparent about this project. While part of the studio construction was funded through our band’s shared budget, we also invested a significant amount of our own private money.
Considering the results we achieved, the overall costs were remarkably low—this was undoubtedly due to our detailed and lengthy planning, our strong motivation and perseverance, and some incredible second-hand bargains we found along the way.
Below, you’ll find a breakdown of the costs specifically related to the acoustic treatment:
One important point to mention is that from the mid of February to the beginning of April, we invested around 25 full workdays as a team of two—not including the additional help we received from other band members and friends—into the acoustic construction alone.
Looking back on it objectively, it’s clear that we pushed ourselves well beyond our limits with this project. It was definitly too much. We often worked more than 12 hours straight to get everything done within such a short timeframe. But in the end – we think, that it`s worth the price.
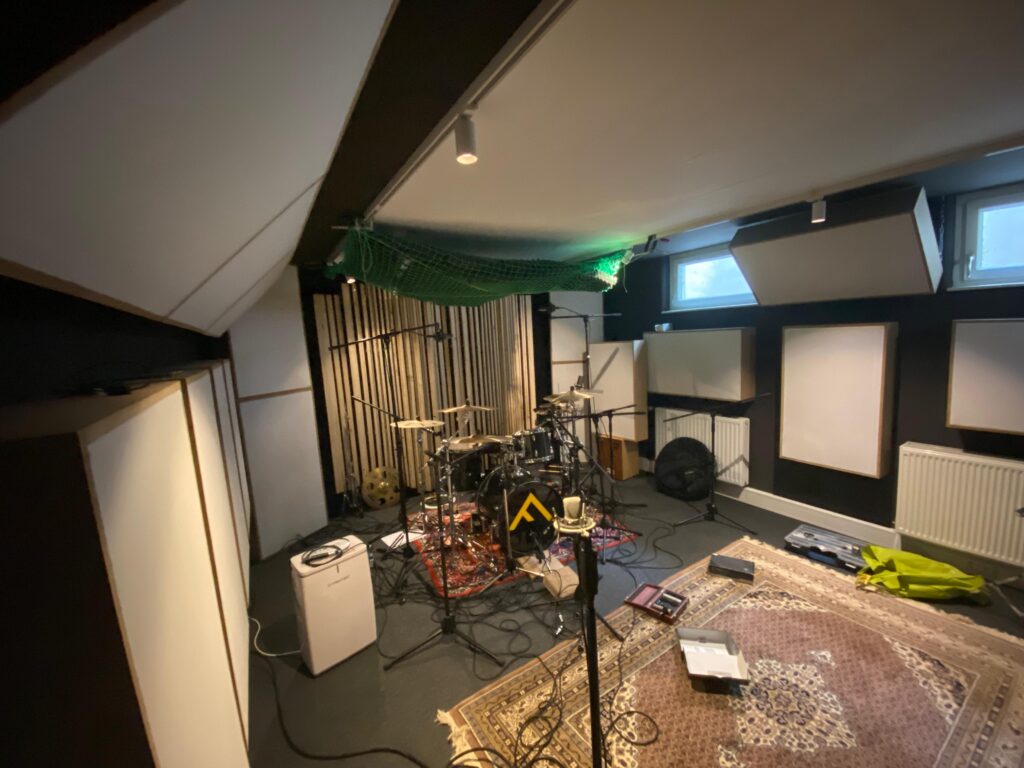
But we are not 100% finished yet. That said, the diffusers in the control room and the ceiling treatments are still unfinished (on some pictures you can see it: we packed leftover pieces of acoustic foam into a cargo net (of a car-trailer) and strapped it to the ceiling above the drums. It’s definitely a temporary fix, but it helped to reduce some reflections from the ceiling). We’re still discussing how best to tackle these elements, and haven’t fully decided on the final approach yet.
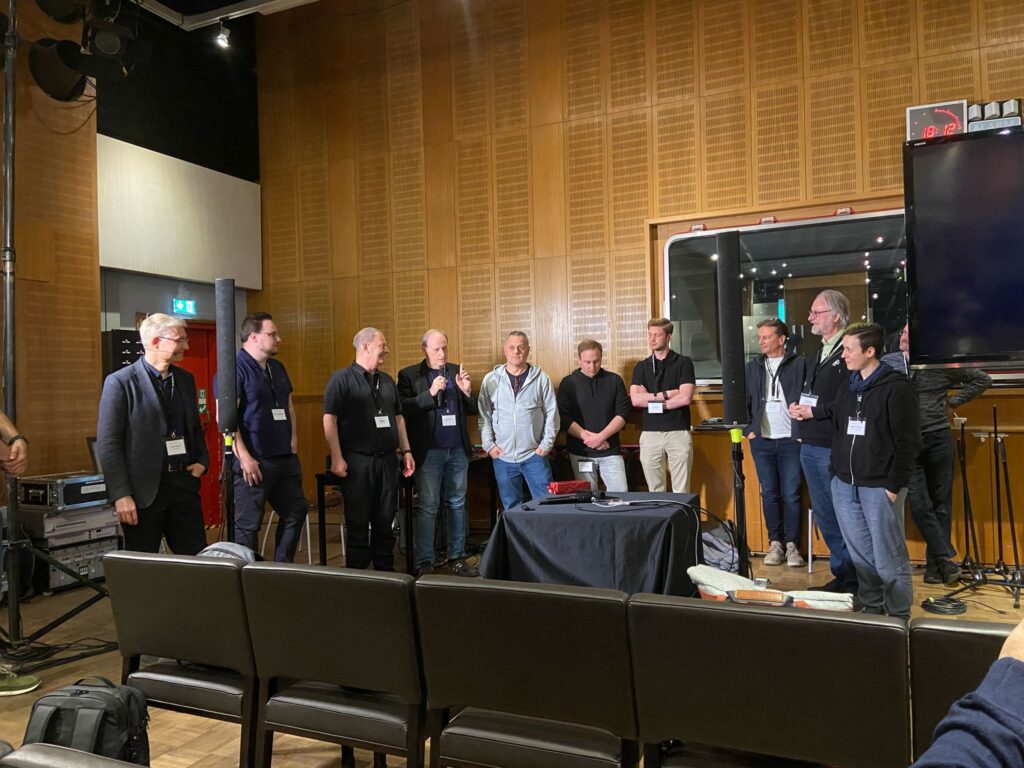
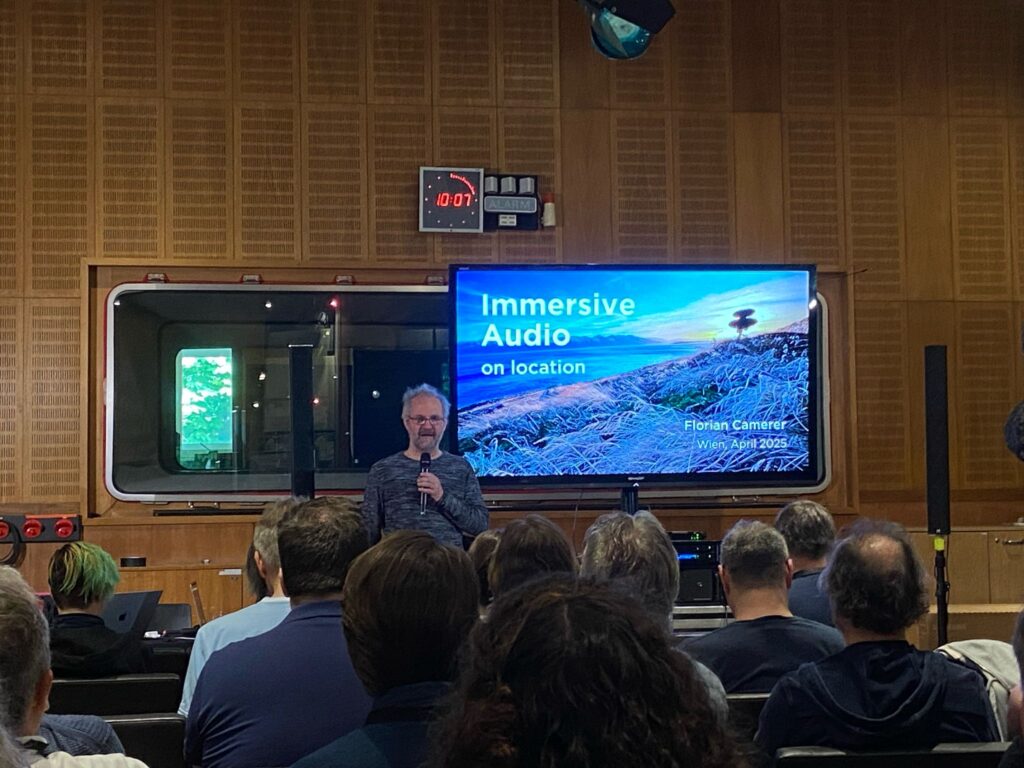
At the end of april, i had the opportunity to attend and participate in Lasse Nipkow’s 3D audio seminar. This seminar was held at the ORF Funkhaus in vienna and many important guests from the industry were invited. At the end of the last day of the seminar, all speakers were asked to talk briefly about the future of 3D audio. These were the most important findings of this discussion:
“Who’s Gonna Pay for This?” – Dietz Tinhof
Dietz Tinhof tackled the uncomfortable question of financing 3D audio head-on. He stressed that creators and innovators in the field rarely see financial returns for their work, while platforms and labels profit. “We’re at the forefront of a development where others will reap the rewards, not us,” he said, pointing out the lack of rights or credits for audio engineers compared to other creative roles like cinematographers. He called for collective action to demand recognition and fair compensation, arguing that immersive audio’s artistic and technical value should translate into tangible benefits for its creators. “Ton wächst nicht auf Bäumen—it’s our labor, our ideas. We can’t keep giving it away for free.”
Lasse Nipkow proposed in this context that we should focus on 3D audio in luxury settings (e.g., spas, luxury hotels).
Tom Ammermann continued by emphasizing the need for better binaural mixes, noting significant room for improvement. He highlighted the growing role of 3D audio in live installations and households, urging producers to prioritize quality to shift perceptions from “it wasn’t bad” to genuine enthusiasm. He envisioned 3D audio becoming “the new stereo” if the industry collectively pushes for higher standards.
Michael A. Bühlmann added that while technical formats like mono, stereo, or 3D are packaging, the artistic vision must remain uncompromised. Roger Baltensperger stressed the importance of mastering workflows and quality control, advocating for the same rigor applied to stereo to unlock 3D’s full potential.
Sebastian Oeynhausen (Pan Acoustics) thanked the community for its welcoming atmosphere and noted the divergence between home and industrial applications, urging manufacturers to develop specialized hardware. He also praised tools like Graves 3D for animating audio objects in DAWs.
Katharina Pollack, representing the scientific angle, underscored the importance of foundational research and artistic-technical synergy. She predicted a binaural-dominated future, citing widespread headphone use and innovative applications like Dreamwaves’ navigation systems for the visually impaired.
Karlheinz Brandenburg reflected on 25 years of binaural and speaker-based audio, celebrating its resurgence but cautioning that home-listening standards (e.g., proper headphones for spatial audio) are still evolving. He dismissed the idea that standard headphones or YouTube could deliver true spatial experiences.
“Good Content Survives Mono Underwater”
Florian Camerer blended humor and skepticism, toasting to “mono beer, stereo schnitzel, and immersive fever dreams.” But his real focus was broadcast’s inertia. While public broadcasters like ORF led the 5.1 revolution, immersive audio remains stuck in limbo. “Everyone’s waiting for someone else to jump first—the BBC, the French, the Germans.” He criticized recycled debates over basics like center channels and LFE, calling it “déjà vu from the 5.1 era.” Yet he ended on optimism: immersive audio, unlike 5.1, might survive because of its artistic potential.
Benedikt Ernst, the youngest in the room, brought a hopeful counterpoint. With “youthful recklessness,” he argued that engaging more creatives could unlock both artistic and economic potential. “If we get artists on board—not just as passive recipients but as active participants—the content will improve, and the money might follow.” He acknowledged the uphill battle but emphasized the need to bridge the gap between technical possibilities and creative buy-in.
Lenni Damann grounded the discussion in reality, citing Spotify’s influence as a make-or-break factor. “Labels ask: Why invest in 3D if our artists have 3 million monthly listeners on Spotify but only 95,000 on Apple Music?” He hinted at industry rumors about Spotify’s potential spatial-audio rollout, which could tip the scales. “If the biggest platform pushes it, suddenly the ‘why’ becomes obvious.”
Closing Words: “The Battle for Quality and Perception”
Dietz Tinhof circled back to dual challenges: production and perception. On one side, clients treat 3D as a marketing afterthought, demanding “stems-based pricing” that sacrifices quality. On the other, end-users hear compressed, downgraded versions of meticulously crafted mixes. “We’re stuck between clients who say we’re not making money and listeners who say we don’t hear the difference.” His rallying cry? Fight for immersive audio as its own art form—not just “stereo with extra steps.” Tom Ammermann and Michael Bühlmann echoed this, sharing stories of artists who dismissed 3D until they experienced it firsthand. The takeaway: Education, advocacy, and unflinching quality are the keys to 3D’s future.
Lasse Nipkow closed with a nod to collaboration, inviting attendees to the next Tonmeistertagung. The room’s consensus was clear: 3D audio’s potential is undeniable, but realizing it demands creativity, persistence, and a fair share for those building it.
In late April 2025, I had the exciting opportunity to attend the 3D Audio Seminar by Lasse Nipkow, held in cooperation with the VDT (Verband Deutscher Tonmeister) under the motto “Goosebumps can be planned!”. The seminar took place on April 29–30, 2025, at the ORF RadioKulturhaus in Vienna and brought together audio professionals, creatives, and technical experts with one clear goal: to create impressive 3D audio content for audiences.
The event was not only aimed at sound designers, studios, and educational institutions, but also at planners and representatives from concert halls, museums, hotels, and other service sectors. Its core mission was to bridge the gap between the technical and creative aspects of 3D audio, offering a deep dive into both psychoacoustic principles and practical implementation.
The program covered a wide spectrum:
Psychoacoustic Foundations – understanding how humans perceive sound emotionally and using this knowledge to shape immersive experiences.
Technology and Practice – showcasing tools and workflows for producing and presenting high-quality 3D audio.
3D Listening Experiences – offering real-world examples and demonstrations in a finely tuned acoustic environment to highlight the full potential of spatial sound.
An exhibition area run by the event’s partner companies also accompanied the seminar, offering product showcases and networking opportunities during breaks and the evening reception.
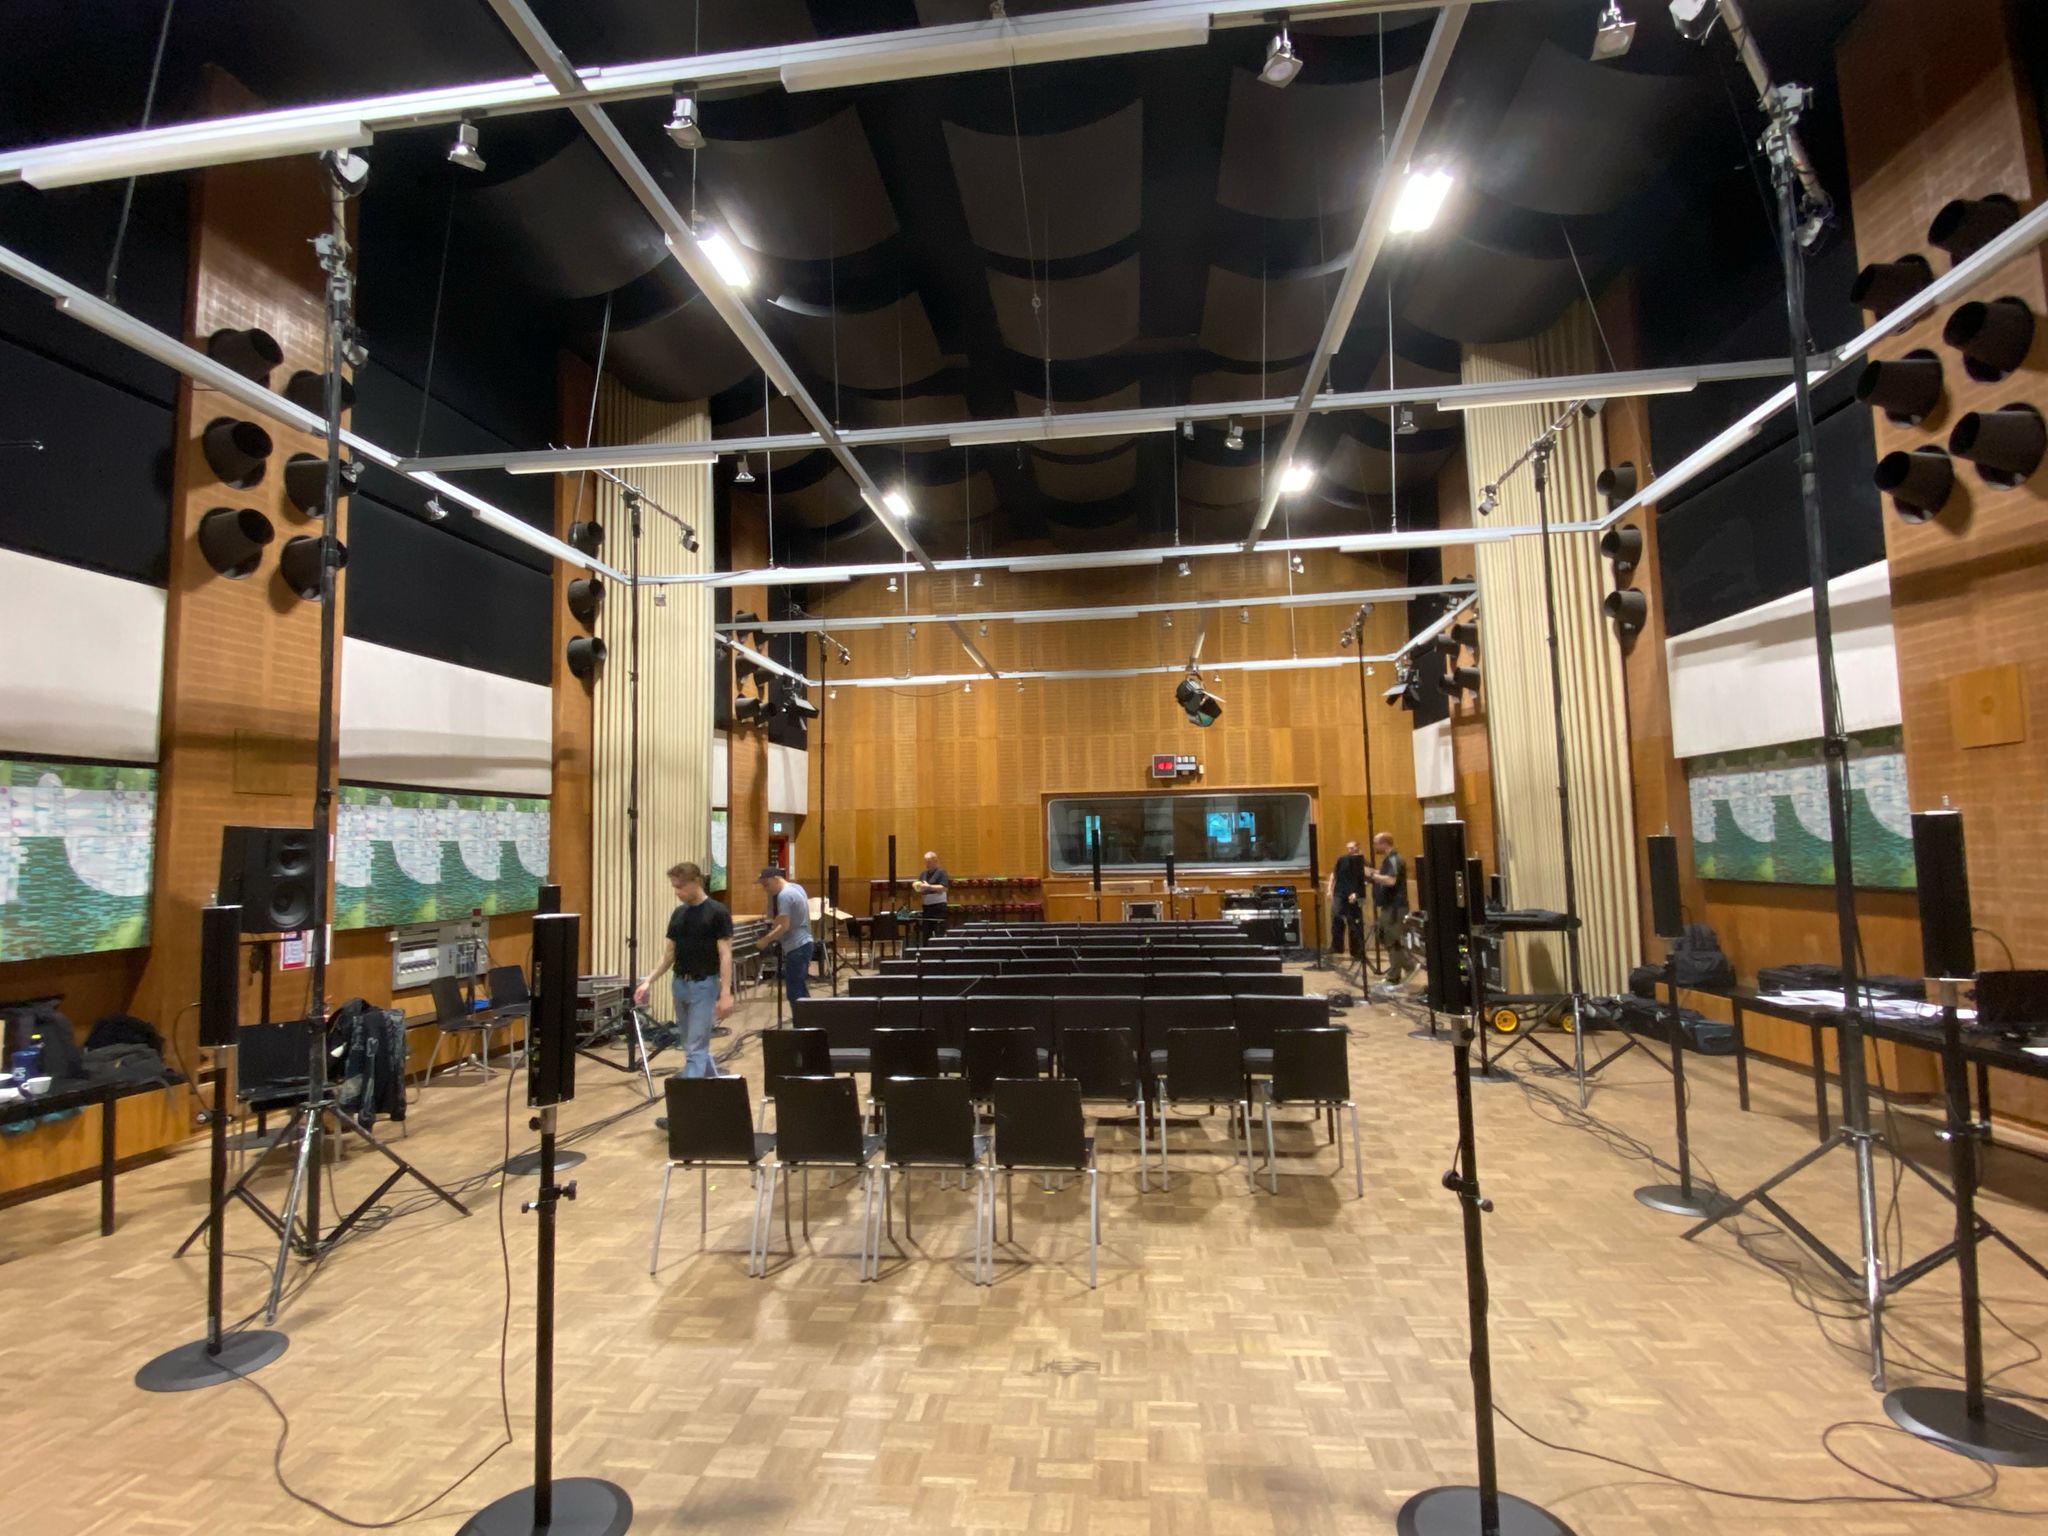
Day 1: Setup and Technical Exploration
Although I initially registered as a participant, Lasse reached out beforehand and asked if I would be interested in joining the setup crew for the event. I immediately agreed—this was a chance I couldn’t pass up.
I arrived in Vienna on Sunday Morning, two days before the official seminar started, and began helping with the installation of the system alongside the team from Pan Acoustics, a German company specializing in professional audio solutions. The setup included multiple speakers, mostly connected via PoE++.
Throughout the day, I had several opportunities for in-depth conversations with Lasse Nipkow himself. These discussions were incredibly insightful and gave me a deeper understanding of the nuances and real-world challenges involved in creating immersive audio content. He also let us try some chocolate he brought from Switzerland – it was very delicious!
A key part of the system design included the placement of the two subwoofers, which were positioned to ensure even bass distribution across the listening area—crucial for supporting the 3D spatial illusion without overwhelming certain areas of the room. One subwoofer was placed in the front of the room, and one on the side. The combination of both subwoofers should ensure an even bass distribution.
Day 2: Measurement and Calibration Issues
Monday was dedicated to measuring and calibrating the system, but several issues became apparent during this process. In my opinion, the subwoofers were simply too small for the size of the room, resulting in a general lack of low-end energy. The bass was not only uneven in some areas—it was overall too weak to support the immersive sound field effectively.
The goal of calibrating the system on this second setup day was to create a neutral listening environment so that all presenters could play their demo material under consistent conditions. However, the system was so poorly calibrated that this goal wasn’t achieved. Most of the ceiling-mounted (height) speakers were barely audible, and the overall balance between the different channels lacked cohesion.
It also seemed likely that some mistakes were made during the measurement process itself—perhaps certain channels were misrouted or mislabeled, which could explain the unusual levels and inconsistent imaging.
As a result, each presenter ended up adjusting individual channel levels to suit their own material and preferences. This led to considerable inconsistencies in playback across presentations—some demos felt immersive and dynamic, while others sounded flat or unbalanced. It was a clear example of how crucial proper system tuning is when aiming for high-quality 3D audio experiences.
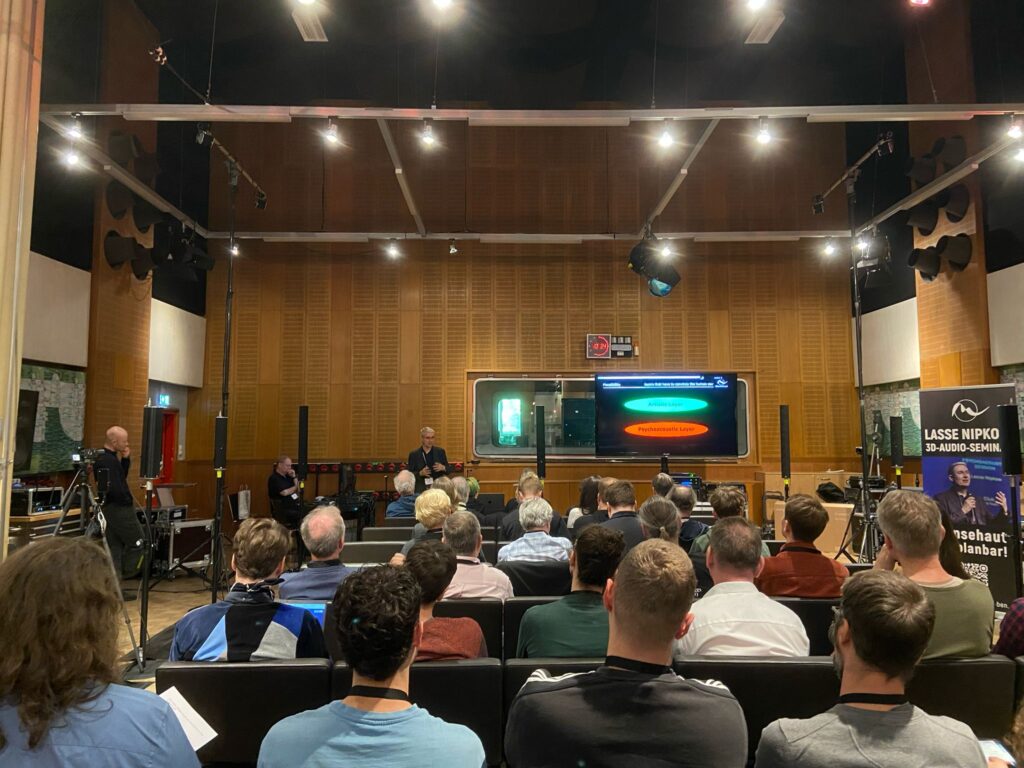
First seminar day – April 29
We met at 8 AM, had a coffee, and took the opportunity to chat with various manufacturers before the first lectures began at 10 AM.
The first day began with a deep dive into the psychological and technical fundamentals of spatial hearing, led by Lasse Nipkow himself. He demonstrated how immersive sound can create emotional reactions and detailed the principles of auditory perception in spatial contexts—explaining how our ears and brains collaborate to locate and interpret sound in a three-dimensional environment.
Then, Daniela Rieger introduced Dialog+, a Fraunhofer-based solution for making dialogues more intelligible using AI-assisted processing. This technology addresses a well-known problem in broadcasting: the difficulty many viewers have in understanding speech due to background noise and music. MPEG-H Dialog+ creates an alternative “Clear Speech” version by lowering background sounds and music from existing audio mixes. This version is available as an additional track in on-demand content, such as in the ARD Mediathek.
Dialog+ utilizes cutting-edge Deep Neural Networks (DNNs) to separate dialogue from other audio components. The system processes audio from real broadcasts, isolating the dialogue to create clearer, more accessible sound. It allows for personalization of the dialogue track, making it easier for viewers to understand speech in a variety of contexts, from documentaries to sports events.
Later in the day, Piotr Majdak and Katharina Pollack from the Austrian Academy of Sciences presented a session on how we perceive sound in space, explaining concepts such as HRTFs, ITDs/ILDs, and the role of early reflections in spatial hearing. Their session bridged the gap between scientific research and practical system design.
At 14:00 after lunch, Karlheinz Brandenburg, co-inventor of MP3 and founder of Brandenburg Labs, took the stage to discuss immersive headphone playback—an astonishing approach that makes the experience of listening over headphones almost indistinguishable from loudspeaker playback. His quote, “When I listen to sounds, our brain is a good pattern recognizer,” set the stage for a fascinating discussion on how our brains constantly compare the sounds we hear with stored expectations.
He presented various concepts:
Belly-voice effect (ventriloquist illusion)
McGurk effect (audio-visual fusion)
Room divergence/convergence (interaction of sound with space)
Learning and training (e.g., listening with different ears)
He argued that a plausible audio illusion requires a match between:
Expectations: What we anticipate hearing in the current environment.
Perceived sound: The actual auditory experience.
Several factors influence this, including:
Anatomy: The shape of the ear canal (HRTF).
Spatial cues: Reflections and room acoustics.
Visual cues: Sight can influence hearing.
Personal experience: Our brain’s prior knowledge.
Individualized HRTF: Recent studies have shown that personalized HRTF (tailored to an individual’s ear and head geometry) is not strictly necessary for realistic spatial audio. The brain can adapt to generic HRTF filters over time, though having a personalized measurement can enhance spatial accuracy, especially in headphone-based setups.
Brandenburg discussed how our brain’s ability to match sound patterns creates the illusion of immersive, spatial sound, and how visual and other sensory cues can enhance or disrupt that illusion.
One of the most practically engaging presentations followed: Tom Ammermann introduced his innovative Spatial Audio Designer Processor. This system, designed for professional use, allows real-time object-based mixing and supports a wide range of formats, from 5.1 and Dolby Atmos to custom 64-channel setups. Tom demonstrated how his system can be used in various contexts, from postproduction to live events, providing a highly flexible tool for immersive audio.
The day concluded with an evening listening session, where Tom, Lenni Damann, and Bene Ernst shared their own immersive productions. One of the highlights was the “Roomenizer” from Pinguin Ingenieurbüro, which let listeners experience real-time acoustic environments like cathedrals and concert halls, showing the power of spatial sound to enhance storytelling.
Day 2 – April 30
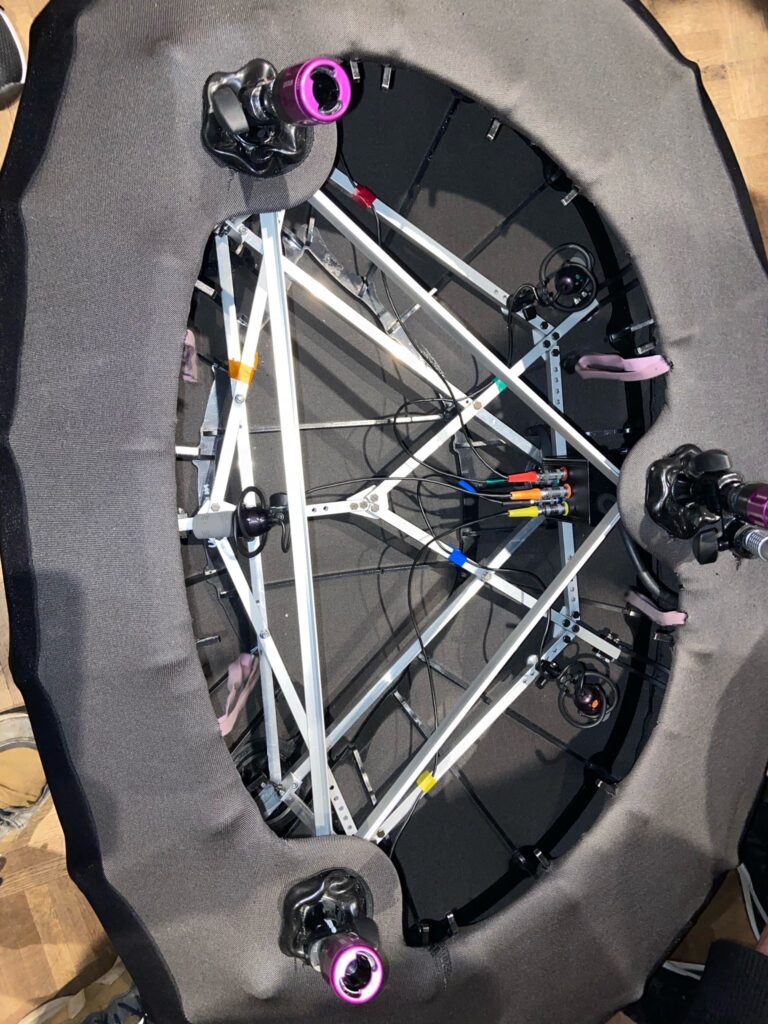
Florian Camerer presented his 9-channel microphone setup as a solution to the challenges of location-based sound recording for immersive audio. This setup addresses the limitations of traditional mono or stereo recordings by enabling more accurate capture of 3D sound.
Camerer’s system was designed to improve localization and spatial depth, utilizing microphone placement and wind shielding to ensure high-quality recordings in outdoor environments. His approach is particularly suited for capturing natural soundscapes in formats like AURO-3D and offers a more immersive listening experience by providing true spatial representation of the environment.
Later, Roger Baltensperger and Dietz Tinhof explored immersive music production, focusing on how spatial design can enhance emotional impact. Dietz Tinhof spoke openly about the current challenges in the production and perception of immersive audio. Two key issues give him, in his words, “a stomachache”: First, immersive content is often created for marketing purposes only or to benefit from higher payouts on platforms like Apple Music—not because of genuine artistic interest.
He recalled a conversation with Apple Music where they said there was a “quality problem.” His response was: “It’s not a quality problem, it’s a comprehension problem.” In his view, there is still a lack of understanding about what immersive audio can and should be. Too often, it’s still treated as an add-on to stereo, rather than its own creative medium.
He also criticized the widespread practice of charging based on the number of stems in a mix. This leads to worse results, he said, because if a label can choose to pay less, they will—forcing engineers to cut corners: “You get what you pay for.”
Tinhof passionately argued that immersive audio deserves to be seen as an independent art form. At the moment, though, the ecosystem is broken: Labels say they make no money, listeners don’t perceive the difference, and producers are stuck in the middle, trying their best without the proper recognition or infrastructure.
The final listening block included wellness-focused soundscapes and meditative music mixes, showing how spatial audio can be used for relaxation and therapeutic purposes.
Spotlight: Lenni Damann & Bene Ernst
The final session by Lenni Damann and Bene Ernst was a true highlight for me. They focused on the creative use of space in music production, emphasizing that 3D audio should serve the music, not the technology itself. Their works, including immersive mixes for artists like AMISTAT or Alexander Pielsticker, demonstrated how subtle movements and depth can transform simple compositions into emotionally immersive experiences.
Lenni and Bene’s philosophy is that “3D only makes sense if it serves the music.” This was evident in their work, where space became an emotional dimension, not just a technical tool. Their use of reverb zones, depth layering, and precise spatial movement turned a solo piano piece into a deeply immersive experience. They showcased how spatial dynamics can amplify the emotional power of music, making every sound more significant.
For AMISTAT, they worked on “Seasons,” a project where 3D audio wasn’t just used for technical innovation but to enhance the storytelling and emotions of the music. Their approach highlighted the power of “Spatial Dynamics” in music production—showing that the size of the mix should follow the story being told, not the other way around.
For Alexander Pielsticker, their immersive mixes of minimalist pieces, including solo piano works, were designed with “3D in mind.” They utilized modern grand piano recordings and extreme effects, allowing listeners to feel as though they were sitting on the piano bench alongside the artist.
Exhibition Area & Manufacturer Highlights
Throughout both days, the exhibition area was a hotspot of inspiration. Leading manufacturers like Neumann, Sennheiser, Brandenburg Labs, and others showcased their latest products, from spatial microphones and monitoring solutions to immersive production tools and head-tracking headphone systems. Being able to test these tools hands-on and engage with developers and engineers provided valuable insights into how these technologies can be integrated into real-world workflows.
Final Thoughts
One of the most important takeaways from Lasse Nipkow’s seminar was the reminder that 3D audio is not simply “surround sound with height channels.” Instead, it creates a true volumetric sound field—one that blends natural spatiality with precise localization. Lasse emphasized how this approach unlocks an entirely different level of immersive experience.
A particularly striking moment was his demonstration of the difference between real sources—sounds coming directly from a speaker—and phantom sources that exist between loudspeakers. Real sources offer sharper localization and a stronger presence, while phantom sources are more flexible in movement but often sound more diffuse.
Another key concept was the separation of localization and spatial envelopment. Accurate imaging relies on direct sound, whereas a convincing sense of space emerges from decorrelated signals—similar content distributed across multiple channels. This principle is at the heart of 3D audio’s immersive quality.
To illustrate these ideas, Lasse presented multi-channel organ recordings made in the Hofkirche Lucerne. Different organ registers were spatially distributed and individually mic’d—some directed from above, some from behind, and others straight ahead. This spatial strategy, combined with uncorrelated ambient material, resulted in a sonic image that felt rich, complete, and true to the complexity of the instrument.
Finally, Lasse underlined the urgent need for more education and training in the field of 3D audio—not only for sound engineers, but also for musicians and producers. It’s not just about technology, he said, but about developing a sensitivity to psychoacoustics and spatial composition. When these two elements—precise imaging and immersive space—come together, that’s when the magic happens.
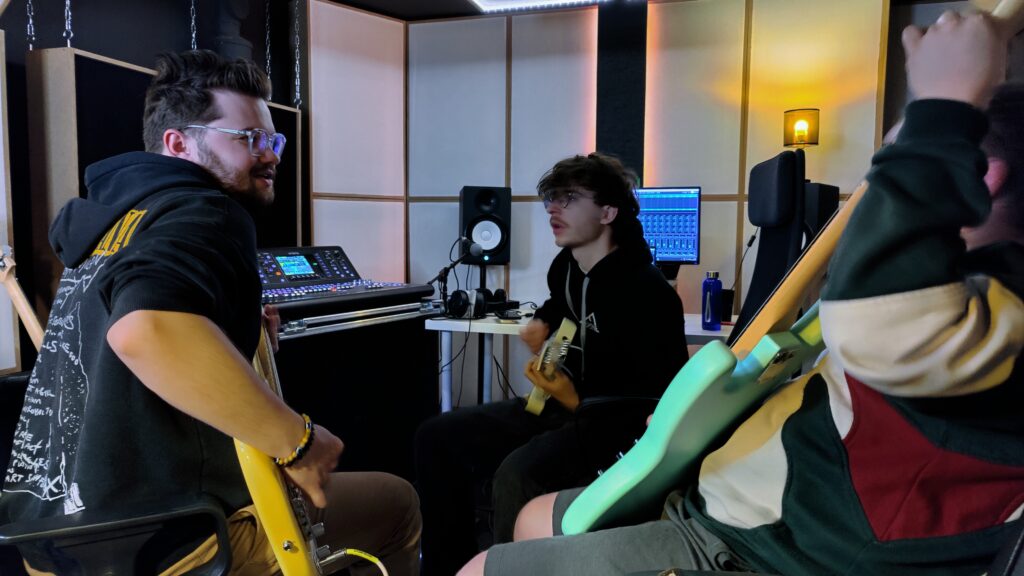
I am currently studying Sound Design in my master’s program. As part of my final project, I am producing a concept album about addiction and dependency together with my band Flavor Amp. One part of the project is creating 3D audio versions of our songs from the concept album.
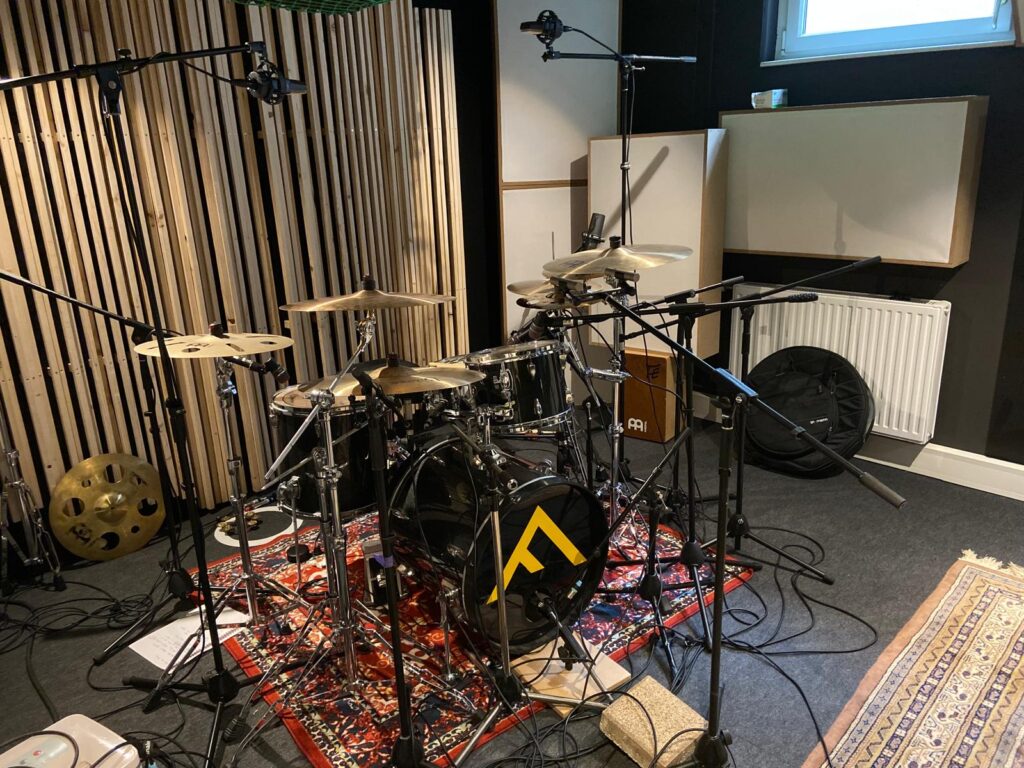
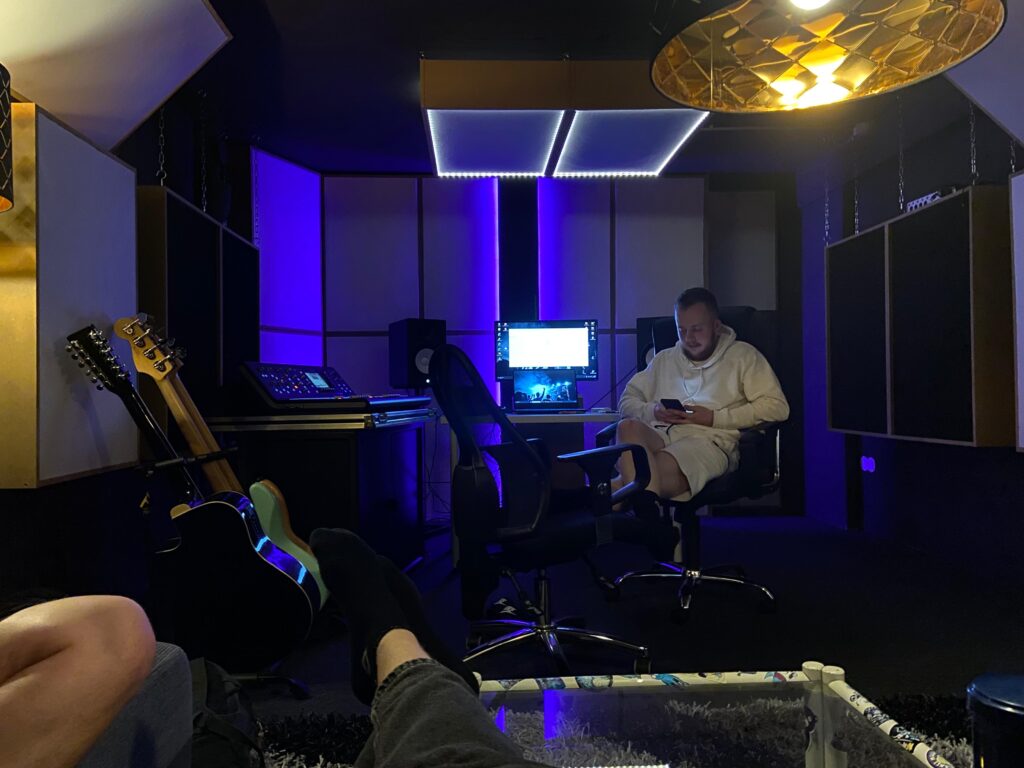
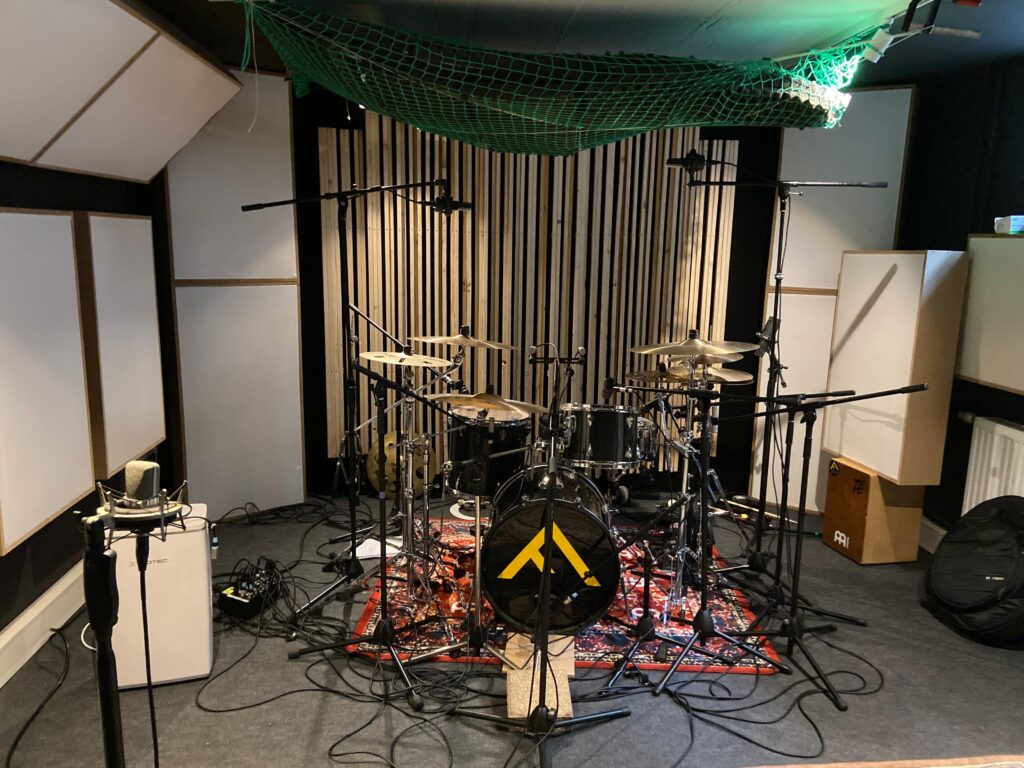
This session marked a very special milestone: it was the very first recording session in our newly built studio.
Although the construction is not 100% finished yet (more on that below), we decided to already start working creatively in the space.
Studio Situation
Since we haven’t found a final solution for treating the ceiling above the drum set yet, we quickly improvised: we packed leftover pieces of acoustic foam into a cargo net (of a car-trailer) and strapped it to the ceiling. It’s definitely a temporary fix, but it helped to reduce some reflections from the ceiling.
The control room is also still a work in progress — the diffusors above the black absorbers haven’t been installed yet. We plan to add them in summer.
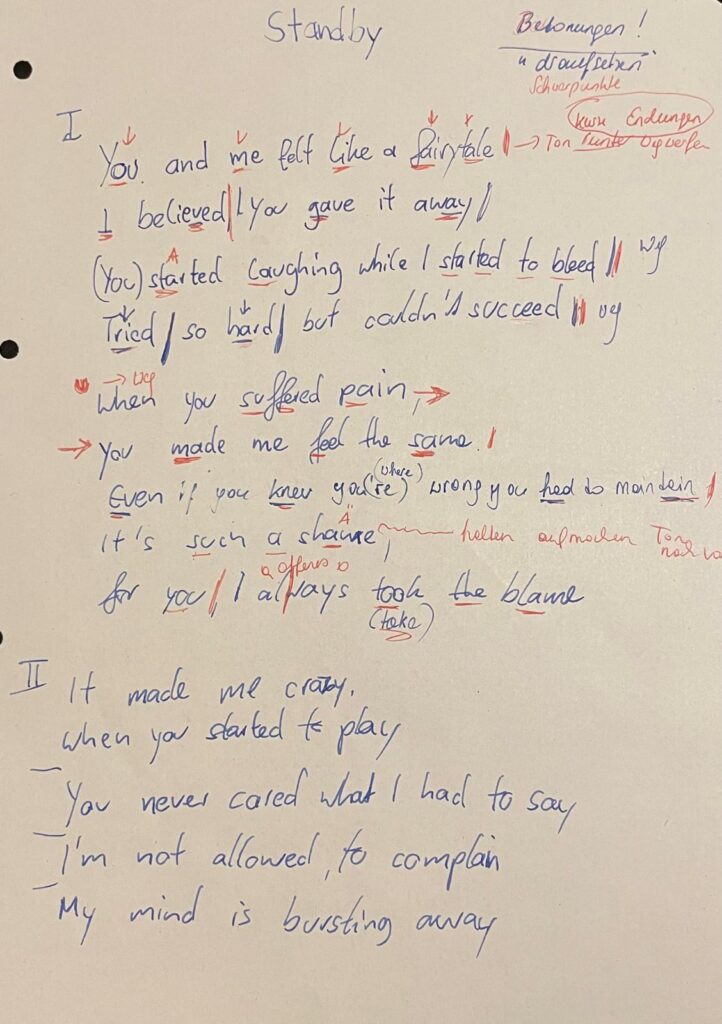
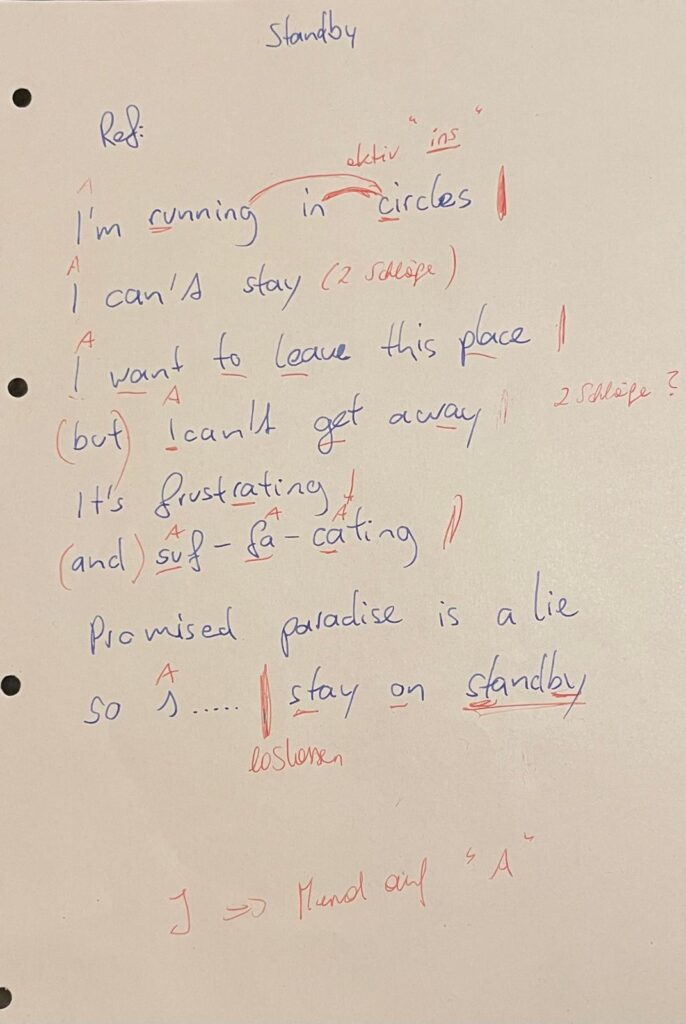
Song: Stand by – Flavor Amp
‘Stand By’ is a raw and emotional track that dives deep into the suffocating reality of being trapped in a toxic relationship—a dynamic that mirrors the psychological and emotional patterns often found in addiction. The song paints a vivid picture of circular thinking and emotional dependency: the feeling of giving everything and receiving harm in return, the confusion of being hurt by someone who once promised love, and the inner battle of wanting to leave but being psychologically unable to do so.
The metaphor of being ‘on stand by’ captures a state of paralysis—still connected, still present, but unable to act or move forward. In the context of our concept album on addiction and dependency, this song stands as a powerful metaphor for emotional entrapment. Just like with substance or behavioural addictions, the individual becomes stuck in a loop: knowing something is damaging but feeling incapable of breaking away.
(Current) Lyrics of the song
Recording Setup
We recorded all 17 channels with my Midas M32-LIVE.
This was our patch plan:
CH1: Kick in (Audix D6)
CH2: Kick out (sE Electronics V-Kick)
CH3: Snare top (sE Electronics SE8)
CH4: Snare top (sE Electronics V7X)
CH5: Snare bottom (sE Electronics V-beat)
CH6: Hi-Hat (Shure Sm7b)
CH7: Tom 1 (sE Electronics V-beat)
CH8: Tom2 (sE Electronics V-beat)
CH9: OH HH (AKG C414)
CH10: OH Ride (AKG C414)
CH11: Ride (Neumann KM184)
CH12: Splashes (Neumann KM184)
CH13: Equal-Distance-Mic (Shure Sm57)
CH14: Mono Room (Neumann TLM102)
CH15: Droom L (Neumann KM184) (AB)
CH16: Droom R (Neumann KM184) (AB)
CH17: Hall (outside of the room) (sE Electronics SE8)
Before the session, I had a talk with Matthias Frank, who gave me some valuable input regarding microphone placement and recording techniques. At the end of the day, he advised me to close-mic as many individual components of the drum kit as possible, in order to have maximum flexibility during the mixing process — especially important for a complex 3D audio production.
We also worked with the overdubbing method to gain more control during the mixing and spatialization process. For example, during certain song parts, our drummer intentionally left out some cymbal hits while recording the main drum performance. We then recorded those cymbal accents separately, allowing us to freely position them in the 3D audio field later on.
Following this advice, we set up a wide range of microphones across the kit:
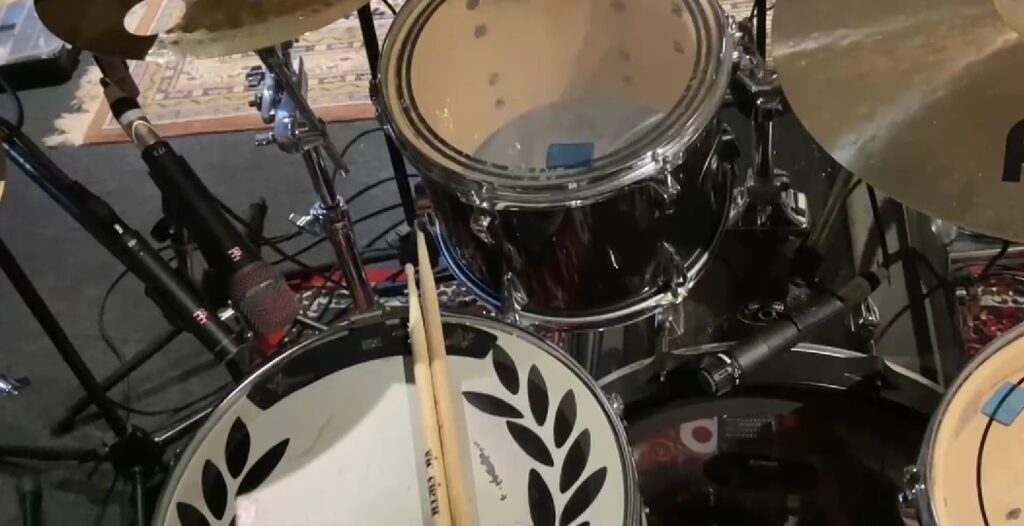
Kick Drum: Mic’d with two microphones — an Audix D6 inside and a SE Electronics V-Kick on the outside. Although I normally prefer a large-diaphragm condenser for the outside mic, using two dynamics turned out to be a great combination (I had no condenser mic left).
Snare Drum: We used three microphones: a typical dynamic mic (V7x) and a small-diaphragm condenser mic (SE8). The condenser captured more brightness and detail, but also more bleed, so I’ll decide during mixing which one fits best. On snare bottom we used the sE Electronics V-beat.
Hi-Hat: Mic’d using a Shure SM7.
Toms: We used the sE Electronic v-beat on both toms.
Overheads: For the overheads, we used AKG C414s — a classic choice known for their clarity and detail.
Cymbals: The ride and the splashes were individually close-mic’d.
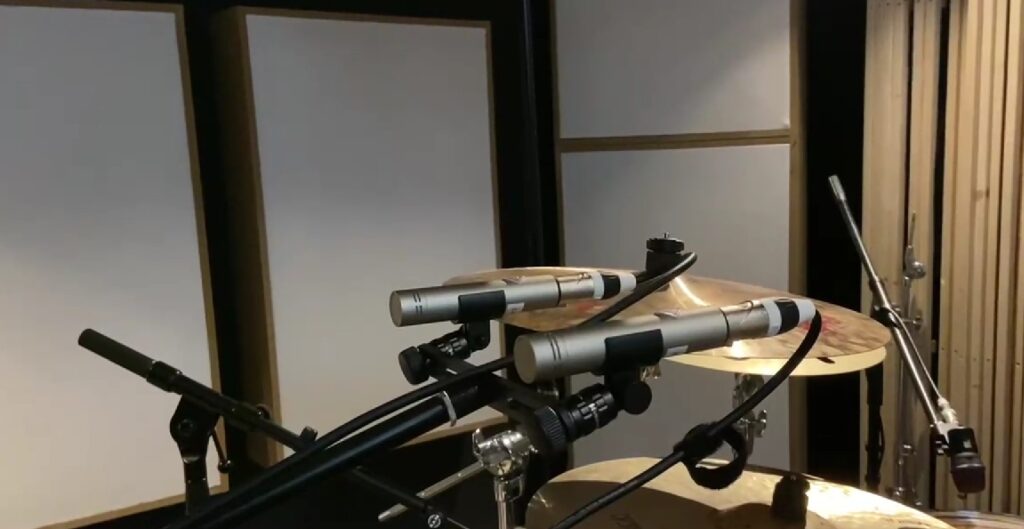
Room Micing: Inspired by German engineer Moses Schneider’s techniques, I experimented with the “Droom” (Dream Room) method. This involves two small-diaphragm condenser microphones (cardioid pattern in our case) placed in an A/B stereo setup, but directed away from the drums to capture a very natural and wide room sound. Although hypercardioid microphones are recommended for this method, the cardioids we used worked surprisingly well. Additionally, we set up a mono room microphone the sound of the whole drum kit in our small room.
The Droom
Equal-Distance-Mic: We also used the so-called Equal-Distance-Mic. It’s a microphone placed centrally in the kit, heavily compressed to add punch and energy to the overall sound.
Equal distance mic
Creating the feeling of: Additionally, we placed five small-diaphragm condenser microphones in the stairwell outside the live room to capture a natural, distant reverb that adds spatial depth and emotional weight to the production. This setup was used specifically for a key transition in the song (2 bars) — moving from the breakdown into the final chorus — to sonically express the feeling of being trapped and relentlessly pursued by one’s surroundings.
Capturing the sound of the hall
At that point in the arrangement, the stereo panorama briefly expands, evoking a fleeting sense of escape, only to contract moments later into a confined, focused sound image — symbolizing the inability to truly break free. To reinforce this theme, I’m also considering adding a rotating movement to the sound elements in this section, echoing the chorus line: “I’m running in circles — I can’t stay.” This motion could enhance the sense of disorientation and emotional entrapment, both musically and conceptually.
Conclusion
The session was an important first step for both the project and the studio. Despite the room still being a work-in-progress, the recordings already sound very promising, and I’m excited to take the next steps in the production.
More updates on the studio construction and upcoming recording sessions will follow soon!
I was extremely tired while filming this, as we had been recording drums late into the night. So please excuse the slightly scattered way of speaking — it was a long but exciting session.
During our visit to IRCAM Forum 2025, one of the most unexpected and inspiring presentations came from Kieran McAuliffe, who introduced us to a unique way of experiencing a video game — not just visually, but sonically. His project, Sonifying The Powder Toy, brought an old genre of games to life in a way that made both sound designers and game designers lean forward.
If you’ve never heard of it, The Powder Toy is part of a quirky, cult genre called “falling sand games.”
These are open-ended, sandbox-style simulations where players interact with hundreds of different particles — fire, water, electricity, explosives, gases, and even fictional materials — all rendered with surprising physical detail. It’s chaotic, visual, and highly addictive. But one thing it never had was sound.
Kieran, with his background as a composer, guitarist, and researcher, decided to change that. His project wasn’t just about adding booms and fizzles. He approached the challenge like a musical instrument designer: how can you play this game with your ears?
The problem was obvious. The game’s physics engine tracks up to 100,000 particles updating 60 times per second — trying to create sounds for every interaction would melt your CPU. So instead, Kieran developed a method of analytic sonification: instead of responding to every pixel, his system tracks the overall distribution of particles and generates sound textures accordingly.
That’s where it gets beautifully nerdy. He uses something called stochastic frequency-modulated granular synthesis. In simpler terms, think of it like matching grains of sand with grains of sound — short, tiny bursts of tones that collectively create textures. Each type of material in The Powder Toy — be it lava, fire, or metal — gets its own “grain stream,” with parameters like pitch, modulation, duration, and spatial position derived from the game’s internal data.
To make all of this work, Kieran built a custom Max/MSP external called LuaGran~. This clever little tool lets him embed Lua scripts directly inside Max, giving him the power to generate and manipulate thousands of grains per second. It allows for both tight control and high performance — a critical balance when your “instrument” is a particle system going haywire in real time.
Some mappings were linear — like more fire equals higher pitch — while others used neural networks or probabilistic logic to shape more complex sonic behaviors. It was a blend of art and science, intuition and math.
During the presentation, I had the chance to join Kieran live by downloading his forked version of The Powder Toy, which sends Open Sound Control (OSC) data to his Max patch. Within minutes, a room full of laptops was sonically simulating plasma storms and chemical reactions. It was fun, chaotic, and surprisingly musical.
One thing that stood out was how Kieran resisted the temptation to make the sound effects too “realistic.” Instead, he embraced abstraction. A massive explosion might not sound like a movie boom — it might produce a textured whoosh or a burst of granular noise. His goal was not to recreate reality, but to enhance the game’s emergent unpredictability with equally surprising sounds.
He described the system more like a musical instrument than a tool, and that’s how he uses it — for laptop ensemble pieces, sound installations, and live improvisation. Still, he hinted at the potential for this to evolve into a standalone app or even a browser-based instrument. The code is open source, and the LuaGran~ tool is already on his GitHub (though it still needs some polish before wider distribution).
As sound designers and creatives, this project reminds us that sound can emerge from the most unexpected places — and that play, chaos, and curiosity are powerful creative engines. The Powder Toy might look like a simple retro game, but under Kieran’s hands, it becomes a dense sonic playground, a platform for experimentation, and a surprisingly poetic meeting of code and composition.
If you’re curious, I encourage you to try it out, explore the sounds it makes, and maybe even mod it yourself. Because as Kieran showed us, sometimes the most interesting instruments are the ones hiding inside games.
Here you can find manual how to instal game and sonification:
When you think of motion tracking, you might imagine a dancer in a suit covered with reflective dots, or a game controller measuring hand gestures. But at this year’s IRCAM Forum in Paris, Emmanuel Fléty and Marc Sirguy introduced R-IoT v3, the latest evolution of a platform developed at IRCAM for real-time interactive audio applications. For students and professionals working in sound design, physical computing, or musical interaction, RIOT represents a refreshing alternative to more mainstream tools like Arduino, Raspberry Pi, or Bela—especially when tight timing, stability, and integration with software environments like Max/MSP or Pure Data are key.
What is it, exactly?
RIOT v3 is a tiny device—about the size of a USB stick—that can be attached to your hand, your foot, a drumstick, a dancer’s back, or even a shoe. Once it’s in place, it starts capturing your movements: tilts, spins, jumps, shakes. All of that motion is sent wirelessly to your computer in real time.
What you do with that data is up to you. You could trigger a sound sample every time you raise your arm, filter a sound based on how fast you’re turning, or control lights based on the intensity of your movements. It’s like turning your body into a musical instrument or a controller for your sound environment.
What’s special about version 3?
Unlike Raspberry Pi, which runs a full operating system, or Arduino, which can have unpredictable latency depending on how it’s programmed, RIOT runs bare metal. This means there’s no operating system, no background tasks, no scheduler—nothing between your code and the hardware. The result: extremely low latency, deterministic timing, and stable performance—ideal for live scenarios where glitches aren’t an option.
In other words, RIOT acts like a musical instrument: when you trigger something, it responds immediately and predictably.
The third generation of RIOT introduces some important updates:
Single-board design: The previous versions required two boards—the main board and an extension board—but v3 integrates everything into a single PCB, making it more compact and easier to work with.
RP2040 support: This version is based on the RP2040 chip, the same microcontroller used in the Raspberry Pi Pico. It’s powerful, fast, and has a growing ecosystem.
Modular expansion: For more complex setups, add-ons are coming soon—including boards for audio I/O and Bluetooth/WiFi connectivity.
USB programming via riot-builder: The new software tool lets you write C++ code, compile it, and upload it to the RIOT board via USB—no need for external programmers. You can even keep your Max or Pure Data patch running while uploading new code.
Why this matters for sound designers
We often talk about interactivity in sound design—whether for installations, theatre, or music—but many tools still assume that the computer is the main performer. RIOT flips that. It gives you a way to move, breathe, and act—and have the sound respond naturally. It’s especially exciting if you’re working in spatial sound, live performance, or experimental formats.
And even if you’ve never touched an Arduino or built your own electronics, RIOT v3 is approachable. Everything happens over WiFi or USB, and it speaks OSC, a protocol used in many creative platforms like Max/MSP, Pure Data, Unity, and SuperCollider. It also works with tools some of you might already know, like CataRT or Comote.
Under the hood, it’s fast. Like really fast. It can sense, process, and send your movement data in under 2 milliseconds, which means you won’t notice any lag between your action and the response. It can also timestamp data precisely, which is great if you’re recording or syncing with other systems.
The device is rechargeable via USB-C, works with or without a battery, and includes onboard storage. You can edit configuration files just like text. There’s even a little LED you can customize to give visual feedback. All of this fits into a board the size of a chewing gum pack.
And yes—it’s open source. That means if you want to tinker later on, or work with developers, you can.
Whether you’re interested in gesture-controlled sound, building interactive costumes, or mapping motion to filters and samples in real time, RIOT v3 is designed to help you get there faster and more reliably. It’s flexible enough for advanced setups but friendly enough for students or artists trying this for the first time.
At FH Joanneum, where design and sound design meet across disciplines, a tool like this opens up new ways of thinking about interaction, performance, and embodiment. You don’t need to master sensors to start exploring your own body as a controller. RIOT v3 gives you just enough access to be dangerous—in the best possible way.
Heart rate is a fundamental indicator of mental health, with heart rate variability (HRV) playing a particularly significant role. HRV refers to the variation in time intervals between heartbeats, reflecting autonomic nervous system function and overall physiological resilience. It is measured using time-domain, frequency-domain, or non-linear methods. Higher HRV is associated with greater adaptability and lower stress levels, while lower HRV is linked to conditions such as PTSD, depression, and anxiety disorders.
Studies have shown that HRV differs between healthy individuals and those with PTSD. In a resting state, people with PTSD typically exhibit lower HRV compared to healthy controls. When exposed to emotional triggers, their HRV may decrease even further, indicating heightened sympathetic nervous system activation and reduced parasympathetic regulation. Bessel van der Kolk’s work in “The Body Keeps the Score” highlights how trauma affects autonomic regulation, leading to dysregulated physiological responses under stress.
There are two primary methods for measuring heart rate: electrocardiography (ECG) and photoplethysmography (PPG).
Feature
ECG
PPG
Measurement Principle
Uses electrical signals produced by heart activity
Uses light reflection to detect blood flow changes
Accuracy
Gold standard for medical HR monitoring
Uses ECG as reference for HR comparison
Heart Rate (HR) Measurement
Highly accurate
Suitable for average or moving average HR
Heart Rate Variability (HRV)
Can extract R-peak intervals with millisecond accuracy
Limited by sampling rate, better for long-duration measurements (>5 min)
Time to Obtain Reading
Quick, no long settling time required
Requires settling time for ambient light compensation, motion artifact correction
pic
sensor name
link
price
what it measures
specification
features
usage case
Gravity: Analog Heart Rate Monitor Sensor (ECG) for Arduino
ECG records the electrical activity of the heart using electrodes placed on the skin, providing high accuracy in detecting R-R intervals, which are critical for HRV analysis. PPG, in contrast, uses optical sensors to detect blood volume changes in peripheral tissues, such as fingertips or earlobes. While PPG is convenient and widely used in consumer devices, it is more susceptible to motion artifacts and may not provide the same precision in HRV measurement as ECG.
Additionally, some PPG sensors include pulse oximetry functionality, measuring both heart rate and blood oxygen saturation (SpO2). One such sensor is the MAX30102, which uses red and infrared LEDs to measure oxygen levels in the blood. The sensor determines SpO2 by comparing light absorption in oxygenated and deoxygenated blood. Since oxygen levels can influence cognitive function and stress responses, these sensors have potential applications in mental health monitoring. However, SpO2 does not provide direct information about autonomic nervous system function or HRV, making ECG a more suitable method for this project.
For this project, ECG is the preferred method due to its superior accuracy in HRV analysis. Among available ECG sensors, the AD8232 module is a suitable choice for integration with microcontrollers such as Arduino. The AD8232 is a single-lead ECG sensor designed for portable applications. It amplifies and filters ECG signals, making it easier to process the data with minimal noise interference. The module includes an output that can be directly read by an analog input pin on an Arduino, allowing real-time heart rate and HRV analysis.
HRV is calculated based on the time intervals between successive R-peaks in the ECG signal. One of the most commonly used HRV metrics is the root mean square of successive differences (RMSSD), which is computed using the formula:
where RRi represents the ith R-R interval, and N is the total number of intervals. Higher RMSSD values indicate greater parasympathetic activity and better autonomic balance. Among ECG sensors available on the market, the Gravity: Analog Heart Rate Monitor Sensor (ECG) is the most suitable for this project. It is relatively inexpensive, includes electrode patches in the package, and has well-documented Arduino integration, making it an optimal choice for HRV measurement in experimental and practical applications.