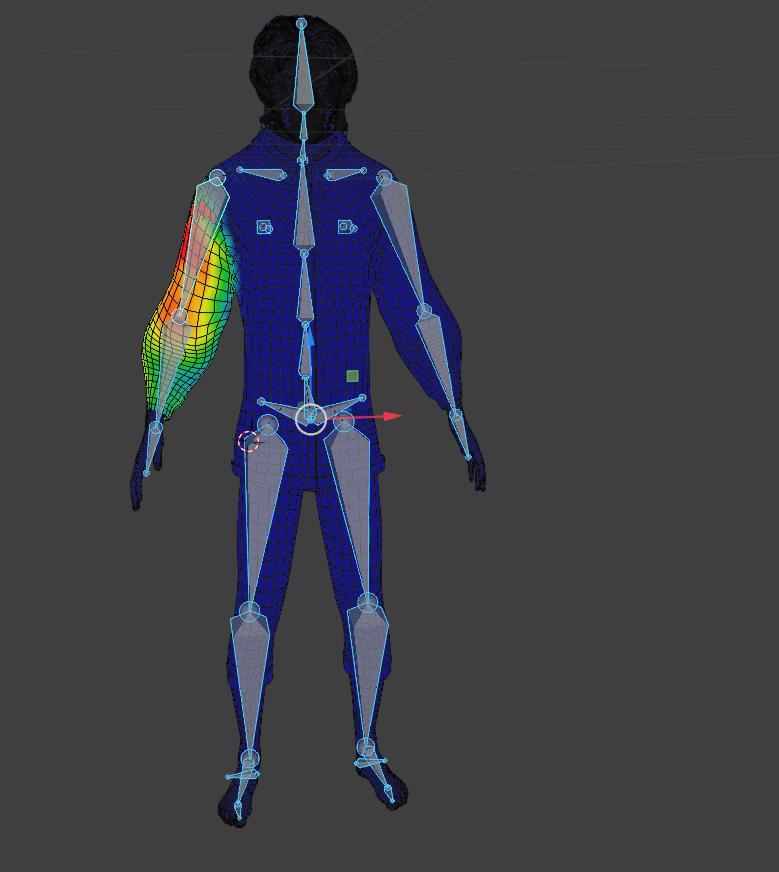
Weight painting proved to be one of the more challenging aspects of the rigging process, despite starting with a solid foundation from Rigify’s automatic weights. The initial distribution worked reasonably well for larger body parts like the torso and thighs, but finer areas required manual adjustment that often led to unintended consequences. One persistent issue was the inability to isolate specific vertices during weight painting – when trying to correct the forearm’s influence on the wrist, for example, the brush would inevitably affect nearby geometry in the hand or elbow that didn’t need modification. This created a frustrating cycle of fixing one area only to inadvertently break another that had been working properly.
The clothing presented particular difficulties due to its proximity to the body mesh. Attempting to refine the shoulder deformation on the jacket would frequently transfer unwanted weighting to the underlying arm geometry, and vice versa. I found myself constantly toggling between vertex groups and using the weight gradient tool to try to contain the influence, but achieving clean transitions required far more precision than I initially anticipated.
After several rounds of adjustments, I developed a more methodical approach: working in small, incremental passes and constantly testing the rig with basic poses between each adjustment. While not perfect, this eventually yielded a serviceable deformation system that handles most necessary movements without obvious distortions. The end result is a rig that works well enough for posing and basic animations, though I can see areas where the weighting could be improved.