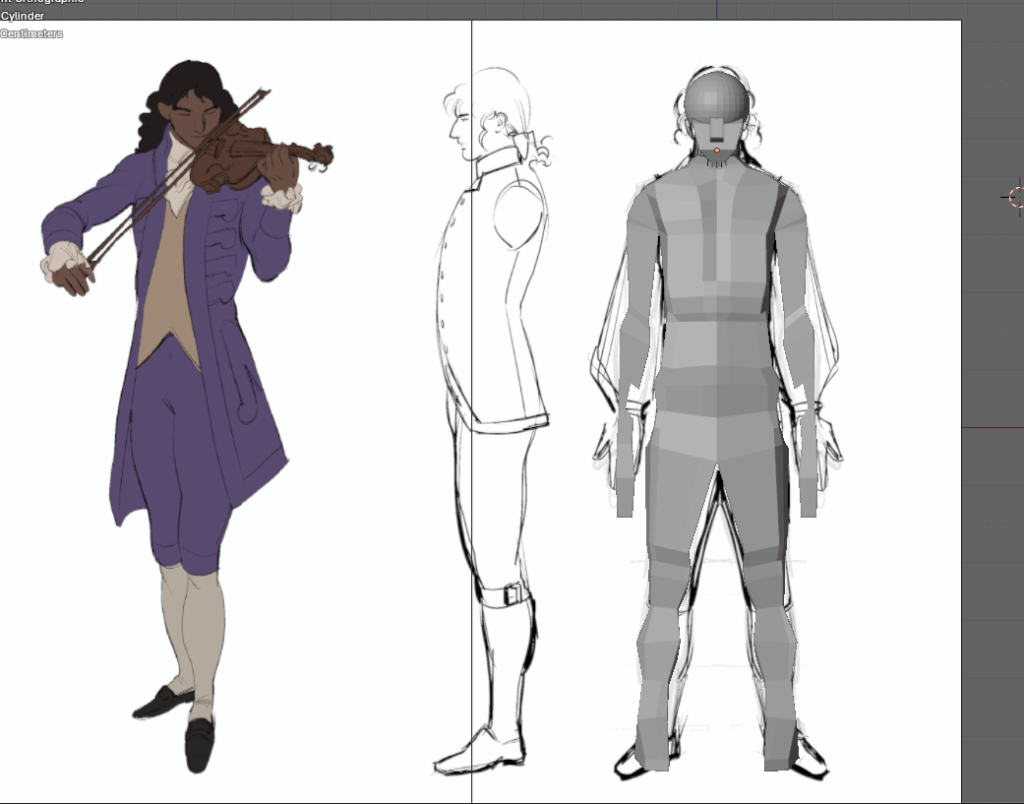
For the turnaround, I meticulously followed the step-by-step instructions outlined in the tutorials mentioned in my previous post. The process required careful attention to proportions, perspective, and consistency across all angles of the character.
The first step was to sketch the character in a ¾ view, as this angle provides a strong foundation for understanding depth and dimension before moving on to more complex perspectives. Starting with this view allowed me to visualize how different parts of the character—such as the head, torso, and limbs—would interact in three-dimensional space.
I began by blocking out the basic shapes; the torso, in particular, required special attention because it needed to appear naturally bent in perspective once the turn-around was complete – I kept in mind the lesson learned from the tutorials – it bends differently in the side-view depending on if it’s seen from the front or the back. I made sure to define the center line of the torso clearly, as this would serve as a crucial reference point for maintaining consistency across all angles.
Once the ¾ view was established, I proceeded to draw construction guidelines that would help maintain uniformity in the character’s proportions across every angle.
These guidelines were essential because even a slight deviation in one angle could make the character appear distorted when viewed in sequence. By adhering to these references, I ensured that the character maintained a cohesive look from every viewpoint.
One of the most difficult aspects of this process was positioning the arms, legs, and feet correctly in perspective. Since limbs can appear foreshortened or elongated depending on the angle, I had to carefully consider their placement to avoid unnatural distortions.
I struggled with placing the feet—should they appear to be floating to get the full length of the character? Or naturally placed on the ground line? One would allow me to draw the feet without worrying about foreshortening them, the other would give me a better idea of the weight placed on the legs. For the rough turnaround, I decided to go with the feet floating, but for the detailed 2 sided reference drawing of the character in his costume, I went with firm planted on the ground. That was shortly going to become very frustrating for me, however.
While the face was not the primary focus of this exercise, it was still important to establish its basic structure. I marked the outer edges of the face in each angle to maintain consistency in the head’s shape and made sure to carefully map out where the nose would fall in the different views. Again, the turnaround was less detailed than the final reference drawing.
With the turn-around drawings complete, the next phase was transferring them into Blender to begin the 3D modeling process. I imported the front and side view as reference images in Blender
In retrospect, I would’ve done a couple things differently. Chief of which would’ve been to actually draw the arm from the side-view, maybe just put to the side. I hadn’t considered that needing the width of the limb would also be important. Another point would be to have the lines colored; whether the entire character filled in or just the line-art, the most important thing would be making sure that when I’m in wire-frame mode I could easily distinguish what is reference and what is the model itself.
A thing I am grateful I did was put the character in Body-conforming clothing, which worked out due to the period costume. Another further consideration would be to draw out other markers of the body: the deltoids, chest muscles, ribcage lines, hipbones, thigh inseem and maybe even the knees. While I could guesstimate their relative position from memory, it would’ve relieved my mental load while already struggling with the vertices during the modeling process.