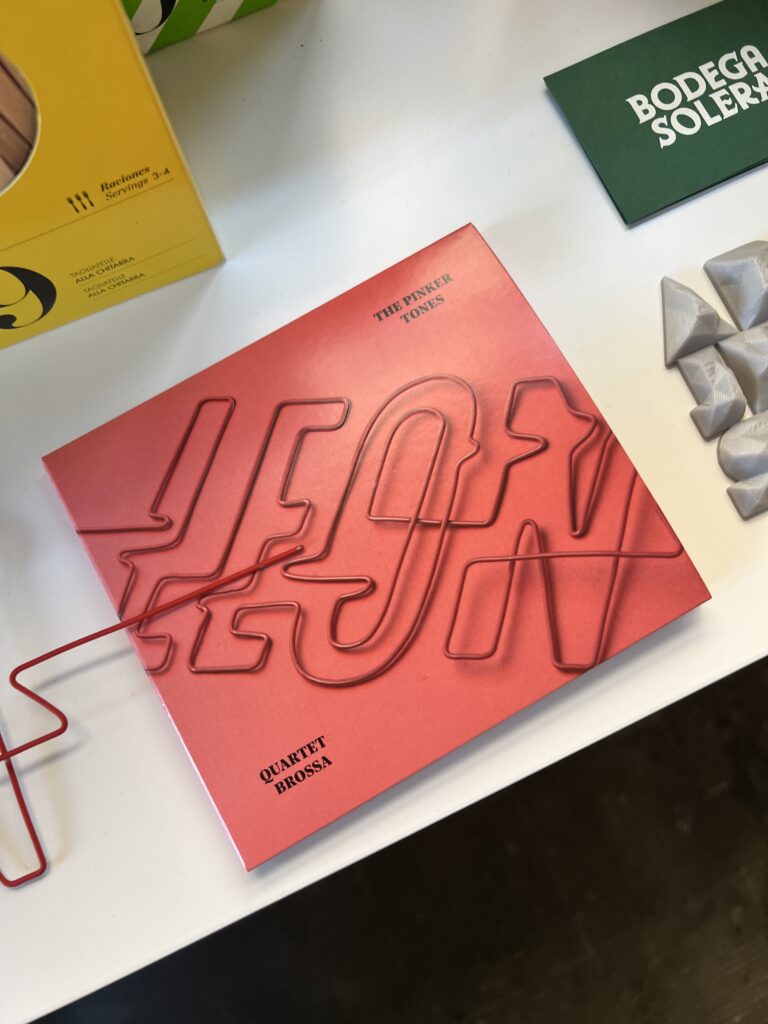
Inspiration & Direction of Research: In Barcelona we got to see insights of the agency “Lo Siento” https://losiento.studio/
This inspired me to take a leap of faith and continue my research from semester 1 and dive deeper into the analogue ideation process and how to create curated and polished designs from it.
Planning my experiments I would like to think about materials first and concepts second as an ideation approach.
MyIdeas for Mixed Media Experiments
Paper x Lasercut
Paper x Riso
Paper x Sewing machine
Paper x Fabric
Fabric x Typewriter
Fabric x Lasercut
Lino x Lasercut
Fabric x Linoprint
Glass x Lasercut
Acrylic Glass x Lasercut
I hope I will be able to leverage materials from previous projects and develop projects as I keep adding new layers and dimensions. In the end I want to professionally photograph my projects and make them look polished like Lo Siento.
With this series of experiments I hope to find out “How to create professional Brandings and design from an analogue ideation process“
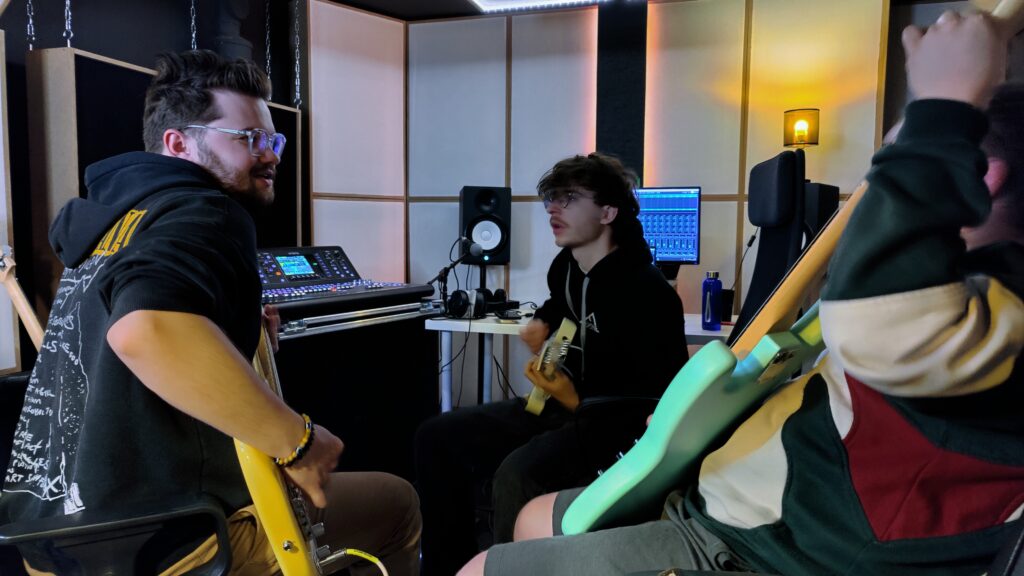
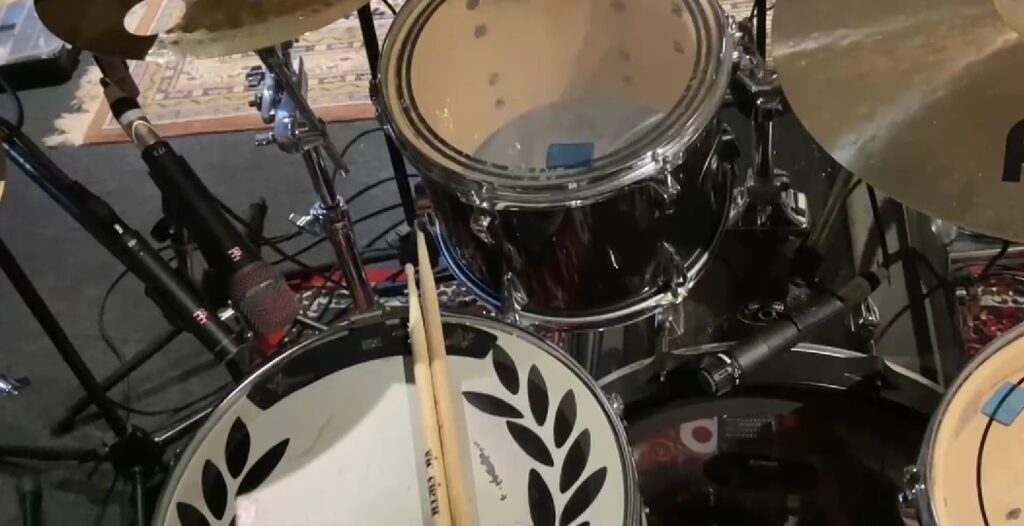
I am currently studying Sound Design in my master’s program. As part of my final project, I am producing a concept album about addiction and dependency together with my band Flavor Amp. One part of the project is creating 3D audio versions of our songs from the concept album.
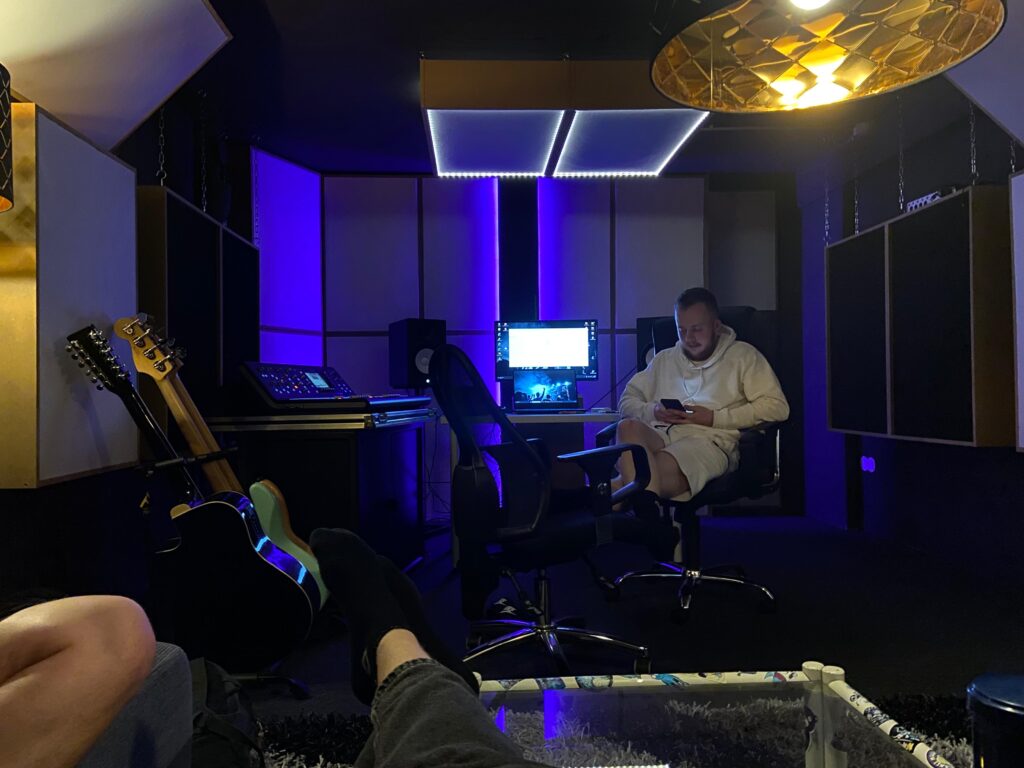
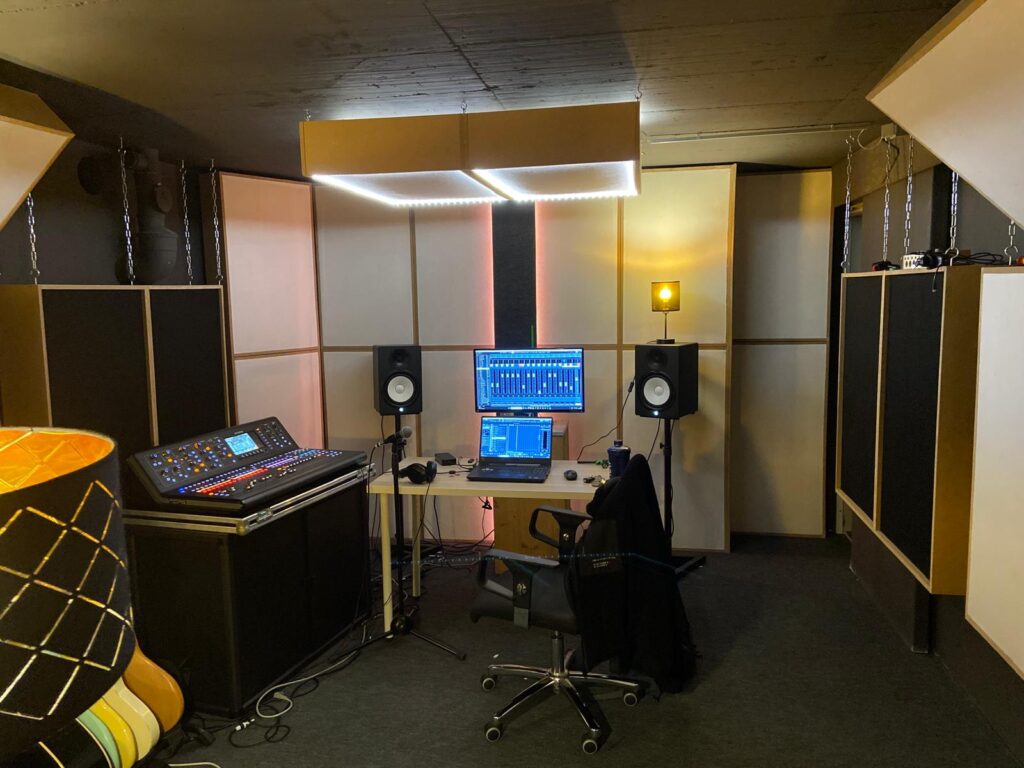
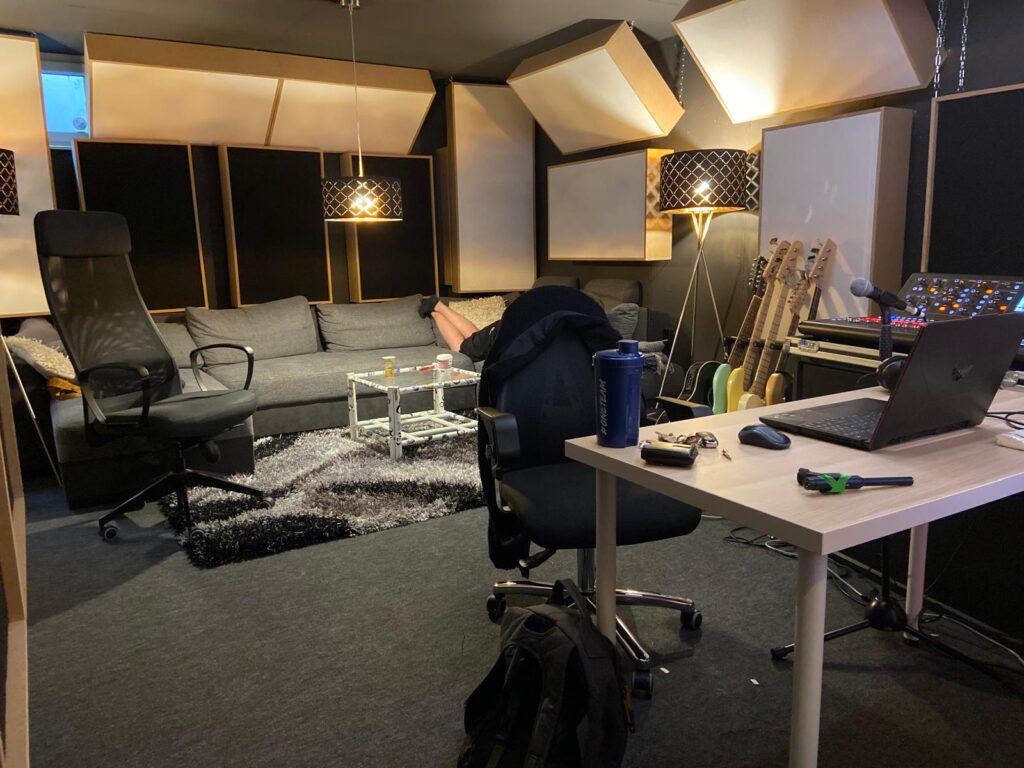
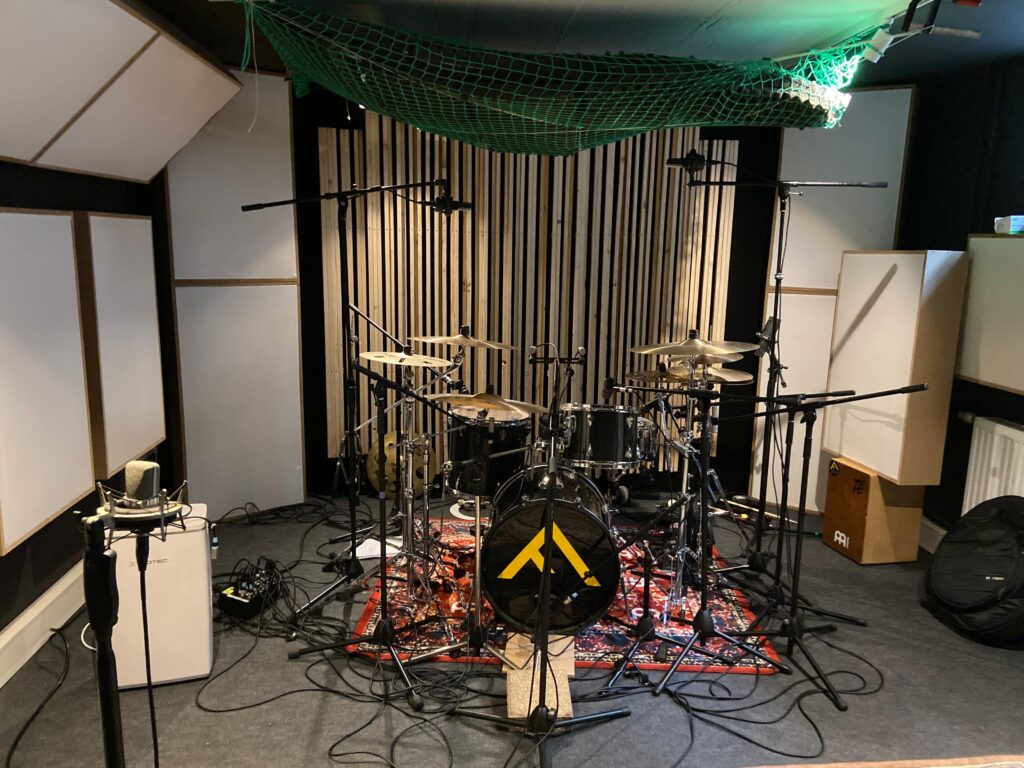
This session marked a very special milestone: it was the very first recording session in our newly built studio.
Although the construction is not 100% finished yet (more on that below), we decided to already start working creatively in the space.
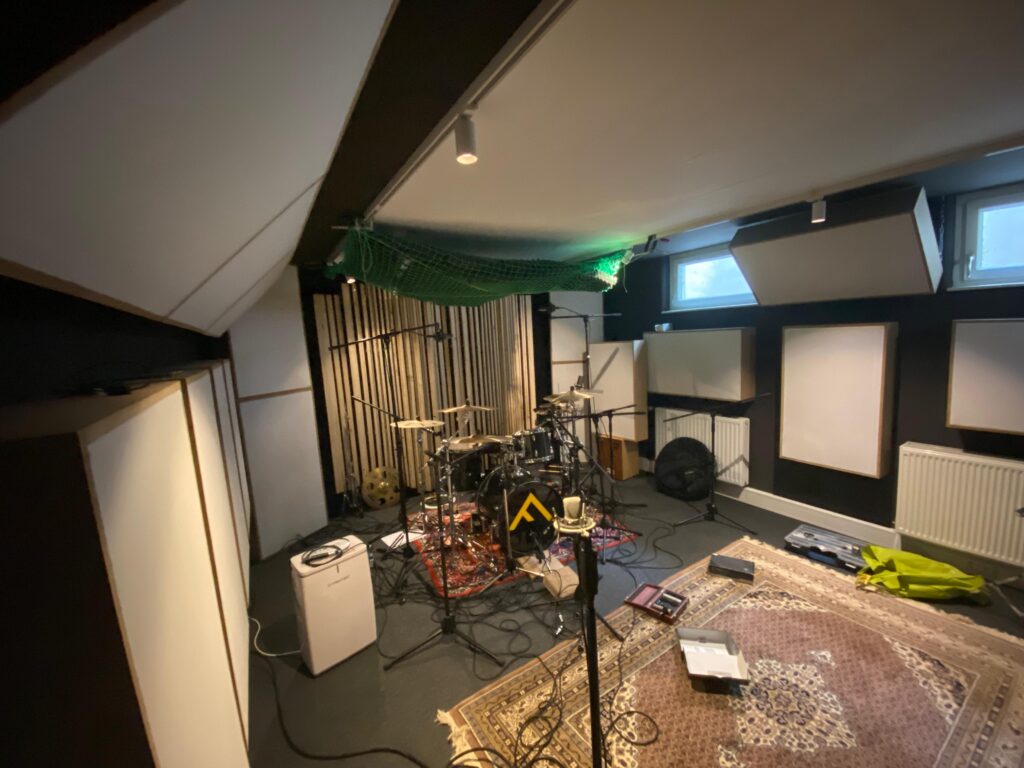
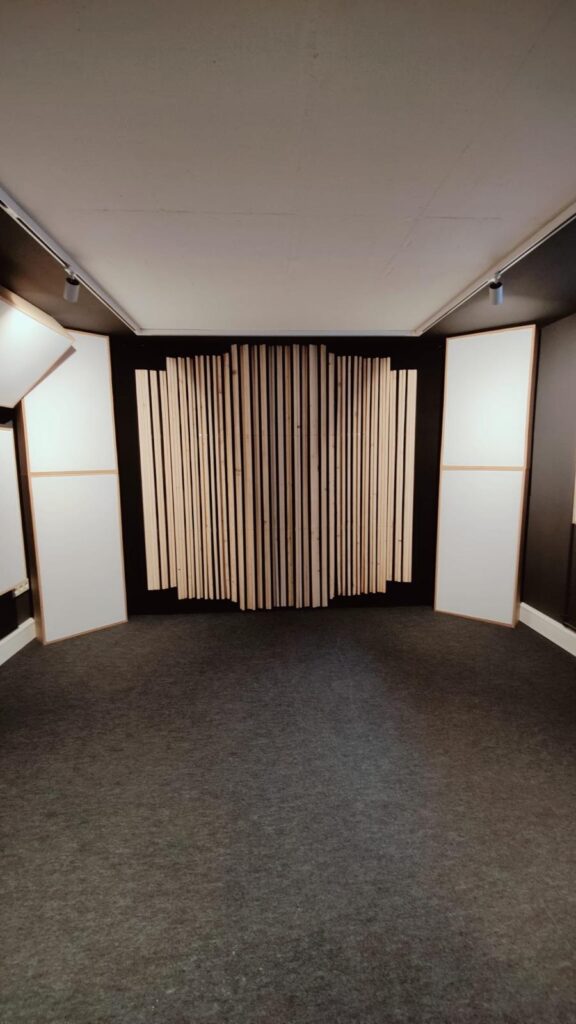
Studio Situation
Since we haven’t found a final solution for treating the ceiling above the drum set yet, we quickly improvised: we packed leftover pieces of acoustic foam into a cargo net (of a car-trailer) and strapped it to the ceiling. It’s definitely a temporary fix, but it helped to reduce some reflections from the ceiling.
The control room is also still a work in progress — the diffusors above the black absorbers haven’t been installed yet. We plan to add them in summer.
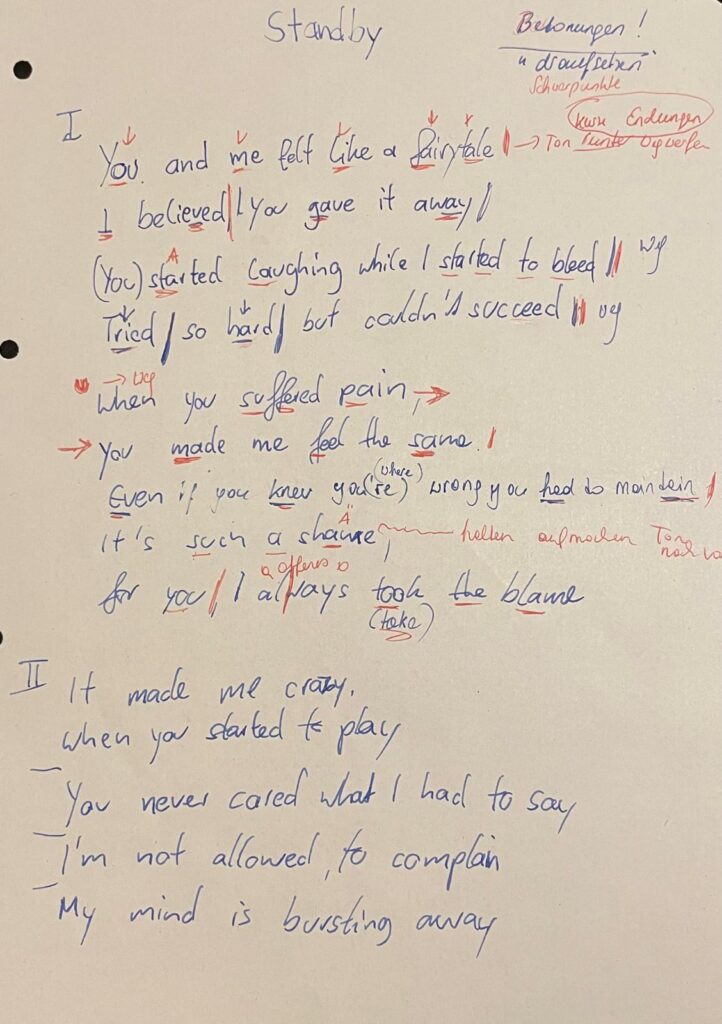
Song: Stand by – Flavor Amp
‘Stand By’ is a raw and emotional track that dives deep into the suffocating reality of being trapped in a toxic relationship—a dynamic that mirrors the psychological and emotional patterns often found in addiction. The song paints a vivid picture of circular thinking and emotional dependency: the feeling of giving everything and receiving harm in return, the confusion of being hurt by someone who once promised love, and the inner battle of wanting to leave but being psychologically unable to do so.
The metaphor of being ‘on stand by’ captures a state of paralysis—still connected, still present, but unable to act or move forward. In the context of our concept album on addiction and dependency, this song stands as a powerful metaphor for emotional entrapment. Just like with substance or behavioural addictions, the individual becomes stuck in a loop: knowing something is damaging but feeling incapable of breaking away.
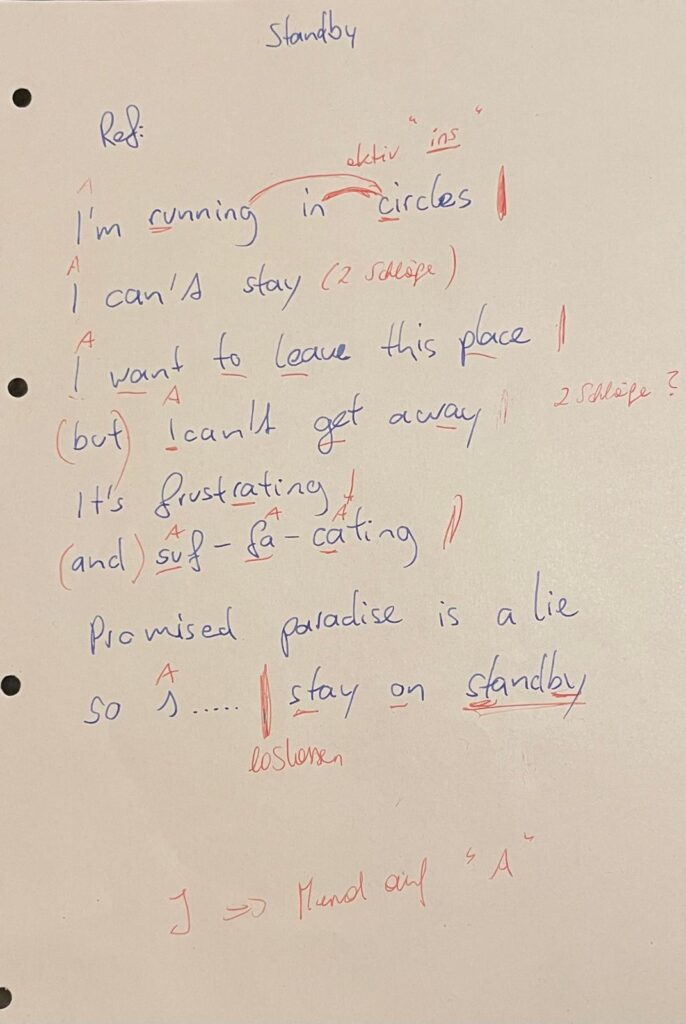
(Current) Lyrics of the song
Recording Setup
We recorded all 17 channels with my Midas M32-LIVE.
This was our patch plan:
CH1: Kick in (Audix D6)
CH2: Kick out (sE Electronics V-Kick)
CH3: Snare top (sE Electronics SE8)
CH4: Snare top (sE Electronics V7X)
CH5: Snare bottom (sE Electronics V-beat)
CH6: Hi-Hat (Shure Sm7b)
CH7: Tom 1 (sE Electronics V-beat)
CH8: Tom2 (sE Electronics V-beat)
CH9: OH HH (AKG C414)
CH10: OH Ride (AKG C414)
CH11: Ride (Neumann KM184)
CH12: Splashes (Neumann KM184)
CH13: Equal-Distance-Mic (Shure Sm57)
CH14: Mono Room (Neumann TLM102)
CH15: Droom L (Neumann KM184) (AB)
CH16: Droom R (Neumann KM184) (AB)
CH17: Hall (outside of the room) (sE Electronics SE8)
Before the session, I had a talk with Matthias Frank, who gave me some valuable input regarding microphone placement and recording techniques. At the end of the day, he advised me to close-mic as many individual components of the drum kit as possible, in order to have maximum flexibility during the mixing process — especially important for a complex 3D audio production.
We also worked with the overdubbing method to gain more control during the mixing and spatialization process. For example, during certain song parts, our drummer intentionally left out some cymbal hits while recording the main drum performance. We then recorded those cymbal accents separately, allowing us to freely position them in the 3D audio field later on.
Following this advice, we set up a wide range of microphones across the kit:
Kick Drum: Mic’d with two microphones — an Audix D6 inside and a SE Electronics V-Kick on the outside. Although I normally prefer a large-diaphragm condenser for the outside mic, using two dynamics turned out to be a great combination (I had no condenser mic left).
Snare Drum: We used three microphones: a typical dynamic mic (V7x) and a small-diaphragm condenser mic (SE8). The condenser captured more brightness and detail, but also more bleed, so I’ll decide during mixing which one fits best. On snare bottom we used the sE Electronics V-beat.
Hi-Hat: Mic’d using a Shure SM7.
Toms: We used the sE Electronic v-beat on both toms.
Overheads: For the overheads, we used AKG C414s — a classic choice known for their clarity and detail.
Cymbals: The ride and the splashes were individually close-mic’d.
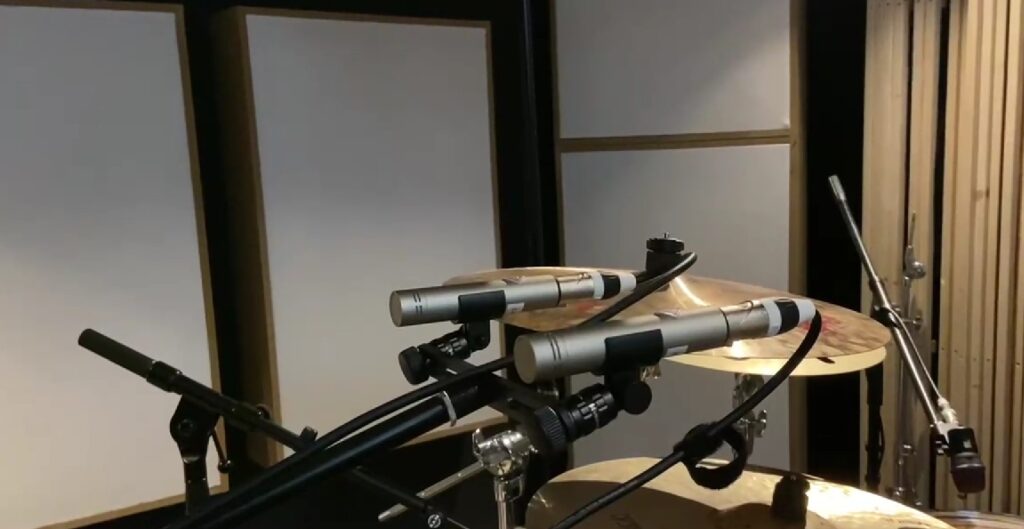
Room Micing: Inspired by German engineer Moses Schneider’s techniques, I experimented with the “Droom” (Dream Room) method. This involves two small-diaphragm condenser microphones (cardioid pattern in our case) placed in an A/B stereo setup, but directed away from the drums to capture a very natural and wide room sound. Although hypercardioid microphones are recommended for this method, the cardioids we used worked surprisingly well. Additionally, we set up a mono room microphone the sound of the whole drum kit in our small room.
The Droom
Equal-Distance-Mic: We also used the so-called Equal-Distance-Mic. It’s a microphone placed centrally in the kit, heavily compressed to add punch and energy to the overall sound.
Equal distance mic
Creating the feeling of: Additionally, we placed five small-diaphragm condenser microphones in the stairwell outside the live room to capture a natural, distant reverb that adds spatial depth and emotional weight to the production. This setup was used specifically for a key transition in the song (2 bars) — moving from the breakdown into the final chorus — to sonically express the feeling of being trapped and relentlessly pursued by one’s surroundings.
Capturing the sound of the hall
At that point in the arrangement, the stereo panorama briefly expands, evoking a fleeting sense of escape, only to contract moments later into a confined, focused sound image — symbolizing the inability to truly break free. To reinforce this theme, I’m also considering adding a rotating movement to the sound elements in this section, echoing the chorus line: “I’m running in circles — I can’t stay.” This motion could enhance the sense of disorientation and emotional entrapment, both musically and conceptually.
Conclusion
The session was an important first step for both the project and the studio. Despite the room still being a work-in-progress, the recordings already sound very promising, and I’m excited to take the next steps in the production.
More updates on the studio construction and upcoming recording sessions will follow soon!
I was extremely tired while filming this, as we had been recording drums late into the night. So please excuse the slightly scattered way of speaking — it was a long but exciting session.
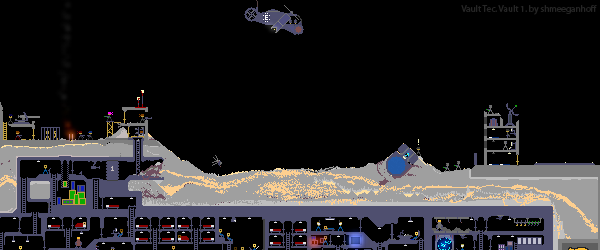
During our visit to IRCAM Forum 2025, one of the most unexpected and inspiring presentations came from Kieran McAuliffe, who introduced us to a unique way of experiencing a video game — not just visually, but sonically. His project, Sonifying The Powder Toy, brought an old genre of games to life in a way that made both sound designers and game designers lean forward.
If you’ve never heard of it, The Powder Toy is part of a quirky, cult genre called “falling sand games.”
These are open-ended, sandbox-style simulations where players interact with hundreds of different particles — fire, water, electricity, explosives, gases, and even fictional materials — all rendered with surprising physical detail. It’s chaotic, visual, and highly addictive. But one thing it never had was sound.
Kieran, with his background as a composer, guitarist, and researcher, decided to change that. His project wasn’t just about adding booms and fizzles. He approached the challenge like a musical instrument designer: how can you play this game with your ears?
The problem was obvious. The game’s physics engine tracks up to 100,000 particles updating 60 times per second — trying to create sounds for every interaction would melt your CPU. So instead, Kieran developed a method of analytic sonification: instead of responding to every pixel, his system tracks the overall distribution of particles and generates sound textures accordingly.
That’s where it gets beautifully nerdy. He uses something called stochastic frequency-modulated granular synthesis. In simpler terms, think of it like matching grains of sand with grains of sound — short, tiny bursts of tones that collectively create textures. Each type of material in The Powder Toy — be it lava, fire, or metal — gets its own “grain stream,” with parameters like pitch, modulation, duration, and spatial position derived from the game’s internal data.
To make all of this work, Kieran built a custom Max/MSP external called LuaGran~. This clever little tool lets him embed Lua scripts directly inside Max, giving him the power to generate and manipulate thousands of grains per second. It allows for both tight control and high performance — a critical balance when your “instrument” is a particle system going haywire in real time.
Some mappings were linear — like more fire equals higher pitch — while others used neural networks or probabilistic logic to shape more complex sonic behaviors. It was a blend of art and science, intuition and math.
During the presentation, I had the chance to join Kieran live by downloading his forked version of The Powder Toy, which sends Open Sound Control (OSC) data to his Max patch. Within minutes, a room full of laptops was sonically simulating plasma storms and chemical reactions. It was fun, chaotic, and surprisingly musical.
One thing that stood out was how Kieran resisted the temptation to make the sound effects too “realistic.” Instead, he embraced abstraction. A massive explosion might not sound like a movie boom — it might produce a textured whoosh or a burst of granular noise. His goal was not to recreate reality, but to enhance the game’s emergent unpredictability with equally surprising sounds.
He described the system more like a musical instrument than a tool, and that’s how he uses it — for laptop ensemble pieces, sound installations, and live improvisation. Still, he hinted at the potential for this to evolve into a standalone app or even a browser-based instrument. The code is open source, and the LuaGran~ tool is already on his GitHub (though it still needs some polish before wider distribution).
As sound designers and creatives, this project reminds us that sound can emerge from the most unexpected places — and that play, chaos, and curiosity are powerful creative engines. The Powder Toy might look like a simple retro game, but under Kieran’s hands, it becomes a dense sonic playground, a platform for experimentation, and a surprisingly poetic meeting of code and composition.
If you’re curious, I encourage you to try it out, explore the sounds it makes, and maybe even mod it yourself. Because as Kieran showed us, sometimes the most interesting instruments are the ones hiding inside games.
Here you can find manual how to instal game and sonification:
When you think of motion tracking, you might imagine a dancer in a suit covered with reflective dots, or a game controller measuring hand gestures. But at this year’s IRCAM Forum in Paris, Emmanuel Fléty and Marc Sirguy introduced R-IoT v3, the latest evolution of a platform developed at IRCAM for real-time interactive audio applications. For students and professionals working in sound design, physical computing, or musical interaction, RIOT represents a refreshing alternative to more mainstream tools like Arduino, Raspberry Pi, or Bela—especially when tight timing, stability, and integration with software environments like Max/MSP or Pure Data are key.
What is it, exactly?
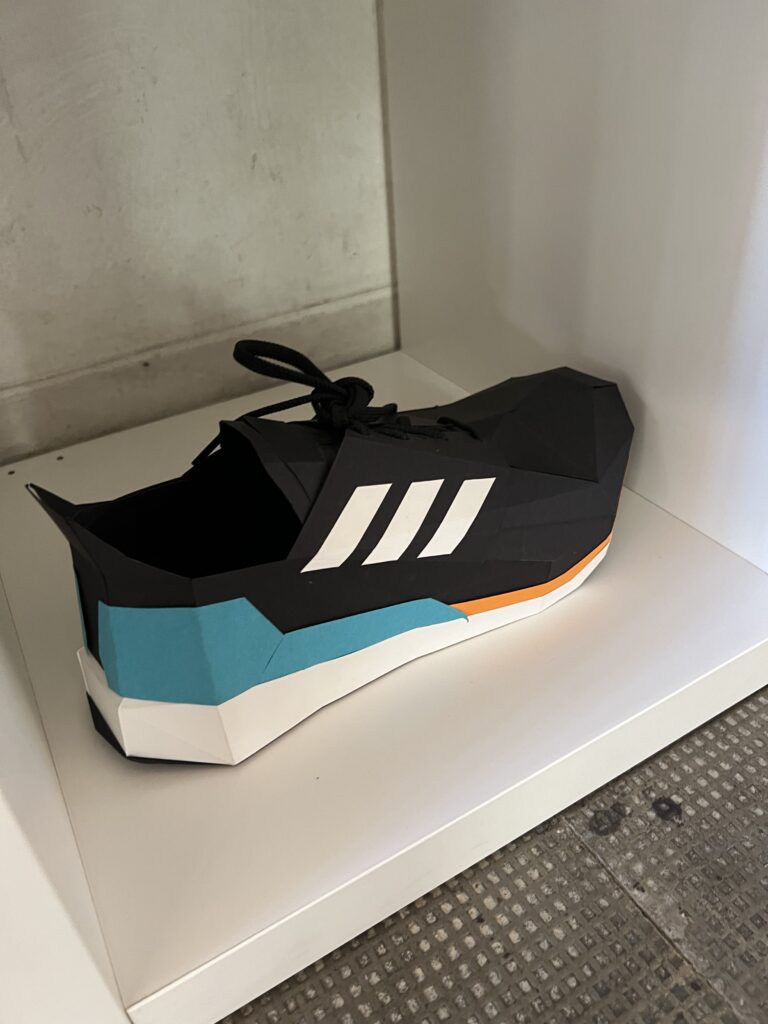
RIOT v3 is a tiny device—about the size of a USB stick—that can be attached to your hand, your foot, a drumstick, a dancer’s back, or even a shoe. Once it’s in place, it starts capturing your movements: tilts, spins, jumps, shakes. All of that motion is sent wirelessly to your computer in real time.
What you do with that data is up to you. You could trigger a sound sample every time you raise your arm, filter a sound based on how fast you’re turning, or control lights based on the intensity of your movements. It’s like turning your body into a musical instrument or a controller for your sound environment.
What’s special about version 3?
Unlike Raspberry Pi, which runs a full operating system, or Arduino, which can have unpredictable latency depending on how it’s programmed, RIOT runs bare metal. This means there’s no operating system, no background tasks, no scheduler—nothing between your code and the hardware. The result: extremely low latency, deterministic timing, and stable performance—ideal for live scenarios where glitches aren’t an option.
In other words, RIOT acts like a musical instrument: when you trigger something, it responds immediately and predictably.
The third generation of RIOT introduces some important updates:
Single-board design: The previous versions required two boards—the main board and an extension board—but v3 integrates everything into a single PCB, making it more compact and easier to work with.
RP2040 support: This version is based on the RP2040 chip, the same microcontroller used in the Raspberry Pi Pico. It’s powerful, fast, and has a growing ecosystem.
Modular expansion: For more complex setups, add-ons are coming soon—including boards for audio I/O and Bluetooth/WiFi connectivity.
USB programming via riot-builder: The new software tool lets you write C++ code, compile it, and upload it to the RIOT board via USB—no need for external programmers. You can even keep your Max or Pure Data patch running while uploading new code.
Why this matters for sound designers
We often talk about interactivity in sound design—whether for installations, theatre, or music—but many tools still assume that the computer is the main performer. RIOT flips that. It gives you a way to move, breathe, and act—and have the sound respond naturally. It’s especially exciting if you’re working in spatial sound, live performance, or experimental formats.
And even if you’ve never touched an Arduino or built your own electronics, RIOT v3 is approachable. Everything happens over WiFi or USB, and it speaks OSC, a protocol used in many creative platforms like Max/MSP, Pure Data, Unity, and SuperCollider. It also works with tools some of you might already know, like CataRT or Comote.
Under the hood, it’s fast. Like really fast. It can sense, process, and send your movement data in under 2 milliseconds, which means you won’t notice any lag between your action and the response. It can also timestamp data precisely, which is great if you’re recording or syncing with other systems.
The device is rechargeable via USB-C, works with or without a battery, and includes onboard storage. You can edit configuration files just like text. There’s even a little LED you can customize to give visual feedback. All of this fits into a board the size of a chewing gum pack.
And yes—it’s open source. That means if you want to tinker later on, or work with developers, you can.
Whether you’re interested in gesture-controlled sound, building interactive costumes, or mapping motion to filters and samples in real time, RIOT v3 is designed to help you get there faster and more reliably. It’s flexible enough for advanced setups but friendly enough for students or artists trying this for the first time.
At FH Joanneum, where design and sound design meet across disciplines, a tool like this opens up new ways of thinking about interaction, performance, and embodiment. You don’t need to master sensors to start exploring your own body as a controller. RIOT v3 gives you just enough access to be dangerous—in the best possible way.
As I begin my first genre experiment, I’ve chosen to rebrand K-Pop through the visualities of Electronic music. This genre offers a rich landscape of aesthetic codes that are at once futuristic, synthetic, and deeply tied to the body, through dance, rhythm, and often, nightlife. It feels like a natural starting point, not only because of its stark contrast with K-Pop, but also because of the potential overlap in theatricality and visual experimentation.
Why Electronic?
Electronic music, particularly in its subgenres like techno, house, and synth-pop, has always been visually forward-thinking. Think neon lighting, metallics, cyberpunk references, holographic materials, and modular or asymmetrical silhouettes. The scene’s roots in underground club culture also open up gender expression in fluid and often transgressive ways, queer aesthetics have long found a home in this space. In that sense, the Electronic genre shares some DNA with K-Pop’s own flirtation with androgyny and boundary-pushing styling, but it amplifies these traits within a more abstract, sometimes even dehumanized framework.
K-Pop, by contrast, often uses styling to emphasize emotion, narrative, or intimacy. Its idols are both idealized and made accessible through fashion that speaks to fans’ desires, aspirations, or fantasies. So what happens when those same idols are placed in the cold, digital, deconstructed aesthetics of Electronic music?
This experiment is ultimately about asking: what kinds visualities are possible within the visual vocabulary of Electronic music, and how might a K-Pop idol inhabit those possibilities?
Next up: I’ll begin creating and documenting the actual visual experimentation.
Heart rate is a fundamental indicator of mental health, with heart rate variability (HRV) playing a particularly significant role. HRV refers to the variation in time intervals between heartbeats, reflecting autonomic nervous system function and overall physiological resilience. It is measured using time-domain, frequency-domain, or non-linear methods. Higher HRV is associated with greater adaptability and lower stress levels, while lower HRV is linked to conditions such as PTSD, depression, and anxiety disorders.
Studies have shown that HRV differs between healthy individuals and those with PTSD. In a resting state, people with PTSD typically exhibit lower HRV compared to healthy controls. When exposed to emotional triggers, their HRV may decrease even further, indicating heightened sympathetic nervous system activation and reduced parasympathetic regulation. Bessel van der Kolk’s work in “The Body Keeps the Score” highlights how trauma affects autonomic regulation, leading to dysregulated physiological responses under stress.
There are two primary methods for measuring heart rate: electrocardiography (ECG) and photoplethysmography (PPG).
Feature
ECG
PPG
Measurement Principle
Uses electrical signals produced by heart activity
Uses light reflection to detect blood flow changes
Accuracy
Gold standard for medical HR monitoring
Uses ECG as reference for HR comparison
Heart Rate (HR) Measurement
Highly accurate
Suitable for average or moving average HR
Heart Rate Variability (HRV)
Can extract R-peak intervals with millisecond accuracy
Limited by sampling rate, better for long-duration measurements (>5 min)
Time to Obtain Reading
Quick, no long settling time required
Requires settling time for ambient light compensation, motion artifact correction
pic
sensor name
link
price
what it measures
specification
features
usage case
Gravity: Analog Heart Rate Monitor Sensor (ECG) for Arduino
ECG records the electrical activity of the heart using electrodes placed on the skin, providing high accuracy in detecting R-R intervals, which are critical for HRV analysis. PPG, in contrast, uses optical sensors to detect blood volume changes in peripheral tissues, such as fingertips or earlobes. While PPG is convenient and widely used in consumer devices, it is more susceptible to motion artifacts and may not provide the same precision in HRV measurement as ECG.
Additionally, some PPG sensors include pulse oximetry functionality, measuring both heart rate and blood oxygen saturation (SpO2). One such sensor is the MAX30102, which uses red and infrared LEDs to measure oxygen levels in the blood. The sensor determines SpO2 by comparing light absorption in oxygenated and deoxygenated blood. Since oxygen levels can influence cognitive function and stress responses, these sensors have potential applications in mental health monitoring. However, SpO2 does not provide direct information about autonomic nervous system function or HRV, making ECG a more suitable method for this project.
For this project, ECG is the preferred method due to its superior accuracy in HRV analysis. Among available ECG sensors, the AD8232 module is a suitable choice for integration with microcontrollers such as Arduino. The AD8232 is a single-lead ECG sensor designed for portable applications. It amplifies and filters ECG signals, making it easier to process the data with minimal noise interference. The module includes an output that can be directly read by an analog input pin on an Arduino, allowing real-time heart rate and HRV analysis.
HRV is calculated based on the time intervals between successive R-peaks in the ECG signal. One of the most commonly used HRV metrics is the root mean square of successive differences (RMSSD), which is computed using the formula:
where RRi represents the ith R-R interval, and N is the total number of intervals. Higher RMSSD values indicate greater parasympathetic activity and better autonomic balance. Among ECG sensors available on the market, the Gravity: Analog Heart Rate Monitor Sensor (ECG) is the most suitable for this project. It is relatively inexpensive, includes electrode patches in the package, and has well-documented Arduino integration, making it an optimal choice for HRV measurement in experimental and practical applications.
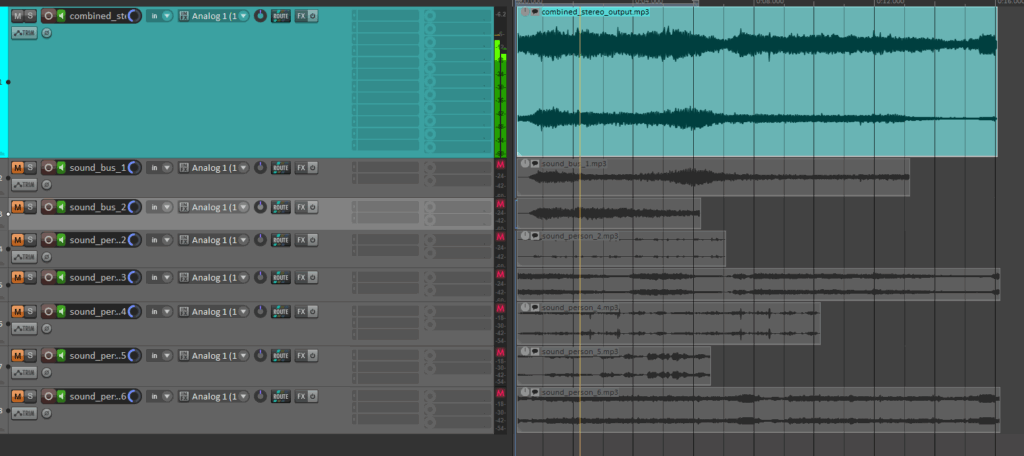
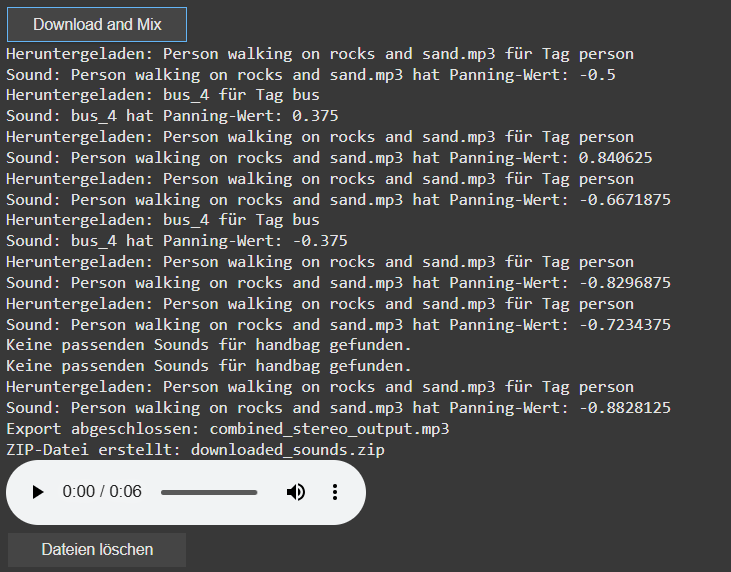
Mixing of the automatically searched audio files into one combined stereo file:
In this latest update, I’ve implemented several new features to create the first layer of an automated sound mixing system for the object recognition tool. The tool now automatically adjusts pan values and applies attenuation to ensure a balanced stereo mix, while seamlessly handling multiple tracks. This helps avoid overload and guarantees smooth audio mixing.
check of the automatically searched and downloaded files + the automatically generated combined audiofile
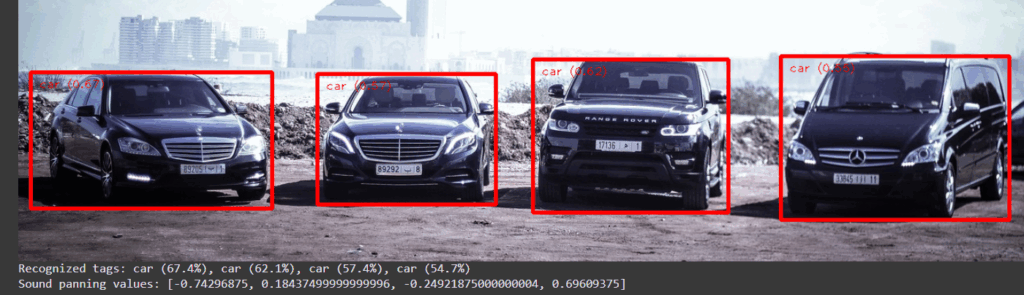
A key new feature is the addition of a sound_pannings array, which holds unique panning values for each sound based on the position of the object’s bounding box within an image. This ensures that each sound associated with a recognized object gets an individualized panning, calculated from its horizontal position within the image, for a more dynamic and immersive experience.
display of the sound panning values [-1 left, 1 right]
I’ve also introduced a system to automatically download sound files directly into Google Colab’s file system. This eliminates the need for managing local folders. Users can now easily preview audio within the notebook, which adds interactivity and helps visualize the results instantly.
The sound downloading process has also been revamped. The filters for the search can now be saved via a buttonclick to apply for the search and download for the audiofile. Currently for each tags there are 10 sounds per tag preloaded, with each sound randomly selected to avoid duplication but ensure the use of multiple times of the same tag. A sound is only downloaded if it hasn’t been used before. If all sound options for a tag are exhausted, no sound will be downloaded for that tag.
Additionally, I’ve added the ability to create a ZIP file that includes all the downloaded sounds as well as the final mixed audio output. This makes it easy to download and share the files. To keep things organized, I’ve also introduced a delete button that removes all downloaded files once they are no longer needed. The interface now includes buttons for controlling the download, file cleanup, and audio playback, simplifying the process for users.
Looking ahead, I plan to continue refining the system by working on better mixing techniques, focusing on aspects like spectrum, frequency, and the overall importance of the sounds. Future updates will also look at integrating volume control and more far in the future an LLM Model that can check the correctness of the found file title.
Nach der Einführung in Post 02.02, in der zwei große Starttutorials ihren Weg in mein Hirn fanden, folgen nun in diesem und im nächsten Post die restlichen Kurztutorials in Modul 1, die sich genauer mit gewissen Themen beschäftigen. Zu jedem dieser Tutorials möchte ich kurz die wichtigsten Dinge festhalten und Tricks, die ich noch nicht kannte mit euch teilen. Die jeweiligen Tutorials findet ihr in Modul 1 des Kurses.
Shape Layer Tricks
Rotobezier: Rotobezier ist quasi autosmooth für Shape Layer. Man kann es mit Rechtsklick auf die Shape unter Mask and Shape Path finden und es lässt die Handles aller Knotenpunkte verschwinden und smoothed sie stattdessen automatisch aus. Der Path bleibt aber trotzdem animierbar.
Gruppieren: CMD+G kann einem das ganze Projekt wirklich extrem gut aufräumen, da man damit innerhalb einer Shape Layer verschiedene Paths gruppieren kann.
Convert Vertex Tool: Sollte man die Handles eines Knotenpunkts mal nicht sehen kann man sie damit zurückholen. Man findet es durch Altklicks auf das Pen-Tool.
Convert to Bezier: Auch “normale” Shapes wie Quader kann man durch Rechtsklick in der Composition in Bezier Paths umwandeln um mehr Gestaltungsmöglichkeiten zu haben.
Vector Trick
Continuously Rasterize: Damit kann man das leidige Problem von Vektor Grafiken in After Effects lösen. So lange man Vektoren nämlich direkt scaled berechnet AE die Pixel immer neu und alles bleibt scharf, Pre-Comped man das Ganze aber und scaled dann die Pre-Comp passiert das nicht mehr. Damit das passiert muss man bei den Switches der Pre-Comp den kleinen Stern aktivieren und schon berechnet AE auch wieder alles vektorbarsiert… crazy.
Graph Editor Hacks
Multi-Tasking: Für manche vielleicht offensichtlich, aber ein brutaler Aha-Moment war für mich, dass ich gleichzeitig mit dem Pen-Tool im Ansichtsfenster Paths verschieben kann und einfach in der unteren Ansicht im Graph Editor parallel das Easing kontrollieren kann.
Value-Graph: Als jemand der mit Keyframes zum ersten mal in DaVinci zu tun hatte (und dort den Spline Editor kennt) habe ich in After Effects im Grunde eigentlich nur mit dem Speed Graph gearbeitet, der dasselbe in Grün ist. In zwei Szenarien kann der Value Graph aber bedeutend mehr: Bei Bounces ist er einfach viel logischer und bei so klassischen Overshoot-Reaktionen (die in Davinci einfach super easy mit der Out-Back-Cubic Easing Funktion von alleine passieren) macht er auch extrem Sinn.
Hold-Keyframes: Wenn man nicht möchte, dass die Zeit zwischen zwei Keyframes animiert wird kann man das stoppen. Geht mit Rechtsklick auf den Keyframe.
Motion-Paths? WTF?!: Also das ist das mit Abstand gestörteste was ich in meinem Leben jemals gesehen habe. Kurz von Anfang an: Ich habe immer gedacht wenn ich ein Objekt auf einer gewissen Bahn bewegen will, muss ich zuerst die Bahn zeichnen, zb mit dem Pen-Tool, dann diese Bahn tracken, ein Null-Objekt anheften und dann mein Objekt ans Null-Objekt parenten. Wenn ich dann etwas an der Bahn ändern will, alles gleich nochmal. Fuck it! Es is einfach unfassbar, aber ich glaubs nicht. Wenn man einfach grundsätzlich zwei Position-Keyframes erstellt, egal wo, erhält man in der Anzeige diese blaue Linie, die repräsentiert zwischen welchen Punkten sich das Objekt bewegt. Und jetzt kommts. DIE KANN MAN BEARBEITEN. Verzieht man das Objekt, erstellt es automatisch einen neuen Keyframe und ändert die blaue Linie… und nimmt man das Pen-Tool kann man diese auch noch abrunden. Mein Leben bisher war sinnlos. Tschau.
Rove-Across-Time: Und es wird immer gestörter. Ich kann After Effects einfach mit Rechtsklick sagen, dass es mir den Wert mancher Keyframes einfach automatisch berechnen soll, wenn ich andere bewege. So kann ich nur meine “Hauptpunkte” easen und alles dazwischen macht AE. Ich bin sprachlos.
Before heading to Barcelona, I started to imagine what the event design of OFFF might look like on-site— especially after diving into their online identity. My goal was to observe how consistently this visual language would translate into the physical space.
What I expected to see:
A wellexecuted event design system should go far beyond just a good logo. I was looking for a coherent visual experience, where all elements come together to form a strong, consistent identity.
These were my key focus areas:
1. Core Design Elements in Use
Logo: How is it applied? On its own, or always in combination with info? Monochrome or full color?
Color Palette: Are the bold color combinations from the digital world carried over into the physical space?
Typography: Does the heavy, sans serif type carry through across all materials?
Icons & Pictograms: Are there custom icons or illustration styles supporting navigation or content?
2. Signage System & Wayfinding
A strong event identity should extend to the navigation system. I was expecting to see:
Color-coded zones or areas
Clear visual hierarchy in signage
Consistent use of typography and iconography
Materials and formats that reflect the festival’s tone
3. Areas of Application
Online Media
Homepage, social media posts, event teasers
Mail signatures, online banners, and ticketing visuals
Offline Media
Printed flyers, magazines, posters
Editorial layouts and environmental graphics
Merchandise
Stickers, T-shirts, bags, fabric applications
Possibly limited-edition printed artwork or zines
Outdoor & On-site
Banners, signage, stage backdrops
Screens and projection visuals
Entryways, queues, and branded spaces like lounges or food areas
Beyond the Basics
I was also curious whether the branding would extend to:
Staff uniforms or lanyards
Digital screens and transitions between talks
Printed programs or daily schedules
Sponsorship visuals and how they’re integrated into the identity
OFFF positions itself as a leading creative festival—so I was expecting not just consistency, but also experimental flair: bold decisions, playful twists, and maybe even moments of surprise where the identity breaks its own rules in clever ways. The visit would be the perfect opportunity to test whether OFFF can deliver a true best-practice example of immersive event branding.