Using mmColorTarget and DaVinci Resolve for Scene-Referred Film Profiling
If you’re diving into film profiling workflows using tools like mmColorTarget and DaVinci Resolve, the 3×3 Matrix Maker is a powerful utility that helps match your source camera image to a target film reference in a scene-referred color space with mathematical precision.
https://github.com/ctcwired/dctl-matrix-maker?tab=readme-ov-file
Step 1: Download and Install the Matrix Maker Script
First, download the ZIP archive that includes all required Python scripts (usually hosted on GitHub by the author or project). Once downloaded:
- Extract the folder.
- Open a terminal in that folder.
- Install any Python dependencies if needed.
- Just copy the commands from GitHub Link above
Tip: If you run into issues, just copy the error message into ChatGPT or another AI assistant — you’ll have it fixed in no time.
Step 2: Prepare Your Color Charts in EXR Format
Prepare your two comparison images:
- Source Image: A render or still of the mmColorTarget captured with your camera (e.g. ARRI, RED, etc.).
- Target Image: A reference mmColorTarget (e.g. a scan from a film stock or ideal target).
Color Space Matching Tips:
- Bring both charts into the same working color space (e.g. ACEScg, Linear Rec.709, or any other linear space). Not necessary but can be a workflow improvement.
- Matching grayscale tones beforehand can significantly improve results.
- Once matched, render both images as EXR files:
- Name them exactly:
source.exrandtarget.exr
- Name them exactly:
Step 3: Run the 3×3 Matrix Maker Script
Open your terminal and navigate to the folder where the script is located:
ls # List contents#directory where the folder is located
cd
cdmatrix-folder-name # Enter the folder where dctl-matrix-maker.py is located
Then run the script with your images:
python dctl-matrix-maker.py source.exr target.exr
The script will compare the two images patch by patch and automatically generate a DCTL file containing a 3×3 color transformation matrix.
Step 4: Apply the DCTL in DaVinci Resolve
- Move the generated
.dctlfile into your DaVinci Resolve LUT or DCTL folder - Restart Resolve so it detects the new DCTL.
- Inside your node tree, add a new DCTL node and select the matrix you just created.
Your source camera image will now closely match the film-scanned target in color.
Pro Tips for Better Results
- Match the grayscale of your source and target images before running the matrix script. This ensures brightness alignment and improves the matrix accuracy.
- Work in scene-referred linear space when possible (e.g. ACEScg, linear Rec.709) for the most accurate color math.
- This tool is ideal for building scene-referred film looks and should be used early in your color management pipeline.
Final Thoughts
This 3×3 Matrix Maker workflow is a valuable tool for filmmakers and colorists interested in authentic film emulation, matching digital cameras to analog film stocks, or learning the math behind color matching.
With just a few steps, you can build a mathematically sound color transform and load it directly into Resolve using only Python, EXRs, and the chart images.
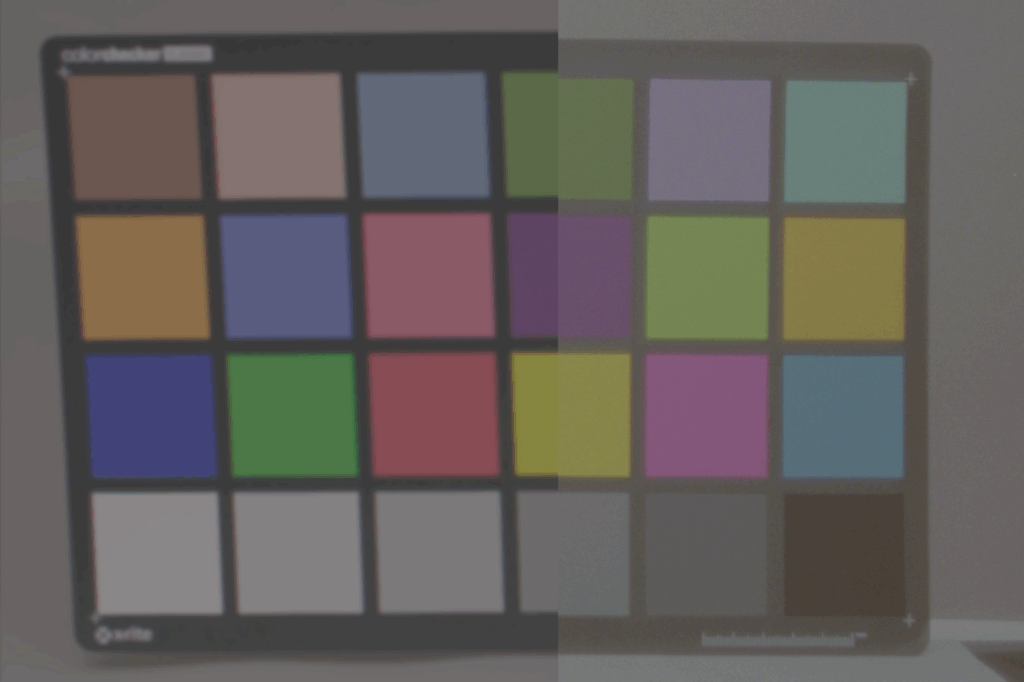
3×3 Matrix Match between ARRI Camera and EXR 100T Filmstock
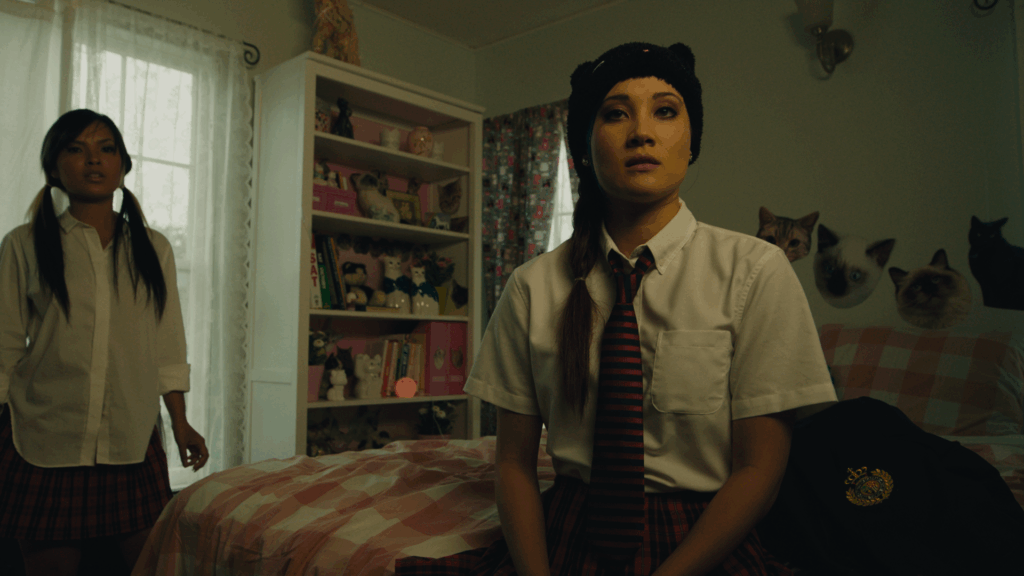
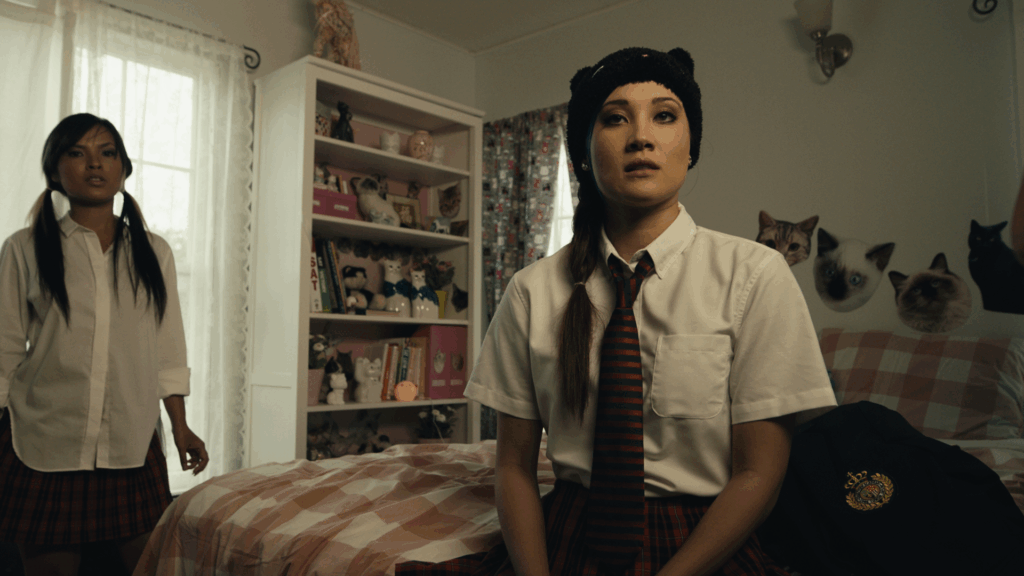
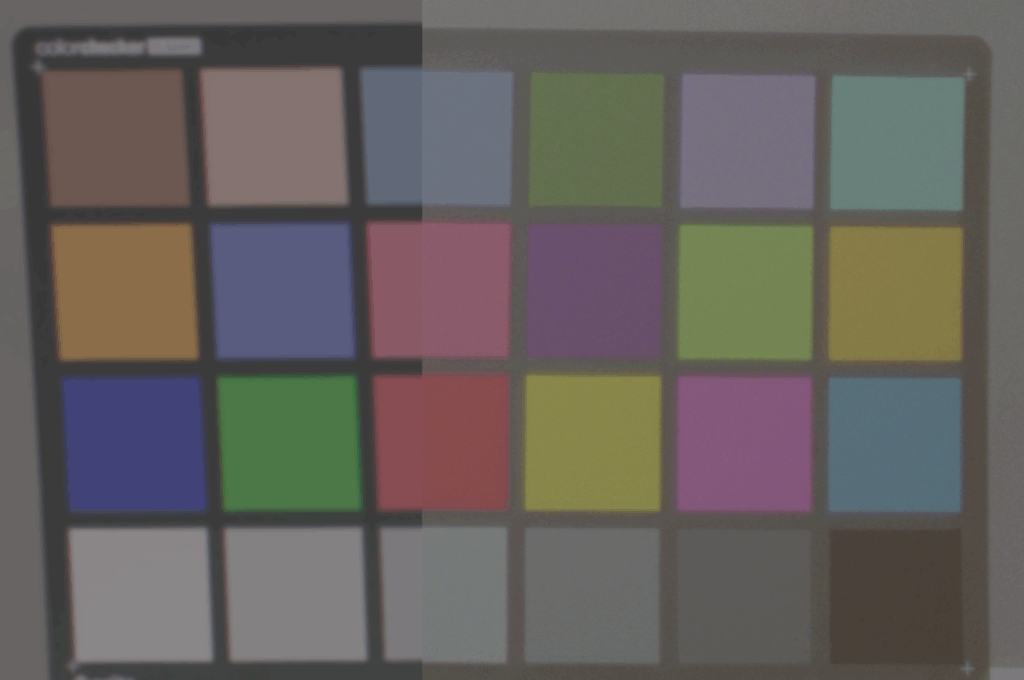
Left with 3×3 Matrix Match and Kodak 2383 LUT / Right Only Kodak 2383 Lut
Gardner, Zeb. “Genetic Color Space Transform Optimization Algorithm.” Zeb Gardner, October 6, 2024. Accessed July 19, 2025. https://www.zebgardner.com/photo-and-video-editing/genetic-color-space-transform-optimization-algorithm.
DeMystify Colorgrading. “Film Profile Journey: 21 – mmColorTarget For Resolve.” DeMystify Colorgrading, n.d. Accessed July 19, 2025. https://www.demystify-color.com/post/film-profile-journey-21-mmcolortarget-for-resolve.