#1 How Cinematographic Techniques Shape the Emotional Experience of the Viewer

Meine Thema für die folgenden Blogposts ist das Zusammenspiel von Kameratechniken um Figuren oder Szenen im Film greifbarer und emotionaler zu gestalten.
Als erstes werfen wir einen Blich auf die Terminologie und anschließend was Kinematografie so ausmacht.

In der Filmwissenschaft treffen Praxis und Forschung oft aufeinander. Ein gutes Beispiel dafür ist die Frage, wie Kinematografie – also Lichtsetzung, Kamerabewegung, Bildkomposition und die Wahl der Optiken – unsere Wahrnehmung eines Films prägt. Viele Regeln stammen zwar aus jahrzehntelanger künstlerischer Praxis, lassen sich heute aber zunehmend durch Erkenntnisse aus Psychologie und Neurowissenschaften erklären.

Empathie: Wie Filme Gefühle auslösen

Die moderne Empathieforschung unterscheidet drei Ebenen des Mitfühlens:

  • Emotionales Mitfühlen (Embodied Simulation) – wir spüren, was Figuren fühlen.
  • Kognitives Mitfühlen (Theory of Mind) – wir verstehen ihre Perspektive.
  • Prosoziale Motivation – wir wollen ihnen helfen. (Zaki & Ochsner, 2012)

Studien zeigen, dass filmische Mittel, etwa Einstellungsgrößen, Nähe/Distanz oder Perspektivwechsel, beeinflussen, ob das Publikum eher emotional eintaucht oder intellektuell mitdenkt.

Kinematografie als Gestaltung von Raum

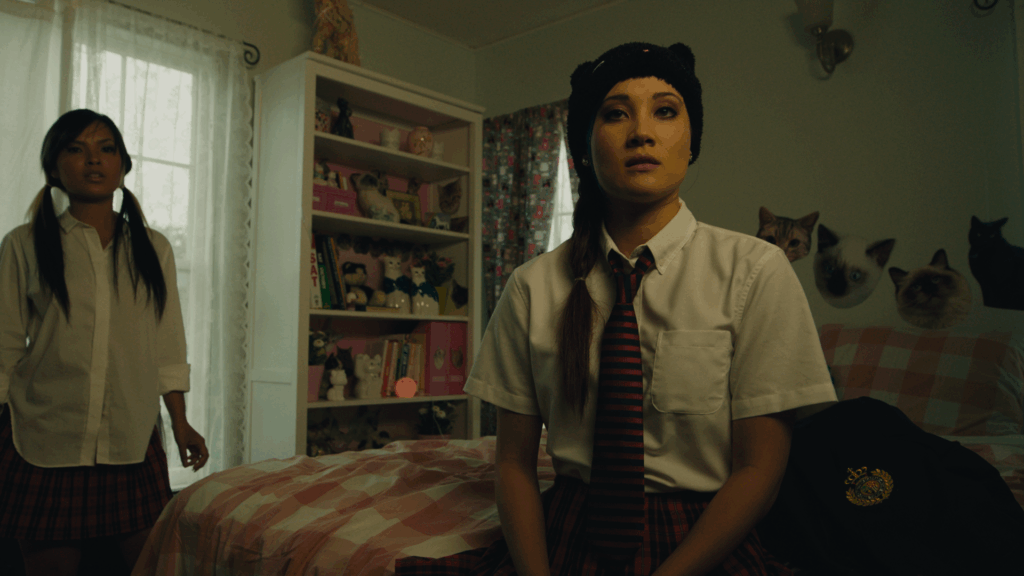
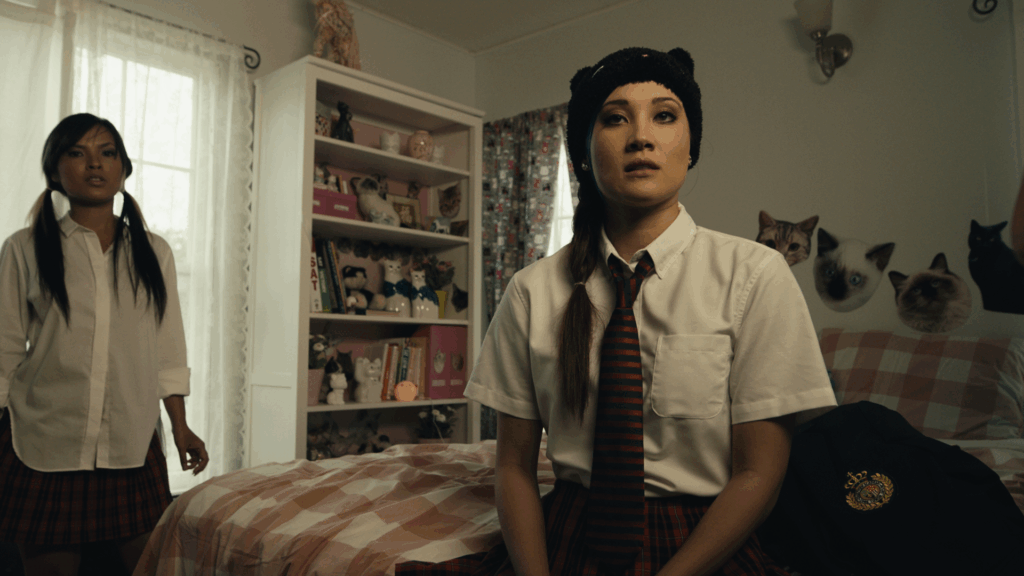
Ein zentrales Anliegen professioneller Kinematografie ist die Erzeugung von Tiefe und räumlicher Wahrnehmung. Denn obwohl Film eine dreidimensionale Welt auf eine zweidimensionale Fläche projiziert, entsteht im Kopf des Publikums dennoch ein überzeugendes Raumgefühl. Deshalb ist es wichtig die Dreidimensionalität zu bewahren und sogar noch zu verstärken.

Kameraleute versuchen dies seit über 100 Jahren. Gewisse Regeln werden von Generation zu Generation weitergegeben, ohne Erklärung warum diese Regeln entwicklet wurden oder warum diese existieren. Wenn man sich diese Regeln genauer ansieht, erkennt man dass diese aktiv daran beteiligt sind größere Tiefe in Bildern zu schaffen:

  • Vorder, -Mittel, Hintergrund: 3 dimensionales Bild durch Komposition
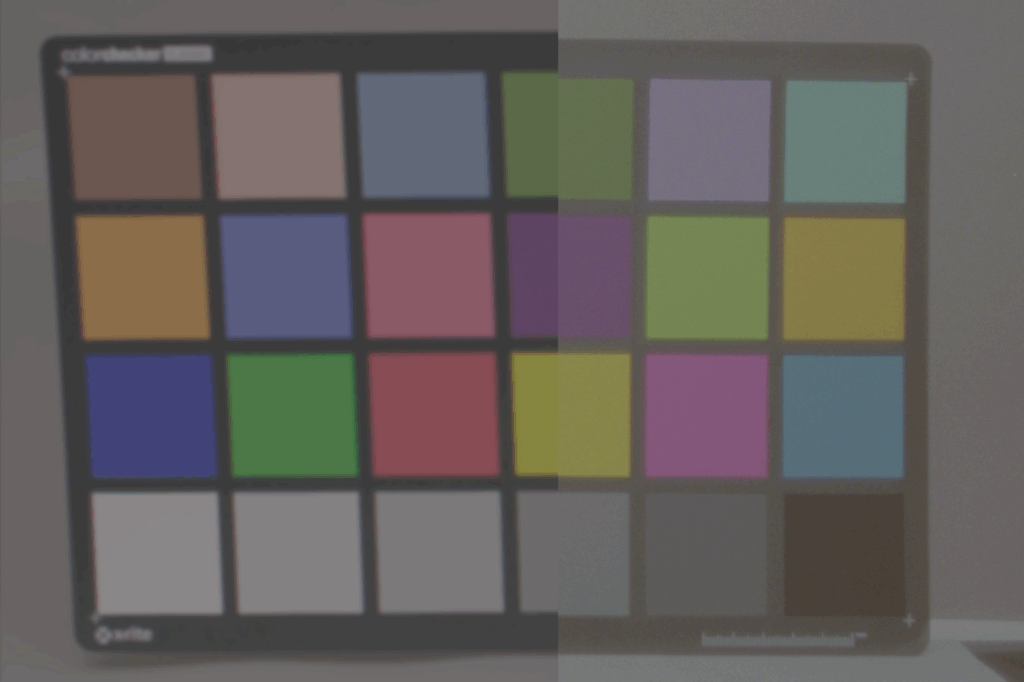
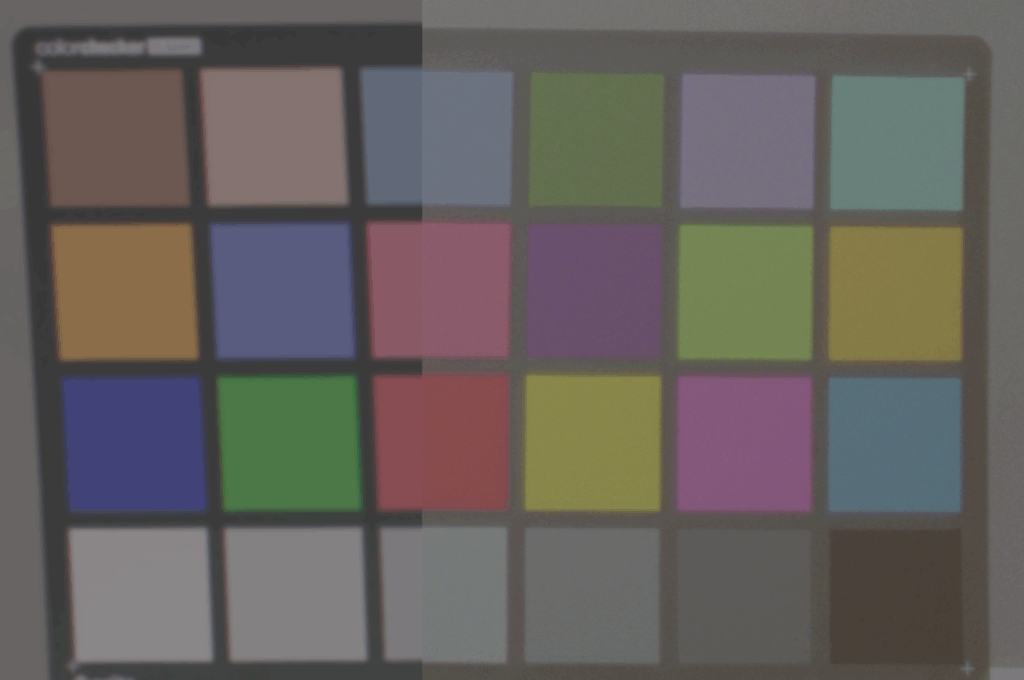
  • Chiaroscuro / Checkerboard Lighting: Hell-Dunkel-Kontraste verstärken Tiefenwirkung.
  • Gegenlicht und Konturenlicht: helfen dem Gehirn, Vorder- und Hintergrund zu trennen.
  • Pools of Light: Lichtinseln definieren unterschiedliche Raumebenen.
  • Lighting in Layers: Lichtschichten schaffen Orientierung im Bild.
  • Short Lighting / Far-Side Key: Erhöht die räumliche Präsenz.

Diese Methoden bedienen sogenannte monokulare Tiefenhinweise, also visuelle Signale, die unser Gehirn nutzt, um aus einem flachen Bild eine dreidimensionale Szene zu rekonstruieren.

Warum Tiefe so entscheidend ist

Kinematografie erzeugt nicht nur ästhetisch ansprechende Bilder – sie nutzt unbewusste Wahrnehmungsprozesse, um das Publikum im Raum einer Geschichte zu verankern. Tiefenwirkung schafft Orientierung, Glaubwürdigkeit und emotionale Bindung.

Deshalb hat sich die Erzeugung räumlicher Tiefe über Jahrzehnte hinweg fast zu einer eigenen Kunstform entwickelt und bleibt bis heute ein zentrales Werkzeug, um Zuschauer*innen in die Welt eines Films hineinzuziehen. Jetzt stellt sich die frage warum es zu einer Obsession geworden ist, Tiefe zu erzeugen?

Neuere neurowissenschaftliche Forschung weist darauf hin, dass die Wahrnehmung von Raum und die Entstehung emotionaler Empathie enger miteinander verbunden sein könnten, als bisher angenommen. Eine zentrale Rolle spielt dabei die Amygdala. Studien mit Menschen und Primaten zeigen, dass die Amygdala nicht nur emotionale Bedeutung bewertet, sondern diese Bedeutung auch mit räumlichen Informationen verknüpft. Dadurch reagiert das Gehirn schneller und intensiver auf räumlich klar verortete Reize, insbesondere wenn diese als emotional bedeutsam gelten.

Realer Raum besitzt Tiefe, und wir nehmen ihn wahr, indem wir alle verfügbaren Tiefenhinweise nutzen. Wenn Bewegtbilder diese Tiefe durch kinematografische Techniken verstärken und ein intensiviertes Gefühl von Räumlichkeit erzeugen, können sie wie ein supernormaler Stimulus wirken und die dargestellte Realität für die Zuschauerinnen und Zuschauer noch kraftvoller oder gesteigerter erscheinen lassen. (Ramachandran & Hirstein, 1999)

Literatur

Lotman, E. (2016). Exploring the ways cinematography affects viewers’ perceived empathy towards onscreen characters. Baltic Screen Media Review, 4(1). https://doi.org/10.1515/bsmr-2017-0005

Ramachandran, V. S., & Hirstein, W. (1999). The science of art: A neurological theory of aesthetic experience. Journal of Consciousness Studies, 6(6–7), 15–51.

Zaki, J., & Ochsner, K. N. (2012). The neuroscience of empathy: Progress, pitfalls and promise. Nature Neuroscience, 15(5), 675–680.

Impulse #3 Daniel Bauer

My third Impulse is about our meeting with Daniel Bauer, which turned out to be much more insightful than I expected. From the moment we started talking, it was clear that he had a very good sense of what makes a story emotionally engaging and how certain narrative decisions can shape the way an audience connects to a film. One of the first things he recommended was reaching out to Yue-Shin Lin, especially in relation to our topic of discrimination. He felt that her expertise could add depth to our project and help us approach the subject with more nuance. I immediately understood what he meant, because the topic is sensitive and it requires perspectives from people who are professionally and personally involved in that field.

After that, Daniel talked a lot about what makes characters and stories relatable. He explained that relatability is not just a stylistic choice, but something that is strongly connected to psychological principles. He mentioned empathy, cognitive fluency, social comparison processes, context shifts and narrative transportation. At first, these terms sounded quite academic, but the way he explained them made them very accessible. Empathy, for example, is about whether we emotionally understand or feel with a character. Cognitive fluency basically describes how easy or difficult it is for viewers to process what they see. Social comparison happens automatically, because people tend to compare themselves to characters on screen. Context shifts can open up fresh ways of looking at familiar topics, and narrative transportation is what happens when a story pulls us in so deeply that we forget the world around us.

What I found interesting was how naturally Daniel linked these ideas to filmmaking. He made it clear that these psychological processes are not abstract theories but actually influence how people respond to films. He used the example of the film Adolescence, which he said resonated strongly with him. Hearing him talk about it helped me understand how important emotional honesty and clarity are. A film does not need to be overly complicated or full of dramatic twists to work. It needs to create a feeling that stays with the audience, something they can relate to or recognise in themselves.

For me, one of the biggest takeaways from the meeting was the idea of really knowing the target audience. Daniel said that if you want your film to have an impact, you need to know who you are speaking to and what kind of emotional experience you want to create for them. This means thinking beyond the story itself and considering how every decision supports the atmosphere, the tone and the overall message. It also means being intentional about how the viewer should feel at certain moments and how the film guides them through that emotional journey.

Overall, the meeting reminded me that filmmaking is not only about visuals or structure. It is also about psychology, emotion and understanding how people experience stories. Daniel helped me see that these aspects are not separate from the creative process but a fundamental part of it. I left the conversation with a much clearer idea of what matters in our project and how we can shape the film so that it truly resonates with the people who watch it.

Impulse #2 Framework

After Watching a lot of Wandering DP Episodes (https://www.youtube.com/@wanderingdp) I took my notebook and wrote down the basics, that he talks about all the time.

He calls it the Framework and he presents it as a practical system that guides the entire process of lighting and visual design. Patrick, also known as The Wandering DP, uses these six core elements to approach every scene in a clear and efficient way. The Framework gives filmmakers a structured method, especially when time, equipment or the location itself impose limitations.

1. Upstage Lighting and the Pareto Principle
The first component of the Framework is Upstage Lighting. This means placing the main light on the far side of the subject in relation to the camera. Upstage lighting shapes the face naturally and introduces pleasing shadows that help define the subject within the space. Patrick connects this idea to the Pareto Principle because he believes that this method provides most of the visual quality with very little effort. It is fast to set up, reliable in almost any situation and instantly produces a cinematic look. In demanding situations where decisions must be made quickly, this approach becomes extremely valuable.

2. Point of Control
The second element is the Point of Control. This idea is about recognising which elements in a location can be controlled and which cannot. Every room has fixed conditions such as window placement, wall color or natural light direction. Patrick suggests starting by identifying the element that is least controllable. Once this is understood, all other choices can be made around it. This mindset stops filmmakers from fighting the location and instead encourages them to work with what is available. It creates clarity and helps build a stable lighting plan.

3. The Lighting Triad
The Lighting Triad forms the third part of the Framework. It consists of the key light, negative fill, edge light and ambient. The key light defines the emotional direction of the scene. Negative fill is used to remove unwanted spill and strengthen contrast. The edge light separates the subject from the background and reinforces depth. Ambient light provides the base atmosphere without competing with the more intentional lights. When these four components work together, the scene gains structure, dimension and balance. Patrick views the triad as the core toolkit for almost any lighting situation.

4. Room Tone
The fourth component is Room Tone. This is the gentle lifting of shadows in a controlled and natural way. Room tone does not mean simply flooding the space with uncontrolled ambient light. Instead, it is a subtle adjustment that makes the environment feel realistic and prevents overly harsh contrast. By shaping the shadows carefully, the cinematographer can guide attention and maintain visual harmony.

5. The L of the Room
The fifth concept is the L of the Room. Patrick encourages shooting in a way that shows two walls of the space whenever possible. Displaying the corner or depth of a room helps the viewer understand its shape and dimensionality. It adds realism and makes the visual world feel lived in and grounded.

6. Salt and Pepper
The final element is Salt and Pepper. This refers to adding small variations of light and shadow throughout the frame. These details keep the image interesting and dynamic. They act like a visual rhythm that guides the viewer’s eye and prevents the frame from feeling flat.

Together, these six components form Patrick’s Framework, a structured, efficient and creative approach to lighting that supports both the technical craft and the emotional experience of a film.

Impulse #1 Movie Afternoon

My first Impulse Post is about an afternoon I spent with Magda and Noah watching a series of short films. We had planned the session mainly to see different approaches to campaign films and socially critical storytelling, but it turned into something much more interesting. We ended up not just watching films but really discussing what makes certain stories stay with us and why others, even when technically impressive, do not leave the same emotional mark.

We went through a mixture of campaign videos, social awareness films and artistic shorts. The overall production quality was high in almost all of them. You could tell that the filmmakers cared about their topics and that a lot of work went into cinematography, editing and sound. Yet despite this level of craft, only a few of the films truly resonated with me. This surprised me because I assumed that technical excellence alone would strongly influence my reaction. Instead, I noticed that films with flawless visuals sometimes felt distant or overly polished, while simpler ones with emotional clarity had a much stronger impact.

After every film we paused to talk about what worked well and what did not. These discussions were surprisingly honest and open. All three of us had different backgrounds and preferences, and that made the conversation more interesting. Sometimes one of us connected deeply with a film that the others found unremarkable, and other times we all reacted in exactly the same way. Through these reactions we slowly started to identify patterns.

By the end of the afternoon we realised that a few specific criteria were consistently important for us. One of them was the number of protagonists. Films felt stronger when they focused on one or two characters rather than trying to spread attention across many. This made the emotional connection more direct, because the film had the time and space to explore a character’s inner world. Another important factor was the intelligence of the story. We liked narratives that had a twist or a surprising detail but still remained grounded in reality. When a film tried too hard to be clever, it often lost emotional authenticity. When it was too straightforward, it sometimes felt predictable.

What worked best for us were the films that took a real-life issue or problem and presented it through a relatable and emotionally engaging story. This combination made the message feel more grounded and impactful. Instead of feeling like we were being lectured, we experienced the issue through a human perspective. It became less about the abstract concept and more about what that concept means in someone’s life. Films like Break the Cycle of Disadvantage or The Robbery showed exactly how powerful this approach can be. Both managed to take a social topic and embed it into a story that felt honest, personal and human.

In the end, the afternoon taught me something important about filmmaking. A film does not need to be complicated or visually overwhelming to make a point. What it needs is emotional clarity and a connection to experiences people can understand. When a story is built around real human moments, even a short film can feel meaningful and stay with the audience long after it ends.

My favorite films where:

Creating a 3×3 Matrix for Camera Matching

Using mmColorTarget and DaVinci Resolve for Scene-Referred Film Profiling

If you’re diving into film profiling workflows using tools like mmColorTarget and DaVinci Resolve, the 3×3 Matrix Maker is a powerful utility that helps match your source camera image to a target film reference in a scene-referred color space with mathematical precision.


https://github.com/ctcwired/dctl-matrix-maker?tab=readme-ov-file

Step 1: Download and Install the Matrix Maker Script

First, download the ZIP archive that includes all required Python scripts (usually hosted on GitHub by the author or project). Once downloaded:

  • Extract the folder.
  • Open a terminal in that folder.
  • Install any Python dependencies if needed.
  • Just copy the commands from GitHub Link above

Tip: If you run into issues, just copy the error message into ChatGPT or another AI assistant — you’ll have it fixed in no time.

Step 2: Prepare Your Color Charts in EXR Format

Prepare your two comparison images:

  1. Source Image: A render or still of the mmColorTarget captured with your camera (e.g. ARRI, RED, etc.).
  2. Target Image: A reference mmColorTarget (e.g. a scan from a film stock or ideal target).

Color Space Matching Tips:

  • Bring both charts into the same working color space (e.g. ACEScg, Linear Rec.709, or any other linear space). Not necessary but can be a workflow improvement.
  • Matching grayscale tones beforehand can significantly improve results.
  • Once matched, render both images as EXR files:
    • Name them exactly: source.exr and target.exr

Step 3: Run the 3×3 Matrix Maker Script

Open your terminal and navigate to the folder where the script is located:

ls     # List contents
cd
#directory where the folder is located
cd matrix-folder-name # Enter the folder where dctl-matrix-maker.py is located

Then run the script with your images:

python dctl-matrix-maker.py source.exr target.exr

The script will compare the two images patch by patch and automatically generate a DCTL file containing a 3×3 color transformation matrix.

Step 4: Apply the DCTL in DaVinci Resolve

  1. Move the generated .dctl file into your DaVinci Resolve LUT or DCTL folder
  2. Restart Resolve so it detects the new DCTL.
  3. Inside your node tree, add a new DCTL node and select the matrix you just created.

Your source camera image will now closely match the film-scanned target in color.

Pro Tips for Better Results

  • Match the grayscale of your source and target images before running the matrix script. This ensures brightness alignment and improves the matrix accuracy.
  • Work in scene-referred linear space when possible (e.g. ACEScg, linear Rec.709) for the most accurate color math.
  • This tool is ideal for building scene-referred film looks and should be used early in your color management pipeline.

Final Thoughts

This 3×3 Matrix Maker workflow is a valuable tool for filmmakers and colorists interested in authentic film emulation, matching digital cameras to analog film stocks, or learning the math behind color matching.

With just a few steps, you can build a mathematically sound color transform and load it directly into Resolve using only Python, EXRs, and the chart images.

3×3 Matrix Match between ARRI Camera and EXR 100T Filmstock

Left with 3×3 Matrix Match and Kodak 2383 LUT / Right Only Kodak 2383 Lut

Gardner, Zeb. “Genetic Color Space Transform Optimization Algorithm.” Zeb Gardner, October 6, 2024. Accessed July 19, 2025. https://www.zebgardner.com/photo-and-video-editing/genetic-color-space-transform-optimization-algorithm.

DeMystify Colorgrading. “Film Profile Journey: 21 – mmColorTarget For Resolve.” DeMystify Colorgrading, n.d. Accessed July 19, 2025. https://www.demystify-color.com/post/film-profile-journey-21-mmcolortarget-for-resolve.

The Role and Relevance of 3×3 Color Transformation Matrices in Color Science-Based Image Pipelines

In digital imaging workflows—particularly those involving color management, camera matching, and film emulation—the use of 3×3 color transformation matrices remains a foundational method for applying accurate linear color space conversions. A tool recently shared on Reddit by the user ctcwired introduces a practical and accessible way to calculate such matrices from a source (e.g., a digital camera) to a target (e.g., a film scan). The script is available via GitHub:
https://github.com/ctcwired/dctl-matrix-maker.

The process requires linear input imagery, ideally in OpenEXR (.exr) format, to ensure the correct mathematical application of the matrix. Since a 3×3 matrix performs a linear RGB transformation, using non-linear input (such as images encoded in gamma-corrected color spaces like sRGB) would yield inaccurate results. While the script is designed for EXR input, it has also been observed to function with linearized TIFF files.

The output is a complete DCTL (DaVinci Color Transform Language) file, which allows for immediate application within DaVinci Resolve, providing Resolve users with a workflow that mirrors the functionality of the mmColorTarget plugin used in Nuke pipelines. This comparison is significant because mmColorTarget has long been considered a high-quality tool for camera matching and color chart calibration, but remains inaccessible to many users due to platform-specific dependencies and installation complexity.

For background, Zeb Gardner introduced a related concept with his tool for color optimization using genetic algorithms, termed the “Genetic Color Space Transform Optimization Algorithm,” detailed in the article:
https://www.zebgardner.com/photo-and-video-editing/genetic-color-space-transform-optimization-algorithm.
While Gardner’s method explores more advanced and dynamic forms of transform fitting, the simplicity and immediacy of the 3×3 matrix approach retain practical value.

From a color science standpoint, a 3×3 matrix is essential for defining primary transformations, chromatic adaptation (e.g., between D65 and D60 white points), or approximate gamut mapping between color spaces. Though it cannot model non-linear tone curves or perceptual shifts, it remains ideal for:

  • Input Device Transforms (IDTs) in ACES or custom workflows.
  • Camera matching in multi-camera setups.
  • Fast, mathematically consistent creative tweaks in look development.
  • Pre-processing before film print emulation LUTs, where a tailored matrix can better approximate a film scan than generic Rec.709 or P3 transforms.

This tool’s ability to integrate directly into Resolve as a lightweight DCTL also makes it a more efficient alternative to heavier, more nuanced transforms such as Radial Basis Function (RBF) interpolation or tetrahedral LUTs. While such methods provide higher fidelity, a 3×3 matrix offers speed, editability, and clarity—particularly in the early stages of look creation or for subtle final image adjustments.

For users building layered, hybrid color pipelines, tools like this one offer critical flexibility and control.

In the last Blogpost I will try and create a custom 3×3 Matrix with Python.

Demystify Color. “Film Profile Journey 21: mmColorTarget for Resolve.” Demystify Color, October 29, 2023. https://www.demystify-color.com/post/film-profile-journey-21-mmcolortarget-for-resolve.

Gardner, Zeb. “Genetic Color Space Transform Optimization Algorithm.” Zeb Gardner, August 30, 2023. https://www.zebgardner.com/photo-and-video-editing/genetic-color-space-transform-optimization-algorithm.

Using flat Film PRINT Emulations for more control

This small excursion introduces the process of creating film print emulations, which are inherently complex and require specialized equipment and workflows. Proper creation of print film emulations typically demands a grading suite equipped with both a film projector and a digital projector operating in tandem. Additionally, accurate profiling requires advanced tools such as spectrophotometers and other precise measurement devices. The financial investment for such a setup often exceeds one hundred thousand dollars, and the associated workflows are technically advanced.

One commercially available process is Fotokem’s shiftAI, a proprietary analog intermediate service developed by a leading motion picture film laboratory. This process facilitates the creation of print film emulations by transforming footage into a print film look. Despite the absence of public technical details, the service provides datasets that can be utilized for profiling and color grading purposes. The process involves producing scan-backs that are notably flatter compared to traditional 2383 print film stocks, likely achieved through specific scanning techniques, potentially involving the Scanity4K scanner.

This flatter scan-back requires subsequent grading and preparation to achieve the desired visual characteristics. The shiftAI process is designed as an intermediate step in a digital workflow: digital footage is initially graded, processed through shiftAI, and then further graded post-process. This methodology offers flexibility, allowing for various approaches in applying the dataset, including software such as Nuke, Fusion, Tetra DCTL, or Light Illusions.

To facilitate integration into scene-referred workflows, a Color Space Transform (CST) can be applied to the scan-backs, converting them into log-based color spaces such as LogC3, ACEScct, or DaVinci Intermediate. Experimentation with different transformations is encouraged to optimize results.

Color Patch Recording and Densitometer Measurements

A dataset comprising over 1700 color patches has been recorded onto 250D film stock and printed onto 2383 print stock. These patches provide a comprehensive basis for film emulation research. Initial attempts to digitize these patches utilized a digital scanner to expedite the process, resulting in cleaner scans compared to those obtained post-densitometer readings. Plans to perform detailed densitometer measurements remain ongoing, supported by the acquisition of film winders to streamline the process.

Datasets derived from these measurements will be made available in CSV or TXT formats, offering accessible data for further emulation development. Upcoming tutorials will address methods for measuring and working with these patches, including automated workflows and scripting approaches aimed at enhancing efficiency and accuracy in film emulation creation.

Integration of Negative and Print Film Emulations

The combination of negative and print film emulations can be implemented using either traditional or modern workflows. The traditional approach involves applying a negative emulation to digital footage in Cineon log space, performing grading, and subsequently applying a print film emulation (FPE) as a final step. Alternatively, a modern workflow leverages scene-referred processes, allowing both negative and print emulations to be applied flexibly within a grading environment. This enables the adjustment of emulation intensity and the selective combination of elements from each profile, providing greater creative control and adaptability.

Demystify Color. “Film Profile Journey: 19 – Creating Your Own Film Print Emulations.” Demystify Color, June 2024. https://www.demystify-color.com/post/film-profile-journey-19-creating-your-own-film-print-emulations.

Create Scene Referred Negativ Emulations (Part 2)

This discussion focuses on the importance of the 3×3 transformation matrix used to convert Plog-encoded film scans into a linear color space. Accurate color space conversion is essential for consistent and reliable post-processing of scanned film negatives. The transformation is achieved through a DCTL (DaVinci Color Transform Language) script, which is publicly accessible at https://github.com/Demystify-Color/DCTLs/blob/main/Technical%20Transforms/DMC_PLogLin.dctl. This tool enables users to place their film scans within the correct color space, thereby facilitating the creation of scene-referred looks, as previously outlined in the initial installment of this series.

The DCTL operates by converting the logarithmically encoded scanned images into a linear color space representation. This linearization is a crucial step before applying a Color Space Transform (CST) to translate the footage into the desired target color space. It is imperative that the target footage shares an identical color space configuration to ensure visual consistency and accurate profiling.

Brightness adjustment within the DCTL is managed by manipulating the “LOG Reference” slider. The procedure involves initially applying a blur filter to the scanned image to minimize noise and local variations. Subsequently, middle gray values are measured using an RGB picker tool, and an average value is calculated. This average is then input into the DCTL parameters, effectively aligning the brightness levels between the source scan and the target footage. This alignment ensures a more precise match in terms of luminance, thereby enhancing the fidelity of subsequent color transformations and profiling process.

Using an Output Device Transform (ODT) at the end allows verification that all applied transforms function correctly and do not introduce unwanted artifacts.

Demystify Color. “Film Profile Journey 11: A Better Way to Prep Your Negative Scans.” Demystify Color, June 2024. https://www.demystify-color.com/post/film-profile-journey-11-a-better-way-to-prep-your-negative-scans.

Create Scene Referred Negativ Emulations (Part 1)

Film negative emulation is a digital process that replicates the look and behavior of traditional film negative stocks, such as Kodak 250D or 500T. These film negatives capture a wide dynamic range with accurate color information, but in a low-contrast, log-like format—similar to how digital cameras record footage using log profiles.

To achieve the final look, the negative would traditionally be printed onto a positive film stock like Kodak 2383. This print stock adds contrast, saturation, and subtle color shifts that define the characteristics.

In digital workflows, film negative emulation mimics this entire process by first emulating the response of the film negative and then applying a film print emulation to recreate the final graded appearance, bringing the image to life with the depth and texture of analog film.

Scene-referred means you’re working for a specific colorspace like Rec.709 Gamma 2.4. Display Referred means that you are working with what you are seeing on screen. For example by doing the ODT with a contrast curve instead of a technical transform.


1. Film Stock Selection and Image Preparation

The workflow begins with selecting the target film stock. An appropriate exposure bracket is chosen, and the image is slightly blurred in the first node to simulate optical softness and reduce digital noise. This step stabilizes color matching and improves the emulation’s realism.

2. Color Space Mapping with a 3×3 Matrix

A 3×3 matrix is then applied to map the film scan’s chromatic values into the working color space. This transformation ensures consistent color behavior and a neutral foundation for further grading. (The matrix construction is detailed in the following chapter.)

3. Output Display Transform (ODT)

An ODT is added at the end of the node tree to convert the image from the working space to the intended output space, ensuring accurate display rendering.

4. Patch Matching and Baseline Normalization

Color patches from the film stock are matched to digital camera equivalents. Initially, only contrast is adjusted using a global offset to establish a neutral baseline for color work.

5. Refining Hue, Saturation, and Density

Using tools such as Color Warper or Tetra v2 DCTL, the target patches are further refined to match hue, saturation, and density. Split toning is added based on grayscale patches for tonal separation and filmic character after that with whatever technique you see fit.

By working in a normalized, wide-gamut color space with moderate contrast, this method enables faster, more consistent emulation results. It reduces the need for extensive contrast adjustments later in the process and offers a more reliable starting point for creative grading.

Preparing the Filmstock

Matching the target footage fo the prepared filmstock

Aurélien Pierre, “The Scene‑Referred Workflow,” Ansel, December 1, 2022–April 26, 2025, accessed June 20, 2025, https://ansel.photos/en/workflows/scene-referred/.

Demystify Color, “Film Profile Journey #18: A New Way for Creating Scene-Referred Negative Emulations,” Demystify Color, June 2023, https://www.demystify-color.com/post/film-profile-journey-18-a-new-way-for-creating-scene-referred-negative-emulations.

Camera Match by Ethan Ou

Following the preparation of both the source and target ColorChecker datasets, the subsequent step involves generating a color transform through mathematical alignment. For this purpose, the tool Camera Match developed by Ethan Ou provides an effective and streamlined solution. This Python-based application enables the creation of LUTs by computationally matching the color responses of the source dataset (e.g., digital camera footage such as ARRI Alexa imagery) to a target dataset (e.g., film scans or alternative camera profiles).

Camera Match is accessible both as a downloadable script and via a browser-based interface (Camera Match GitHub Repository). The basic workflow for LUT generation using the browser interface is as follows:

  1. Initialization:
    Execute the script by pressing the “Play” button, which installs all necessary Python libraries automatically.
  2. Source Data Upload:
    Load the source dataset (e.g., Alexa ColorChecker measurements) into the interface.
  3. Target Data Upload:
    Upload the corresponding target dataset representing the desired film look or alternative camera profile.
  4. LUT Generation:
    Initiate the LUT creation process by selecting the Radial Basis Function (RBF) algorithm as the matching function. The RBF method provides smooth and continuous color transitions, making it suitable for high-fidelity color transformations.
  5. LUT Export:
    Save the generated LUT to a local directory for further use.

Once created, the LUT can be implemented in post-production applications such as DaVinci Resolve, Lattice, or any system capable of ingesting standard LUT formats. The process is highly efficient, offering a rapid turnaround from dataset preparation to deployable LUT creation.

While this approach enables the user to quickly produce functional LUTs, it is important to acknowledge that the quality of the input datasets—particularly the preparation of the ColorChecker charts—significantly influences the final result. In subsequent discussions, we will explore more advanced methodologies for chart preparation, focusing on best practices for achieving scene-referred workflows compatible with color-managed environments such as DaVinci Wide Gamut Intermediate and ACES.

Although this preparation phase remains time-consuming, it is a critical component for those seeking the highest levels of color accuracy and transform reliability.

Reference:

DeMystify Colorgrading. (n.d.). Film Profile Journey: 20 – More Automation, Less Tedious Manual Work. Retrieved April 28, 2025, from https://www.demystify-color.com/post/film-profile-journey-20-more-automation-less-tedious-manual-work