Like I have teased in the last blog post, I came across a YouTube video, that showed, how to create a web interface for an Arduino. This has a number of use cases, live sensor monitoring, remote control, live system feedback or interactive installations. This makes it possible to control how the user can interact with an Arduino, using a platform, that they already know.
When the Arduino connects to a WiFi network, it gets an IP address and starts a tiny web server that can talk to web browsers. When you open that IP address in your browser, the browser sends a request to the Arduino. The Arduino responds with a simple web page, in my case a form in which you can write morse code. If you type something and click “Submit,” the browser sends the text back to the Arduino. The Arduino reads and understands the send information and can react accordingly. This way, the Arduino works like a tiny website, letting you interact with it through any browser.
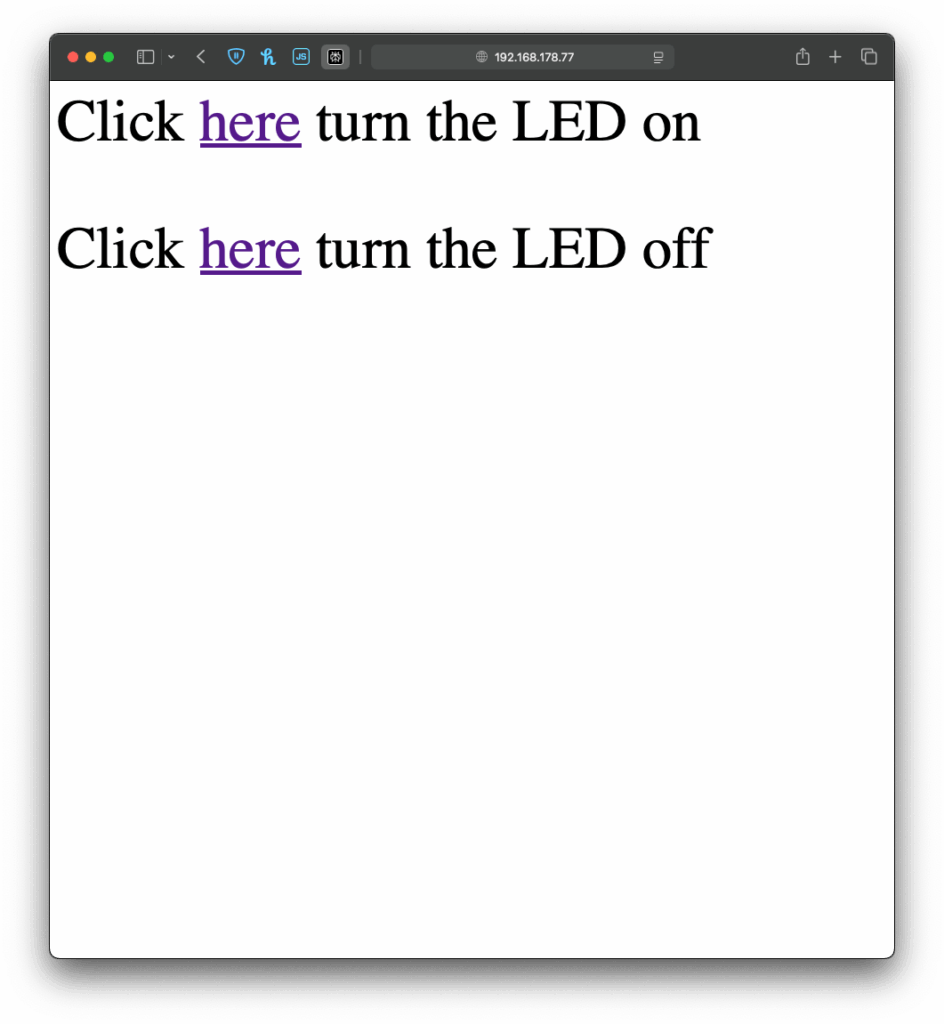
I once again started with an example, I found in the WiFiS3 library of Arduino, “SimpleWebServerWiFi”. This code generated a very simple website with which you could turn on and off an LED on the Arduino. Using this as my starting point, I first wanted to expand the web interface, which took a little longer than it would usually take to build, since I had to upload the code multiple times and change it so it finally looked “good enough” for this prototype. But doing the interface it self was just the easy part.
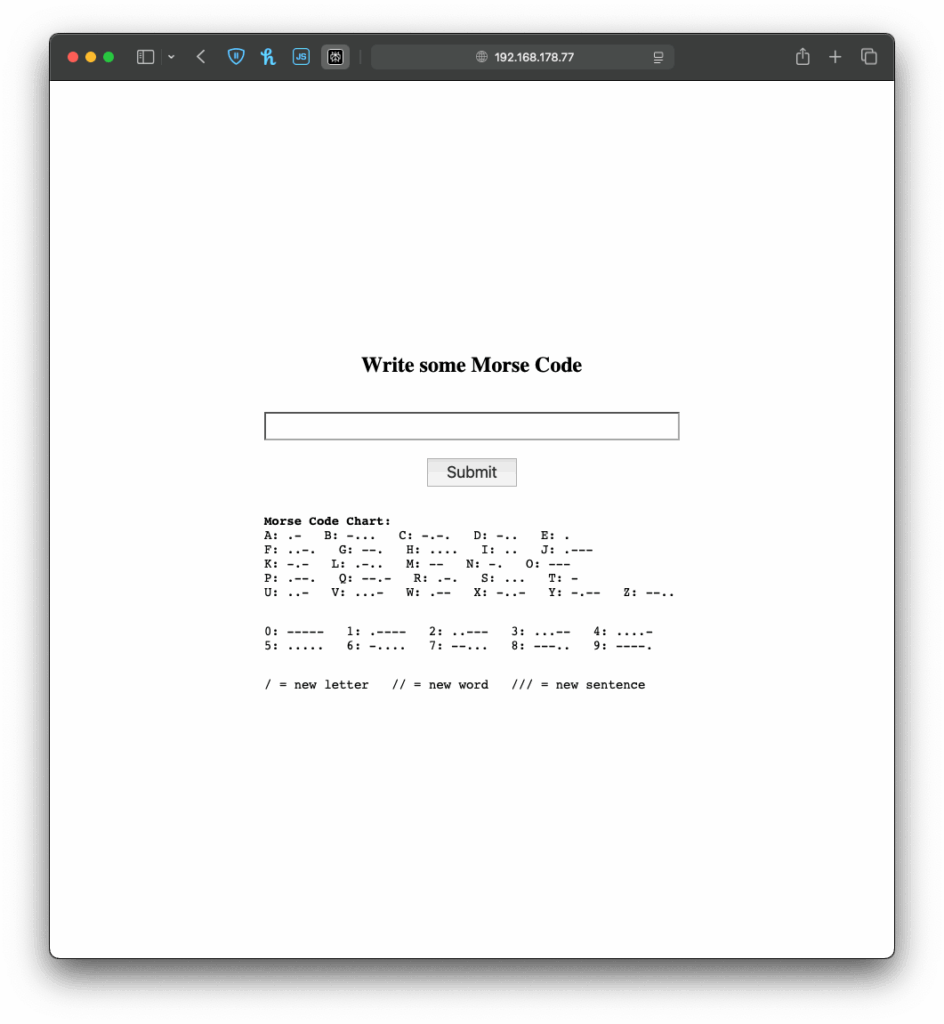
Next I wanted to give my simple interface some functionality, there for the form I created on the Arduino needed to send the data input by the user back to the Arduino, so it could understand and for now translate it. And I have to be honest, I really tried to understand the code but just couldn’t figure out, how it worked, so I asked ChatGPT to help me out. Using its infinite wisdom it created a short piece of code, that converted the users input into a string, that could be understood by the code, I had written before.
The next step was easy, I added the code for decoding the message, I created last week and explained in the last blog post. Now I just needed the Arduino to display the message, after it received one, which was easy enough by just adding an “if” statement, that would only add extra content to the website, if a message had been received before. And like that, I finished the next version of my chaotic morse code prototype.
Now that I’ve built this basic version, I’ve been thinking about how this kind of setup could be used in different contexts. For example, it could be adapted for interactive museum exhibits, where visitors can type a message into a browser on their phone and trigger lights, sounds, or physical movements in an installation. It could also be used for DIY home automation, like controlling lights. Or it might become a learning tool for kids, where they can experiment with inputs and immediately see results, helping them understand communication systems like Morse code in a playful, hands-on way.
Instructions
If you wanted to try it out yourself, here was what you needed:
- An Arduino
- a Laptop or any other device that can use a Browser ;D
This time it is even simpler, plugin the Arduino, change the SSID & Password to fit your home WiFi network and upload the sketch. In the Serial Monitor you will then see the Arduinos IP address, now open a browser and type in the shown IP address. Now you should see the simple interface I created, the only thing to do now is to write some morse code and let the Arduino decode it.