After defining the complex architecture and data flows in my previous posts, it was time to shift focus from the backend logic to the user’s reality. I needed to answer the most important question: What will this experience actually look and feellike for Alex, our shopper? This is where the design process begins. It’s a journey of translating abstract ideas into tangible, interactive screens. For this project, I followed a three-stage methodology, moving from low-commitment sketches to a fully realized high-fidelity vision.
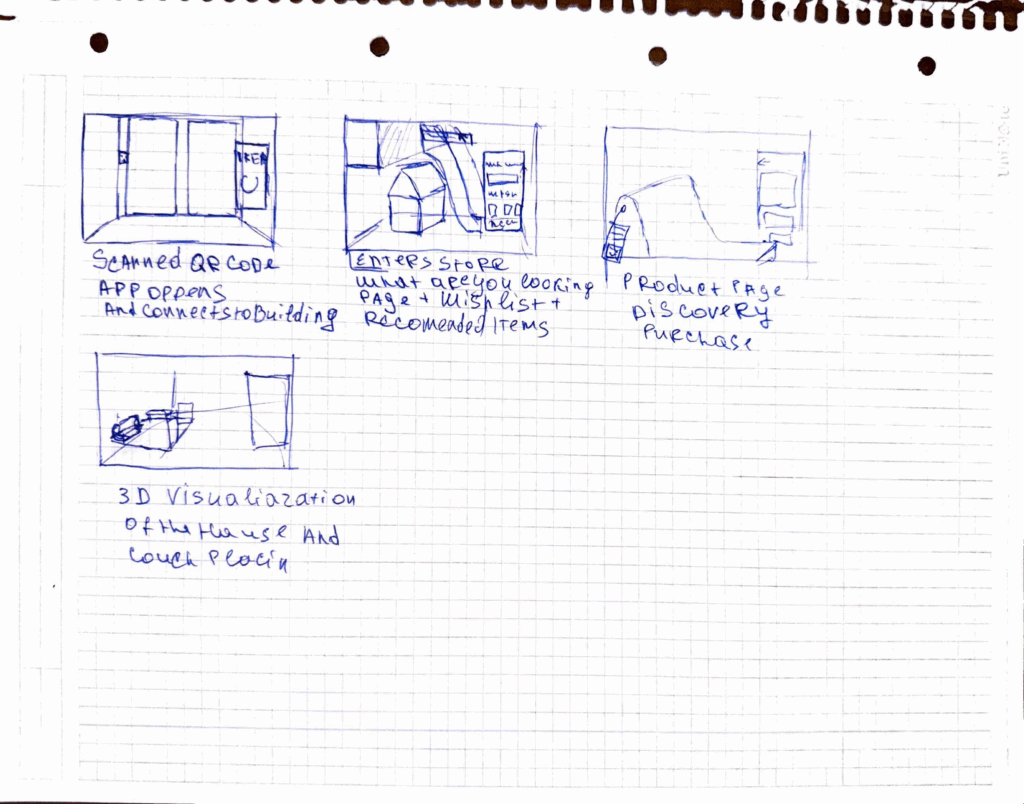
Stage 1: The Spark of an Idea – Paper Wireframes Every complex digital product begins with the simplest of tools: a pen and paper. Before getting down to pixels and software, I sketched out the core user flow. This stage is all about speed and ideation—capturing the main steps of the journey without worrying about details.As you can see from my initial drawings, I focused on the key moments: entering the store, viewing a product, and the “wow” moment of 3D visualization in the user’s own home. This raw format allowed me to establish the foundational structure of the application.
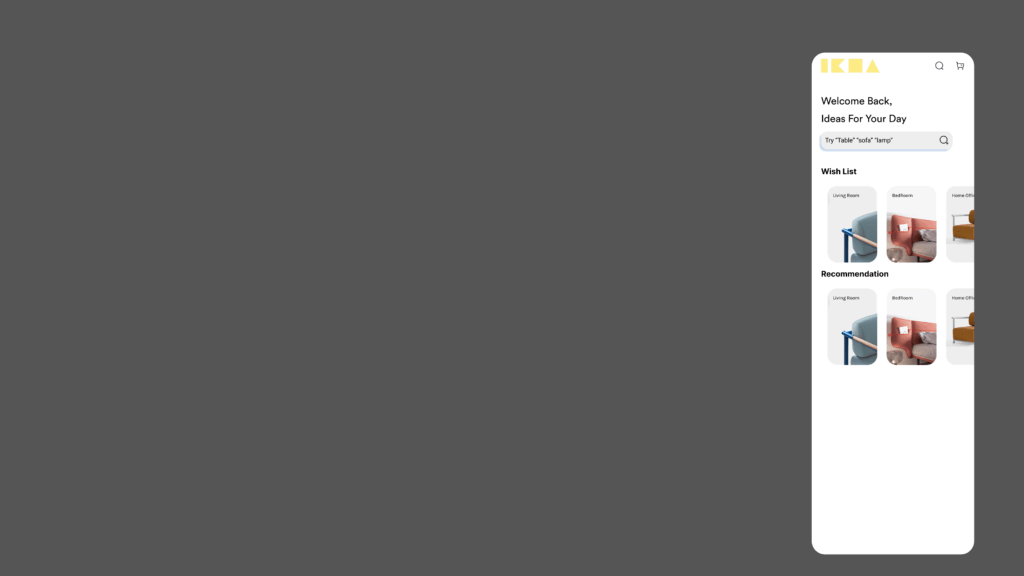
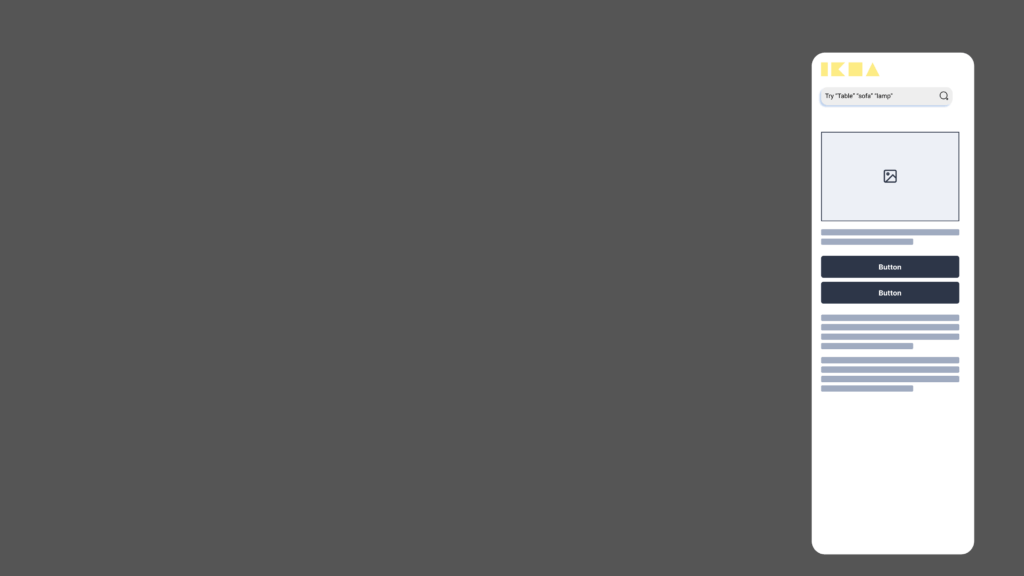
Stage 2: Building the Blueprint – Low-Fidelity (Lo-Fi) Digital Wireframes With the basic flow mapped out, the next step was to give it a more formal structure. I created low-fidelity digital wireframes. The goal here is not beauty; it’s clarity. By using simple grayscale boxes, placeholder images, and basic text, I could focus entirely on information hierarchy and layout. These Lo-Fi designs helped me answer critical questions: Where should the search bar go ? How should a product’s details be organized? What does the checkout process look like? At this stage, I focused on a mobile form factor to solidify the core components in a familiar layout before adapting them for a more complex AR view.
Stage 3: Bringing the Vision to Life – High-Fidelity (Hi-Fi) AR Mockups This is the leap from a 2D blueprint into a 3D, immersive world. Designing for Augmented Reality, especially for the main target of smart glasses, required a complete shift in thinking. The user interface can’t just be a flat screen; it needs to live within the user’s space, providing information without obstructing their view.Here are some of the key design principles I implemented in the high-fidelity mockups:
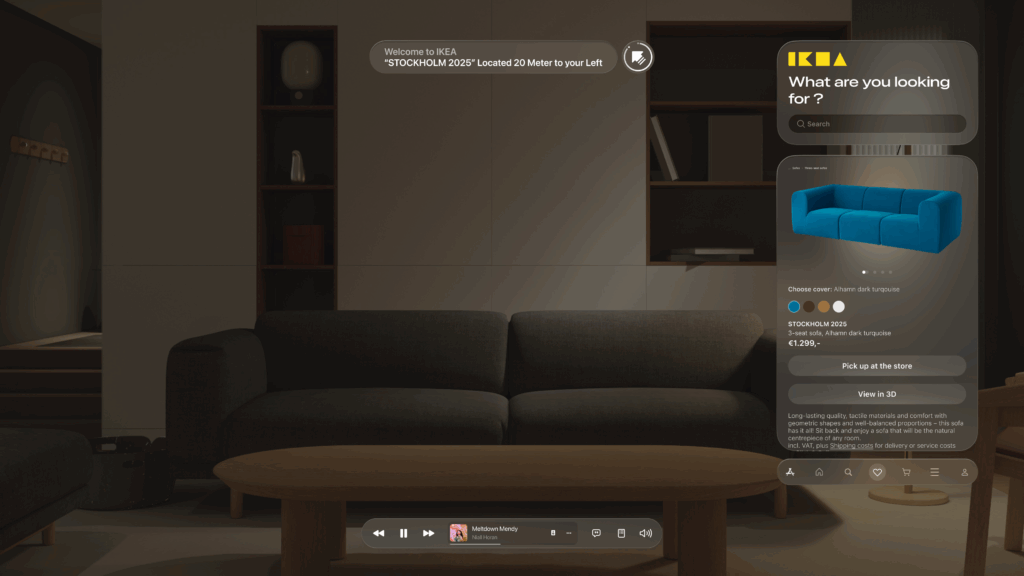
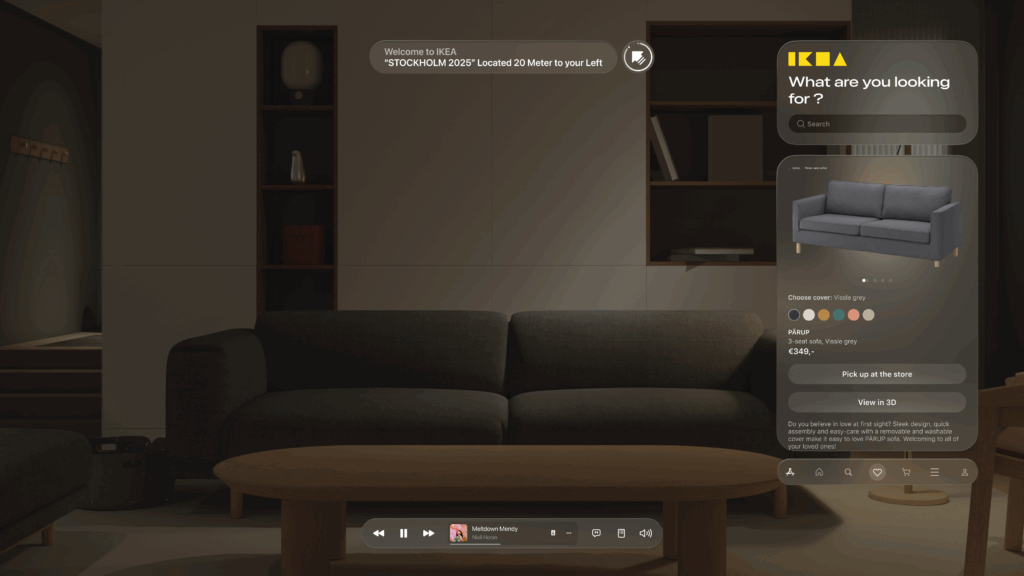
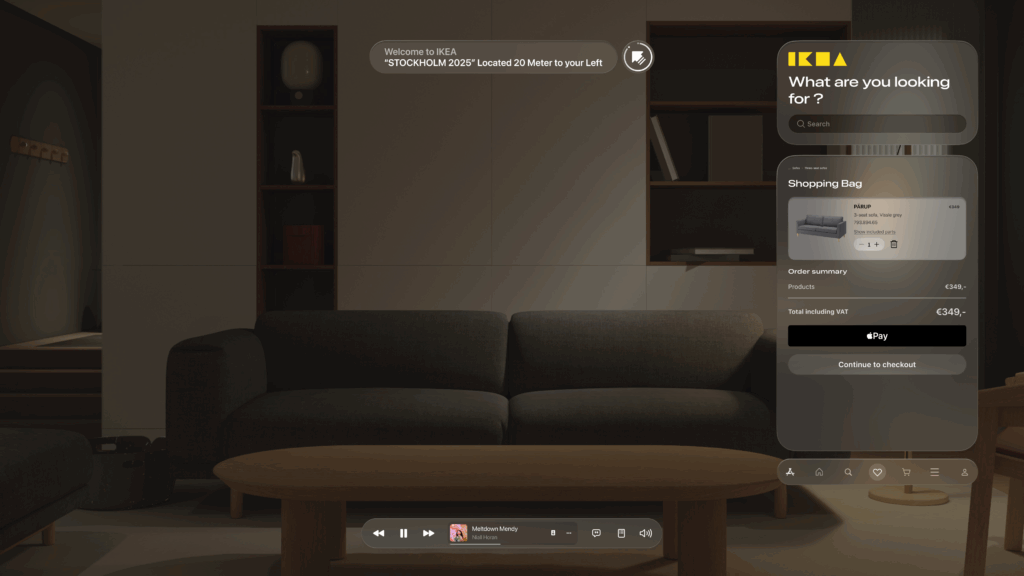
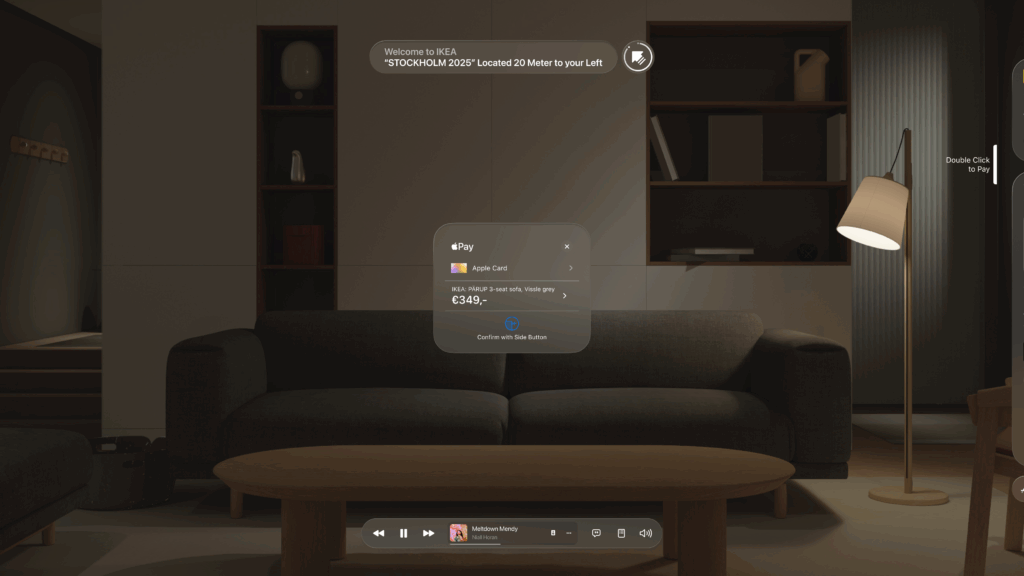
Spatial & Contextual UI: The interface appears as a series of floating panels, or “holograms.” A navigation prompt appears at the top left, while the main interactive panel is on the right, keeping the central field of view clear. This UI is also contextual—it changes based on what the user is doing, whether they are navigating, inspecting an item, or making a purchase.
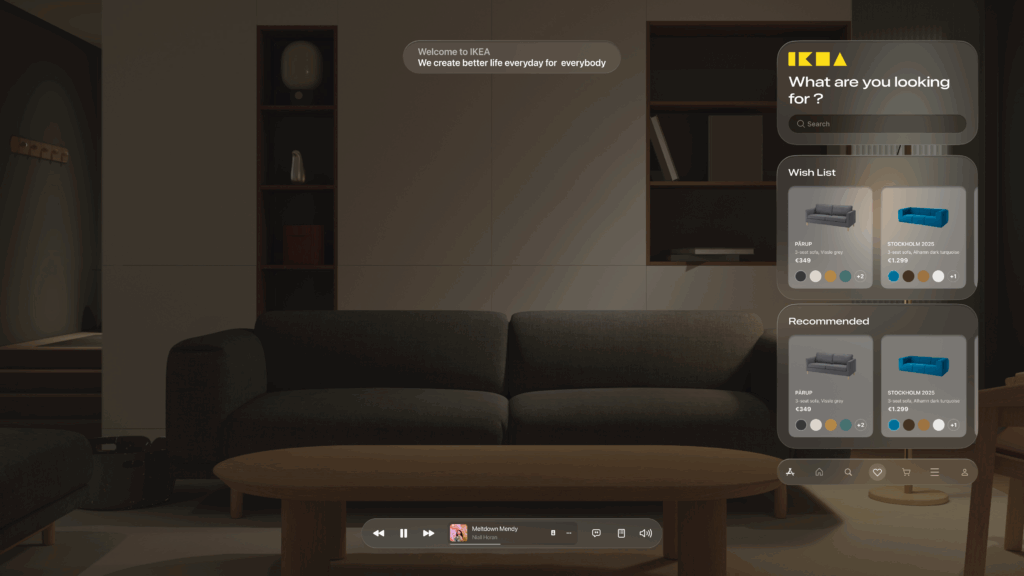
Glassmorphism: I used a translucent, blurred background effect for the UI panels. This modern aesthetic, known as glassmorphism, allows the user to maintain a sense of the environment behind the interface, making it feel integrated and less obtrusive.
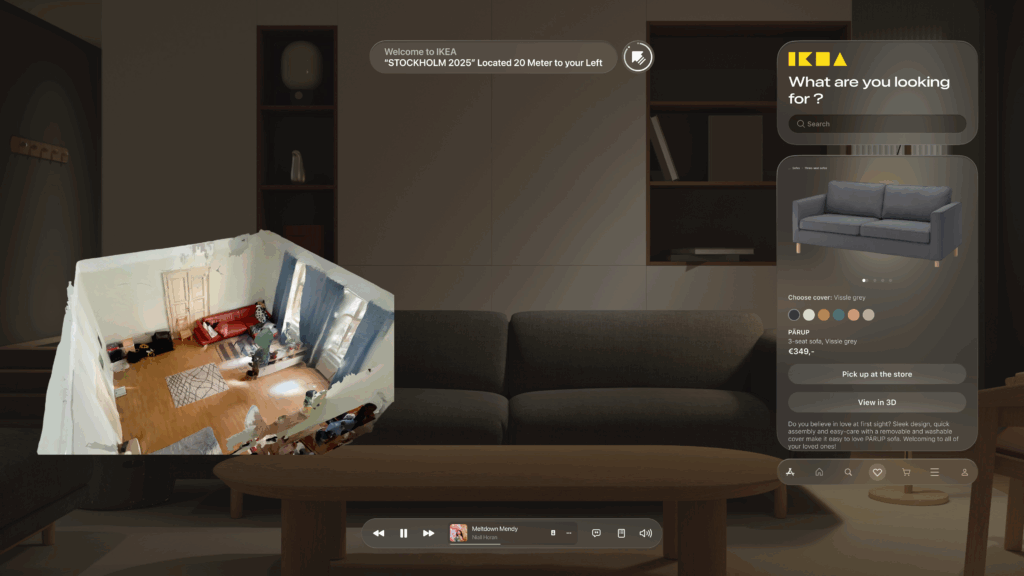
Seamless AR Integration: The core feature—visualizing furniture—is seamlessly integrated. As seen below, when Alex wants to check how a sofa looks in his apartment, the app displays the 3D scan of his room directly within the interface. This feature provides immediate, powerful value and solves a key customer pain point.
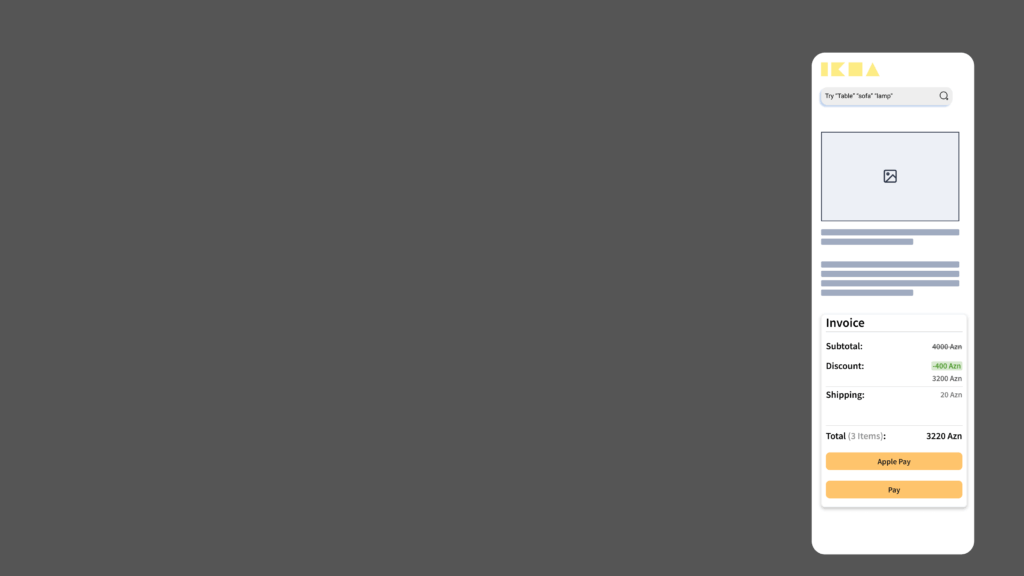
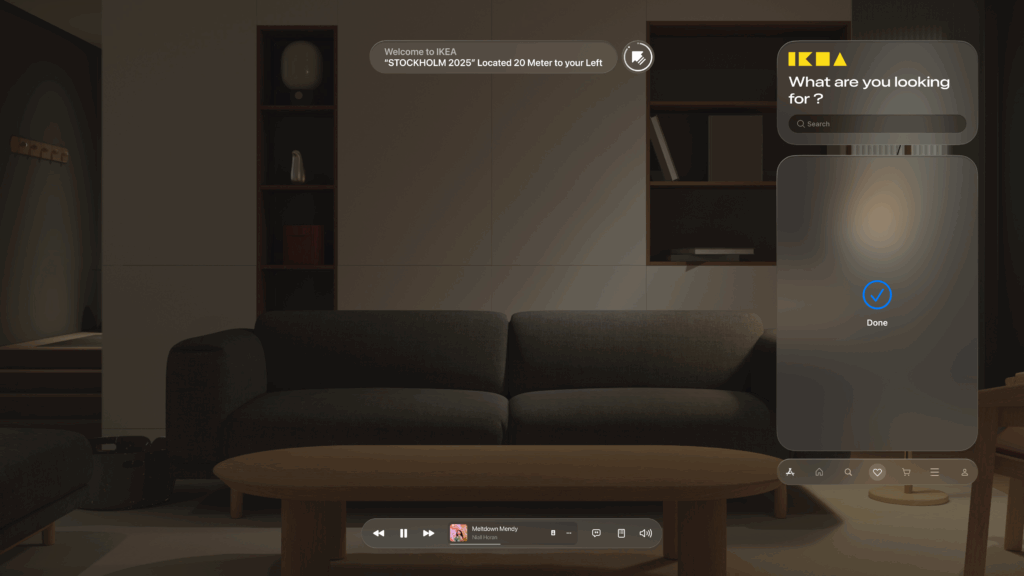
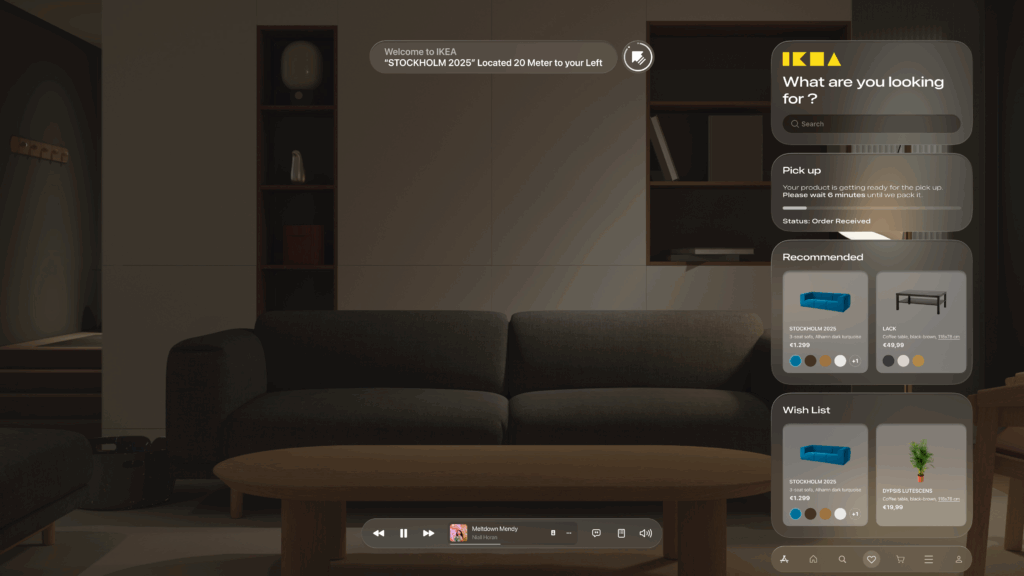
- An End-to-End Flow: From Browse the wishlist to making a secure payment with Apple Pay and seeing the order status, the entire purchase journey is designed to be fluid and intuitive, requiring minimal interaction from the user this. This actually concludes my idea of the technology us human moving from interacting with the objects by typing or other means now we have our devices to do so.
This iterative journey from a simple sketch to a polished AR interface was crucial for refining the concept and ensuring the final design is not only beautiful but also intuitive and genuinely useful.
With the architecture defined and the user interface designed, the final step is to merge them. In my next post, I’ll discuss the technical prototyping process—bringing these designs to life with code and seeing them work on a real device.