Designing the Soul of the Room

After the challenging process of installing sensors and wiring up the interactions, I finally reached the most joyful part of the whole project: decorating the miniature room.

I started with some structural additions. I built a small door using cardboard and a special stopper that helps align it with the beam sensor, making the door interaction more stable. The bed and drawer were already completed in the previous phase, as I had to integrate the sensors inside and hide the cables early on.

Next came the laptop corner. I created a table and chair from cardboard to support the distance-sensor interaction. Then I built a small cardboard laptop with a hole where the LED light could shine through when activated, just like turning on a real screen.

But the real fun began with the tiny interior details. I made a carpet from folded toilet paper, and also used toilet paper to decorate the lamp to give it a soft, cozy look. For the bed, I crafted a blanket from tissue and fabric scraps, used a cotton pad for the pillow, and made the whole setup feel warm and lived-in.

To make the room feel more personal, I added a compact mirror next to the drawers, just like I have in my real room, and decorated the walls with Japanese-style poster stickers and a postcard featuring a girl from a Yoshitomo Nara painting. After all, this whole miniature-room concept was inspired by Nara’s “My Drawing Room” installation, so it felt right to include a small homage.

Finally, I placed a few small toy decorations and plushies around the bed area, echoing how I decorate my own space. It truly felt like revisiting childhood, like playing with a dollhouse, but this time with all the layers of interactivity and intention that come with a design prototype.

This was definitely the most heartwarming and satisfying part of the whole process. I didn’t expect to enjoy it as much as I did, but it became clear to me that creating these small, personal touches brought real magic and life into the room. It stopped being just a prototype and became a tiny world of its own.

Behind The Scenes. Installing all sensors and cables into a tiny room.

After testing everything on the table, it was finally time to bring the sensors into the tiny house I built. That’s when the real chaos and magic began.

Phase 1: The First Arduino Set – Doorbell & Laptop

I started simple. The first set of interactions included:

  • A doorbell: a button paired with a buzzer.
  • A laptop: triggered by a distance sensor, lighting up a small LED and playing a “startup” sound.

To make this work, I did small holes in the house walls to fit the lights and sensors. It wasn’t too hard, mostly about being careful with the details, especially when I had to connect two things to one leg of the button. It was tricky to get stable, and of course, when everything was finally ready, the buzzer went rogue and started buzzing constantly. Turned out it was just a bad connection. I had to redo the whole thing.

Phase 2: The Second Arduino Set – The House Comes Alive

This part was more complex. It took way longer not just because of the number of sensors, but also because I had to design furniture to hide them all before placing them in the house.

This set included:

  • A door interaction using a beam sensor to control the main light.
  • A bed interaction with a photoresistor that also controlled the main light.
  • A drawer interaction using conductive tape to detect when the drawer was open.

The drawer was the hardest part. I didn’t know where to hide the cables. Eventually, I hid them inside the drawers and made small holes in the back wall to run them to the Arduino. Sounds neat? It wasn’t.

When I finished wiring everything and plugged it in… nothing worked 🙁

2AM Debugging and the Classic Mistakes

It was already 2am and I was too excited to sleep without seeing it all come to life. But the drawer interaction wasn’t working, the tape inside had ripped from all the handling, so no signal could pass through. I had to redo everything.

slay…

And worse, I had skipped one very important step: checking each sensor one by one. The door sensor was acting weird, jumping erratically between 0 and 1, or not reacting at all. As a beginner, I didn’t immediately see the problem. I tried everything… until I moved the power and ground connections on the breadboard closer to the source. That fixed it. At 4am. And yes, it felt like a small miracle.

P.S. I don’t even have any pictures or videos from trying to fix the door sensor because I was full head inside the problem and could not remember to do videos of how annoying the process was.

What I Learned

  • Always test sensors one by one before sealing them into furniture.
  • Connections that look “fine” might not actually work, check and recheck.
  • Even a tiny sensor setup can break down unexpectedly in a small-scale project.
  • Pain at 4am feels worth it when the room finally lights up.

By the next day, everything was running. And with the system installed, I could finally move on to the fun part, decorating the room. I didn’t expect so much to break during setup, but it taught me more than any tutorial.

Trying Things Out One by One: My First Days with Arduino Sensors

This is officially my first time working with Arduino and honestly, it’s kind of funny how I began. I started with the simplest possible circuit: an LED light and a resistor, just to see something turn on. That small success was weirdly exciting. From there, I began testing each sensor individually, one by one, to understand how they work and what kind of interactions are possible.

I treated it like a kind of warm-up exercise. I wanted to get the logic behind each sensor, what it senses, how it reacts, what kind of output it gives, and how I could use that in my prototype. Here’s how the testing phase went, step by step:

1. The Doorbell (Button + Buzzer)

This was the very first interaction I tried out. A classic doorbell setup: you press the button, and the buzzer buzzes. Super simple and it worked immediately. A perfect confidence booster to start with!

2. The Door Beam Sensor

Next up was the door sensor using a KY-010 beam sensor and an RGB light. The idea was: if the beam is blocked (door closed), the light stays off; if the beam is clear (door open), the RGB light turns on. At first, it worked the other way around but that was just a logic issue, and the fix was quick. Once reversed, it worked great.

3. The Drawer Sensor (Conductive Tape + Light)

This one was really fun. I used two pieces of conductive tape inside the drawer, when they touch, it means the drawer is open and a soft yellow light turns on so you can see what’s inside. It was cute and cozy, and it worked smoothly right away.

4. The Laptop Interaction (Ultrasonic Sensor + Light)

Here I used an ultrasonic sensor. When you come close to the “laptop,” the light turns on, like you’re opening it. This interaction also worked as planned from the start, and I was pretty happy with how natural it felt.

5. Adding a Photoresistor for Sleep Mode

Finally, I added a photoresistor to control the same light as the door sensor. The idea was: the light turns on when the door opens but if you go to bed and cover the photoresistor with a blanket, the light turns off. I had some trouble with the values at first (it worked in reverse again), but I adjusted the threshold and fixed it quickly. It’s a small detail, but it adds a nice touch of realism.

Day Two: Combining It All

The second day was about combining all the sensors to work together. That’s when things got a bit tricky. One of the main challenges was the wiring, especially since I wanted to keep all components off the breadboard and inside my little room model. Managing all the cables without losing my mind took some time.

And then, a surprise problem appeared: the laptop interaction stopped working. No matter what I did, the ultrasonic sensor just wouldn’t respond. After lots of trial and error, I realized the issue wasn’t in the code, it was power. The Arduino couldn’t handle all the sensors at once.

The Fix: Two Arduinos Are Better Than One

To solve the power issue, I decided to connect the laptop interaction to a second Arduino board. And voilà, it worked again! I even added a little sound interaction: when you come close to the laptop, it lights up and plays a soft “turning on” sound. When you leave, the light turns off and you hear a subtle “shutting down” tone. It made the interaction feel much more alive.

Next Steps

In my next blog post, I’ll describe how I’m placing all the sensors, lights, and elements inside the mini room itself. Now that everything works, it’s time to bring the little artist’s space to life!

Exploring Art Through the Artist’s Room: My First Interactive Prototype

My idea began with a simple question: How can we bring people closer to art, especially those who might not know much about it? Museums often present artworks as static, untouchable objects. You’re meant to look, admire, and move on. But what if there was a way to help people feel art more directly, to experience the context in which it was created?

My original idea was to create miniature versions of famous artists’ studios. The idea came from something I’ve always found fascinating: an artist’s workplace can reveal so much about their process, personality, and even their emotional world. The arrangement of objects, the choice of lighting, the mess or the order, it all speaks. A workspace tells the story behind the art, sometimes more clearly than a wall label ever could.

I first truly felt this while visiting Yoshitomo Nara’s installation “My Drawing Room” in Baden-Baden. It was a scaled-down version of his studio, full of intimate, personal touches: scribbled notes, half-used materials, posters on the wall, and most memorably, cute little toys and dolls scattered across the room. These weren’t just decorations, they were expressions of his character and influences, part of the world he builds when he works. Even his favorite rock music was playing in the background. It felt like stepping into a hidden part of his mind. And for someone unfamiliar with Nara’s art, this room offered a beautiful, gentle entry point.

After my first consultation with Birgit, we realized it could be even more compelling if the room wasn’t just something to look at but something you could interact with. Art in museums is often so untouchable, so distant. This could be different. That’s when I decided to dive into Arduino and sensors to make a room that actually responds to you.

For the first prototype, I didn’t focus too much on the detailed decoration of a specific artist’s studio. Instead, I created a simplified miniature room, kind of like my own room here in Graz. You know, I am something of an artist myself.

Then I began researching what kinds of Arduino interactions are possible and which sensors could work for what I had in mind. The first obvious choice was a door interaction: when you enter the room, the light turns on. Simple, but already gives the space life. Then I found tutorials about TV or laptop interactions and added those as well. One by one, the room began to feel more real.

Here are the sensors and interactions I used in the prototype:

  • KY-010 Beam Sensor (door sensor): detects when the door is open, triggering the room light.
  • KY-018 Photoresistor: simulates natural lighting—when the room is dark (like at night), the behavior changes but for my prototype I used to detect the lack of light, so if you go to bed and cover it with a blanket, it turns the light off.
  • Conductive Tape Sensor (drawer interaction): when the drawer is open, a soft light turn on.
  • Ultrasonic Sensor (HC-SR04): detects if someone approaches the TV. When you get close, the TV turns on and a soft startup sound plays. When you leave, it powers off with a shutdown sound.
  • Button and Buzzer: originally used as a basic interaction tool to test sound responses, I used it a doorbell.

By combining all these elements, I planned to create a small room that responds to the presence and actions of a visitor. The lights change. Sounds react. It’s still just a prototype but already it’s something you don’t just look at. You feel it. And maybe, through this interactive experience, someone who doesn’t normally connect with art might pause and think: “Wait… this is actually interesting.”

WebExpo Conference. 12 Core Design Skills Every Designer Should Master

At this year’s WebExpo, Jan Řezáč delivered a compelling and structured talk titled “12 Core Design Skills” that reframed what it means to be a complete designer today. Drawing from real-world challenges in UX, CX, and product design, he warned against common traps and laid out a roadmap for how designers can escape it by growing beyond just creativity or aesthetics.

Here are the 12 essential skills he outlined, along with some key takeaways from each:

1. Design Process

Design is not art. It’s intentional problem-solving. Whether you’re improving conversion rates or building a new service, a structured and goal-oriented design process is critical.

2. Business Thinking

To be taken seriously, designers must speak the language of business. This means understanding value chains, profit models, and being fluent in spreadsheets, metrics, and strategic frameworks.

3. Workshop Facilitation

Good workshops don’t happen by accident. Designers need to know how to listen actively, manage group dynamics, and facilitate decision-making sessions that are productive—not just fun.

4. Customer Research

From interviews to analytics, understanding what people say vs. what they do is vital. Tactical empathy—listening well, reading nonverbal cues, and avoiding judgment—is just as important as choosing the right method.

5. Sense-making

It’s not enough to gather data—you must extract meaning from it. Tools like journey maps, affinity diagrams, or concept maps help designers (alone or in teams) make strategic sense of what they learn.

6. Strategy

Designers influence business outcomes. Strategic thinking involves more than goals—it’s about choosing the right battles and methods. Familiarity with tools like Wardley Maps or Cynefin helps designers navigate complexity.

7. Stakeholder Management

This is a social skill, not a soft skill. Designers must persuade, negotiate, and manage conflict—often while handling governance and aligning teams. The higher you go, the more this matters.

8. Ideation

Great designers generate many ideas. Juniors tend to fixate on the first; seniors create, oppose, remix, and improve. With AI in the mix, idea generation becomes a hybrid of human insight and computational creativity.

9. Rapid Prototyping

Prototypes aren’t just sketches—they’re experiments. From static screens to AI-driven tools, being fast and iterative is essential. Tools like Replit, Firebase Studio, and Glitch are part of the modern prototyper’s stack.

10. Testing Business Ideas

Borrowing from lean startup methods, this skill is about de-risking innovation. You don’t need to build to test—you need fake doors, landing pages, concierge tests, and more.

11. Design Operations

The backstage of design: automation, documentation, tooling, and workflows. Understanding APIs, JSON, prompt engineering, and how to use AI tools well is increasingly part of the designer’s toolkit.

12. Project Management

Designers who can’t manage time, people, and dependencies get stuck. As you grow, you must manage not only yourself, but also others—and your boss. That means mastering risks, gantt charts, and even meetings.

Final Thought: Avoid the Second Diamond Trap

One of the most resonant warnings from Řezáč was about the “Second Diamond Trap”—the tendency to over-invest in ideation and exploration without ever delivering results. To rise above that, designers must develop both creative and operational muscles.

If you’re a junior, mid-level, or senior designer, this list isn’t just a checklist—it’s a map. And in a world where 95% of new products fail, becoming fluent in these 12 areas might just make the difference between launching something forgettable… or something that lasts.

WebExpo Conference. Survival kit for the Advertising Jungle

At WebExpo Prague, one standout talk compared the world of advertising to a jungle. A dangerous, chaotic, yet exciting terrain where only the smart and strategic make it out alive. The speakers laid out a vivid survival guide with 10 essential rules for brands trying to cut through the noise and thrive. Here’s what I took away.

1. Know What’s in Your Survival Kit
Every successful campaign starts with knowing the basics: who you are, what you’re selling, and who you’re talking to. Your brand, product, and target audience form your survival gear. Without a clear identity and focus, you’re setting off without a map or a compass.

2. Enter with Courage
Surviving the advertising jungle takes guts. You need the courage to invest, often heavily and the courage to be different. Playing it safe means blending in. True bravery lies in trying new approaches, breaking norms, and not fearing bold decisions.

3. Hunt One Animal
Don’t try to chase everything at once. Focus your efforts on one clear objective and communicate one strong message. Klarna’s “smooth payments” campaign succeeded not because it was extraordinary, but because it was simple, focused, and consistent.

4. Stay on the Path
Consistency and integration are what keep a campaign strong over time. An integrated campaign is 31% more effective, and consistent brands earn 28% more profit. That means sticking to your story, your values, and your visual language across every platform.

5. Take a Buddy
Your buddy in the jungle could be a mascot or a recurring character, what’s called a fluent device. Most brands play it safe with friendly figures, but the bold ones dare to go rogue. Think of the chaotic Duolingo owl or the famously grumpy “Never Say No to Panda.” A strong character gives your brand a recognizable, repeatable voice.

6. Climb the Tree for Perspective
Survival sometimes means stopping to get a better view. In creative terms, that means finding unusual angles, new interpretations, or breaking common patterns. Great ideas often come from looking at the ordinary in unexpected ways.

7. Follow the River
Trends are like rivers: fast-moving, powerful, and unpredictable. Tapping into them can give your brand momentum. Think of Heineken’s “The Flipper” or the viral explosion of “Brat summer.” These cultural waves don’t last long, but when timed right, they carry you far.

8. Cooperate with the Indigenous People
In the jungle, locals know the terrain. In advertising, that means working with credible people who already have trust and reach like influencers, actors, or community figures. But the influencer cannot be the idea itself. Calvin Klein’s campaign with Jeremy Allen White had cultural fit; Kendall Jenner’s Pepsi ad did not. Authenticity is key.

9. Turn Obstacles into Opportunities
Barriers don’t have to stop you they can inspire creativity. When a brand faced “consumer blindness” to prices, it made the price tag the visual identity. When beer ads were banned from football kits, they got players to shave beer logos into their hair. Restrictions can become your creative fuel.

10. Celebrate at the End
Surviving the jungle is no small feat. When the campaign ends, take time to reflect, share what you learned, and celebrate the journey. The best brands don’t just move on—they take their wins, analyze their failures, and build smarter strategies for next time.

Final Thought
In the end, advertising isn’t about playing it safe. It’s about preparing wisely, taking risks, collaborating meaningfully, and adapting fast. The jungle is wild but with the right survival kit, your brand might not just survive. It might lead the way.

NIME Review – Juggling for Beginners by Zeynep Özcan, and Anıl Çamcı

I recently read a paper presented at NIME 2024 called “Juggling for Beginners: Embracing and Fabricating Failure as Musical Expression”. It immediately caught my attention, not only because of its playful title, but because it challenges some of the deepest assumptions we have about performance, skill, and music-making.

What the paper is about

The paper I read introduces a musical interface that is unlike anything I’ve seen before. Instead of rewarding precision or control, it creates music from failure. The authors designed a system that turns unsuccessful attempts at juggling into expressive sound.

The concept is as charming as it is deep. A person begins juggling (or trying to), and the system tracks their movements. Instead of focusing on how well the person juggles, the software listens for the irregularities—the clumsy throws, the missed catches, the awkward flailing—and those gestures are what drive the music. The worse you are at juggling, the more interesting and expressive the sound becomes.

This flips the usual narrative of performance entirely on its head. Instead of needing years of practice to produce something worth hearing, this instrument invites beginners to make music from the get-go. It doesn’t ask you to be good—it asks you to be honest and in motion.

A beautiful rethinking of performance

What I found most powerful in this work is the idea of embracing mistakes not just as accidents, but as an essential part of the musical expression. In so many areas of life—especially in music, dance, and design—we are taught to rehearse, refine, and perfect. Only when we’ve eliminated our errors do we feel ready to perform. But this project suggests the opposite. What if mistakes are the very thing that makes a performance meaningful?

This feels incredibly precious and unusual. It invites a kind of vulnerability that we don’t often associate with technology-based interfaces. There is something beautifully human about using failure as a medium. And more than that, it opens the door to people who might never have considered themselves performers. You don’t need skill to play this instrument. You just need to show up and try.

The paradox of getting better

One interesting point the authors raise is that, over time, players naturally begin to improve at juggling—even without trying. Our bodies quietly refine our motor skills in the background. As a result, the spontaneous mistakes that originally made the music expressive start to disappear, and the performance begins to feel more controlled and less surprising.

To counteract this, the authors suggest modifying the sound engine itself to subtly provoke mistakes. By introducing stochastic elements—randomized or unpredictable changes to how juggling movements are translated into sound—they can gently “distract” the performer. The idea is that the sonic feedback becomes less stable, less predictable, and this in turn prompts more slips and errors. I found this approach really elegant because it keeps the performer in that beautiful, vulnerable space of not quite knowing what’s going to happen next.

My thoughts

Personally, I find the idea of making music from failure deeply moving. It’s not just a technical innovation—it’s a philosophical one. It makes space for the unpolished, the nervous, the beginner. It reminds me that expression doesn’t have to come from mastery. It can come from trying, from stumbling, from not quite knowing what you’re doing.

In a culture that constantly pushes us toward perfection, this work feels like a breath of fresh air. It reminds me that technology doesn’t have to make us faster, better, or more precise. Sometimes, the most poetic thing it can do is reflect our imperfections back to us in a way that feels like music.

First Lo-Fi Prototype

Prototyping Something I Actually Needed: A DIY Card Holder

Prototyping doesn’t always have to be about complex mechanisms or perfectly rendered 3D models. Sometimes, it’s about solving a real problem in a clever, quick, and personal way. That’s exactly what I did when I created my first low-fidelity prototype: a custom card holder made from an old makeup bag.

The Problem

Like many people living in student housing, I rely on an access card to enter my dorm. The problem? I kept forgetting it or misplacing it. I wanted something that made it easier to carry my card—something I could simply wear around my neck, so I’d always have it on me. And if it could look nice too, even better.

The Prototype

To create the card holder, I used what I had at home. The back piece is cut from a light blue plastic makeup bag—a resin-type material I chose specifically because it’s semi-rigid, waterproof, and still allows a card chip to be read through it.

For the front, I used the transparent part of the bag, which features small printed illustrations of people swimming. I loved how it looked—playful, bright, and just a little bit surreal. It added a fun visual layer to something that could easily be purely utilitarian.

To make the card holder wearable, I punched two holes and tied a pink ribbon I found among my accessories. It’s soft, slightly shiny, and gives the piece a gentle, decorative touch.

User Testing (aka Class Feedback)

We had a feedback session in class, and it was both helpful and encouraging. First of all, everyone immediately recognized what the prototype was and how it worked. That kind of clarity is important in prototyping—if people “get it” without explanation, you’re already off to a good start.

One important point that came up was the strap. While the ribbon looks nice, it’s a bit too short, making it awkward to reach the door reader. A longer or adjustable strap would make it more practical.

On the material side, my classmates liked that the card doesn’t need to be removed to be scanned. The plastic is durable, waterproof, and easy to clean. Someone even mentioned that it could be worn while swimming—imagine you’re staying in a hotel by the beach and don’t want to carry anything. You could just wear your room card like this around your neck. Surprisingly useful.

And then there was the design. People really appreciated the look—the little swimmers, the color combo, the ribbon. One person said it perfectly matched my vibe. That made me think: what if this card holder could be customizable? Different prints, colors, or strap styles for different personalities.

Final Thoughts

This was a super simple prototype, but it taught me a lot. It didn’t take long to make, it solved a small but real problem, and I’ve been using it every day since. I even hang it by the door now, so I never forget it again.

What started as a class assignment ended up becoming something personal, practical, and pretty stylish. That’s the kind of prototyping I love: solving real needs in a way that feels truly you.

Let them tell their stories

Life is built on stories. Movies are stories, books are stories, every single song is a story. But fine art doesn’t possess the same natural capability to narrate. While other mediums unfold their tales over time, we usually spend only a fleeting moment next to the paintings. Their stories and contexts remain hidden beneath layers of paint. And when we visit museums, the only guide to understanding often comes in the form of a small text label next to the artwork.

This limitation creates a disconnect between art and its audience. Many people feel intimidated by museums and galleries, perceiving art as something they lack the knowledge to understand. This barrier discourages meaningful engagement, leaving artworks shrouded in mystery and misunderstanding. However, technology offers a transformative solution. By using tools like augmented reality, spatial audio, projection mapping, and artificial intelligence, we can break through this divide, making art more accessible, engaging, and comprehensible for everyone.

Why Technology Matters in Art Perception

Art is often considered a bridge between eras, emotions, and cultures, but for many, this bridge can feel inaccessible. Museums and galleries have long struggled with making art relevant and engaging to broader audiences, and technology offers an exciting solution. By weaving interactive and immersive tools into the art experience, we break down the “glass barrier” between viewers and the context of artworks, transforming how people engage with and learn from art.

Moreover, people often feel intimidated by museums and galleries because they think they don’t understand art. This intimidation creates a barrier that discourages many from exploring and appreciating artistic works. With technologies designed to simplify and enrich the understanding of art, we can lower this barrier. By presenting art as an approachable and engaging experience, technology empowers audiences to explore creativity without fear of judgment or confusion.

Enriching Education

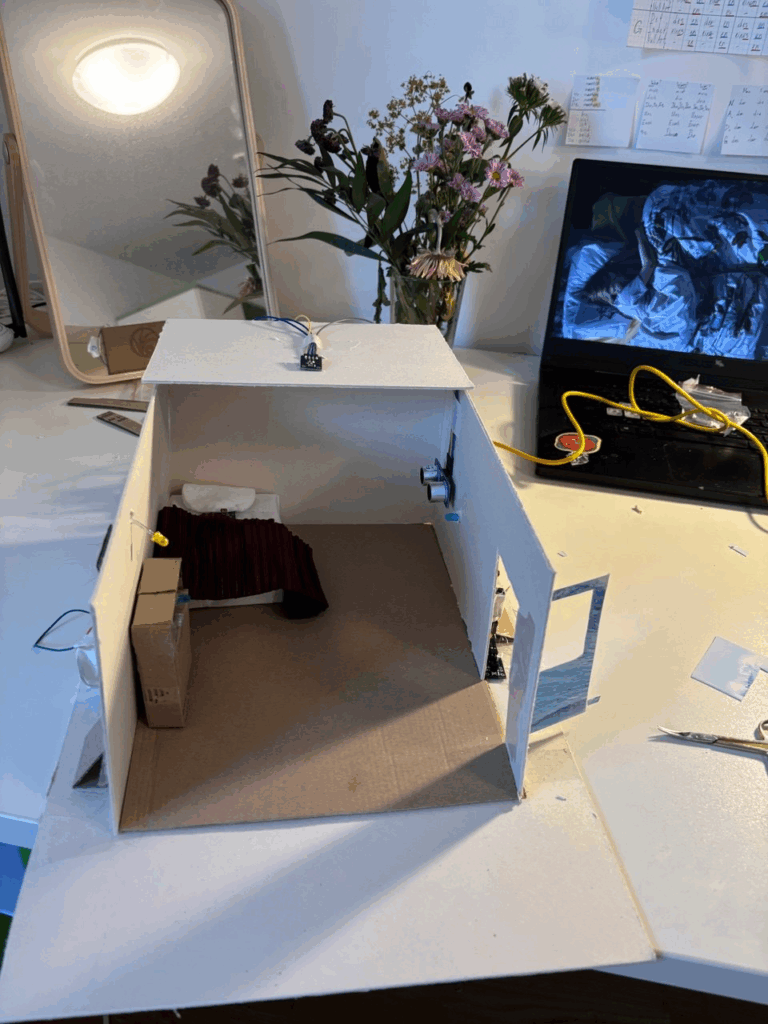
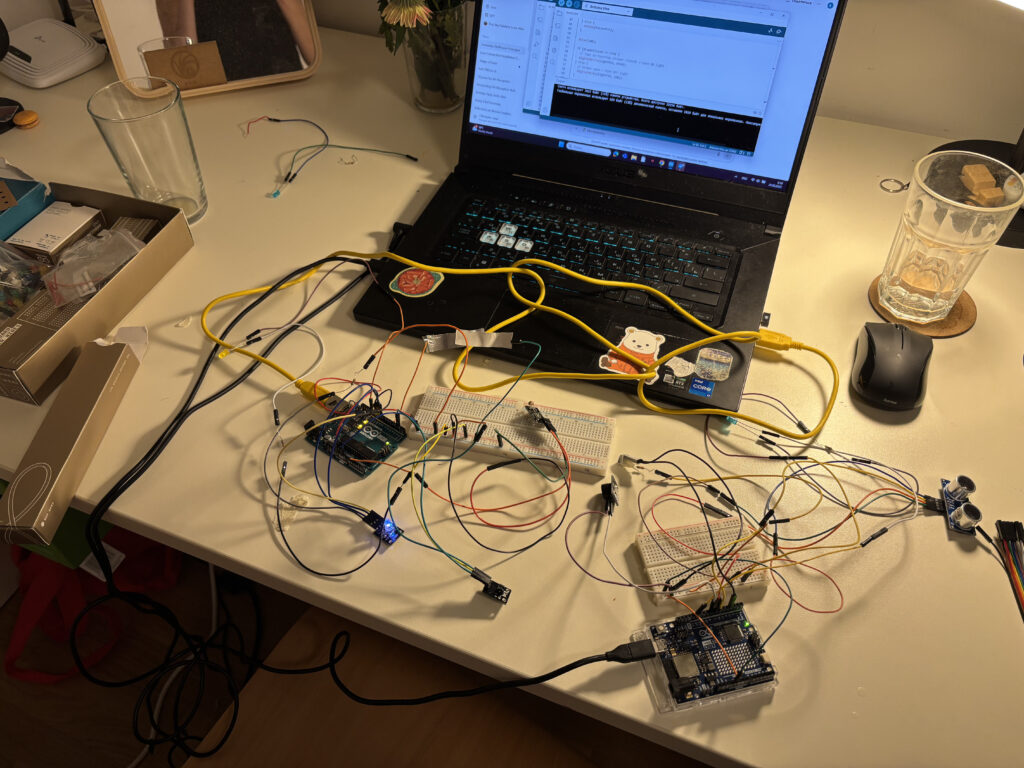
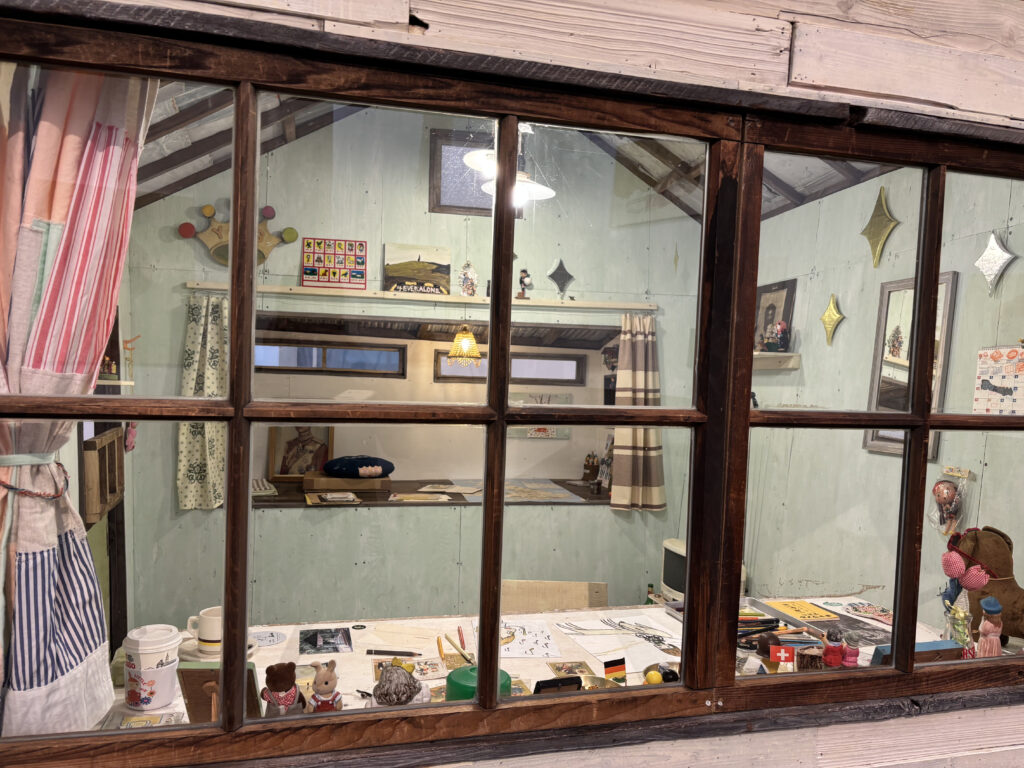
Education is at the heart of art appreciation, but traditional methods of conveying context can feel dry or overwhelming. Technology revolutionizes this by presenting historical and cultural narratives in dynamic, interactive ways. Projection mapping, for instance, can transform a painting into an evolving story, visually illustrating its historical background or the artist’s process. Augmented reality overlays can offer real-time insights as viewers explore an artwork, encouraging a richer understanding without detracting from the piece itself. These innovations cater to different learning styles, helping visitors of all ages and backgrounds connect with art on their own terms.

Bridging Generational Gaps

Attracting younger audiences to museums and galleries has always been a challenge, but technology can make art more engaging and relatable. Gamified experiences, interactive AR exhibits, and AI-driven storytelling captivate digital natives accustomed to immersive content. These technologies meet younger generations where they are, transforming museums into hubs of discovery and inspiration. By fostering early interest, they pave the way for lifelong appreciation of art and culture.

Fostering Emotional Connections

One of art’s most profound roles is its ability to evoke emotion, and technology can amplify this impact. Spatial audio, for example, creates immersive soundscapes that enhance the emotional resonance of an artwork. Similarly, projection mapping breathes life into static works, allowing viewers to experience art as a living, breathing narrative. These sensory layers deepen personal connections, making the experience unforgettable.

Building Cultural Understanding

Art serves as a mirror of society, reflecting its values, struggles, and triumphs. By integrating technologies like AI and AR, museums can make these reflections more vivid and accessible. AI tools can uncover hidden patterns or connections between works, illustrating how different cultures and time periods influence one another. Augmented reality can bring to life the stories behind artifacts, showcasing their cultural significance and encouraging empathy for diverse perspectives. This deeper understanding fosters a sense of global interconnectedness, reminding us of our shared humanity.

Enhancing Accessibility

For many, physical or geographic barriers can make art inaccessible. Virtual tours enabled by 3D technology and augmented reality allow audiences to experience masterpieces from anywhere in the world. These tools provide close-up views of intricate details and textures, offering a level of intimacy that even in-person visits may not achieve. Additionally, digital experiences can incorporate accessibility features, such as audio descriptions for visually impaired users or multilingual options, making art truly inclusive.

The Broader Impact of Technology in Art

Incorporating technology into the art world doesn’t just enhance individual experiences—it has far-reaching societal benefits. Museums that embrace these tools often see increased attendance, as interactive exhibits draw in curious visitors who might otherwise feel detached from traditional art spaces. This growth boosts funding opportunities and cultural tourism, contributing to local economies and fostering community pride.

More importantly, these innovations ensure that the stories behind art are preserved and shared with future generations. By making art more accessible, engaging, and inclusive, we protect its relevance in an ever-changing world and invite everyone to explore the depths of creativity, history, and emotion it offers.

References:

https://www.participations.org/18-02-18-wlazel.pdf

https://nancyreyner.com/2024/08/15/art-in-society-the-impact-and-influence-of-art-in-culture-and-community/

https://ejazkhanphotography.com/why-art-is-important-to-society/#:~:text=A%20study%20of%20the%20arts,reality%20with%20greater%20cultural%20appreciation.

https://www.youtube.com/watch?v=zepG-4Y2ZIg&ab_channel=TEDxTalks

https://easylearn.baidu.com/edu-page/tiangong/questiondetail?id=1730185010859166304&utm_source=chatgpt.com

Rediscover with Projection Mapping

Projection mapping, also known as spatial augmented reality, uses specialized software to project images and animations onto three-dimensional surfaces. Unlike traditional flat-screen projections, it adapts to the contours of objects, creating dynamic, visually captivating effects. From enhancing historical landmarks to elevating museum exhibitions, projection mapping merges storytelling with technology, providing viewers with an engaging and memorable experience.

What is the impact on Art

Projection mapping offers a unique way to help audiences engage with art and its history. By turning artworks into dynamic, multi-sensory experiences, it allows people to connect more deeply with the stories behind the pieces. This technology can guide viewers through the cultural and historical context that shaped the art, making it easier to understand and appreciate.

One of the key benefits is how it captures attention and draws in people who might not normally feel interested in art. Instead of staring at a static piece, viewers are surrounded by movement, color, and sound that bring the artwork to life. It’s not just about creating a spectacle; it’s about immersing audiences in the time, place, and emotions of the artist’s world. For example, a centuries-old painting can be paired with projected visuals showing its original colors or the environment in which it was created. This adds layers of meaning that make the experience richer and more personal.

Projection mapping also makes art more accessible to broader audiences, including younger generations who might be more accustomed to digital and interactive formats. By blending technology with storytelling, it lowers the barrier for understanding and appreciating traditional works of art, creating a bridge between the past and the present

Case Study: Projection Mapping at the Tokyo National Museum

A great example of this was seen at the Tokyo National Museum during an exhibition called “The Mysteries of Asuka.” One of the key artifacts in the exhibition was the Saru Ishi, or “Monkey Stone,” an ancient carved object.

Projection mapping was used to bring the Monkey Stone to life. Animations lit up its surface, showing its carvings in detail and adding visuals that explained its historical and cultural importance. Visitors could imagine what the world looked like during the Asuka period of Japanese history. Instead of just looking at the stone, they experienced it as part of a bigger story. By projecting historical scenes and explanations onto the artifact, the museum helped visitors better understand the context of its creation and significance.

Van Gogh and the Rise of Projection Mapping in Art

Another popular use of projection mapping is seen in exhibitions like Van Gogh: The Immersive Experience and Van Gogh Alive. These exhibitions transform entire rooms into moving, animated versions of Van Gogh’s iconic works. Walls, floors, and ceilings are covered with projections of his art, accompanied by music and quotes from his letters.

These immersive exhibitions succeed because they provide context in a way that feels immediate and emotional. Instead of just reading about Van Gogh’s struggles or inspirations, visitors are surrounded by the swirling skies of Starry Night or the vibrant yellows of Sunflowers. The combination of visuals and sound pulls audiences into Van Gogh’s world, helping them understand not only his art but also the emotions and events that shaped it. By reimagining his works in this format, these exhibitions make his legacy feel alive and relatable to a modern audience.

Conclusion

Projection mapping is an amazing way to bring the stories behind art to life. It makes it easier to understand and connect with pieces that might otherwise feel distant or hard to relate to.

By making art more engaging, accessible, and contextual, projection mapping has the potential to spark a new level of interest in both classical and contemporary works. The possibilities are endless, and the results could change the way we see and understand art forever.

References:

https://headfull.jp/360-projection-mapping-at-tokyo-national-museum

https://www.jstage.jst.go.jp/article/pjab/100/3/100_pjab.100.012/_pdf/-char/en

https://blooloop.com/technology/opinion/future-of-projection-mapping/

https://vangoghexpo.com