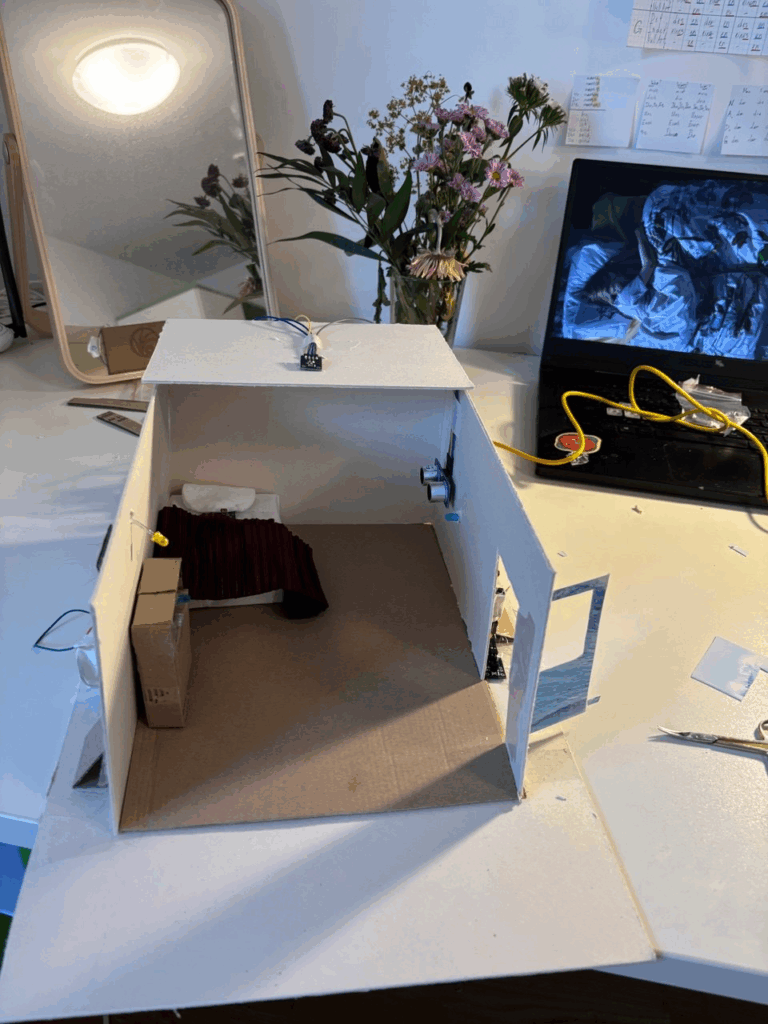
After testing everything on the table, it was finally time to bring the sensors into the tiny house I built. That’s when the real chaos and magic began.
Phase 1: The First Arduino Set – Doorbell & Laptop
I started simple. The first set of interactions included:
- A doorbell: a button paired with a buzzer.
- A laptop: triggered by a distance sensor, lighting up a small LED and playing a “startup” sound.
To make this work, I did small holes in the house walls to fit the lights and sensors. It wasn’t too hard, mostly about being careful with the details, especially when I had to connect two things to one leg of the button. It was tricky to get stable, and of course, when everything was finally ready, the buzzer went rogue and started buzzing constantly. Turned out it was just a bad connection. I had to redo the whole thing.

Phase 2: The Second Arduino Set – The House Comes Alive
This part was more complex. It took way longer not just because of the number of sensors, but also because I had to design furniture to hide them all before placing them in the house.
This set included:
- A door interaction using a beam sensor to control the main light.
- A bed interaction with a photoresistor that also controlled the main light.
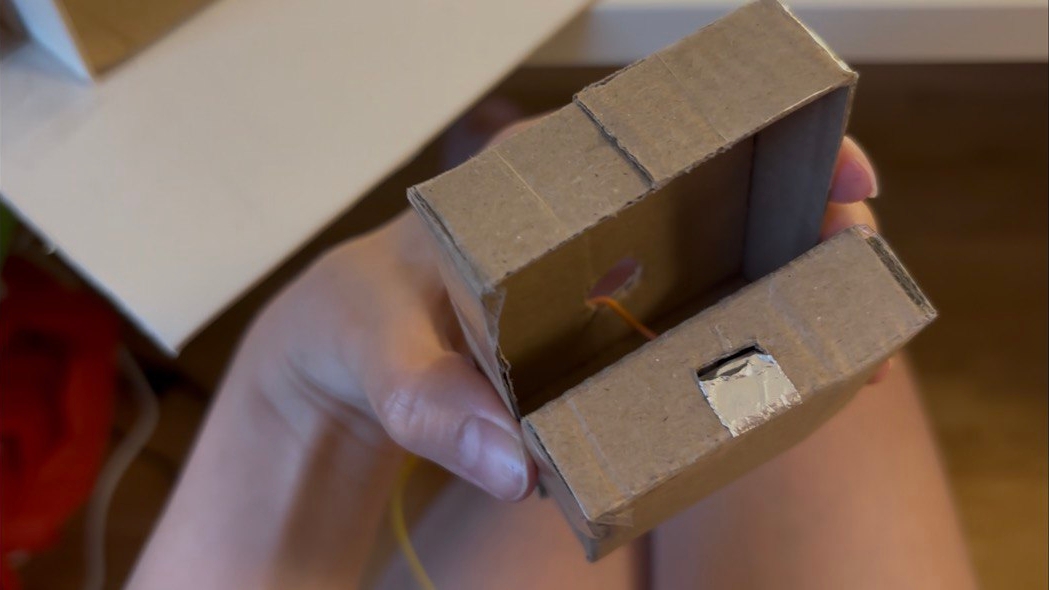
- A drawer interaction using conductive tape to detect when the drawer was open.
The drawer was the hardest part. I didn’t know where to hide the cables. Eventually, I hid them inside the drawers and made small holes in the back wall to run them to the Arduino. Sounds neat? It wasn’t.

When I finished wiring everything and plugged it in… nothing worked 🙁
2AM Debugging and the Classic Mistakes
It was already 2am and I was too excited to sleep without seeing it all come to life. But the drawer interaction wasn’t working, the tape inside had ripped from all the handling, so no signal could pass through. I had to redo everything.
slay…
And worse, I had skipped one very important step: checking each sensor one by one. The door sensor was acting weird, jumping erratically between 0 and 1, or not reacting at all. As a beginner, I didn’t immediately see the problem. I tried everything… until I moved the power and ground connections on the breadboard closer to the source. That fixed it. At 4am. And yes, it felt like a small miracle.
P.S. I don’t even have any pictures or videos from trying to fix the door sensor because I was full head inside the problem and could not remember to do videos of how annoying the process was.
What I Learned
- Always test sensors one by one before sealing them into furniture.
- Connections that look “fine” might not actually work, check and recheck.
- Even a tiny sensor setup can break down unexpectedly in a small-scale project.
- Pain at 4am feels worth it when the room finally lights up.
By the next day, everything was running. And with the system installed, I could finally move on to the fun part, decorating the room. I didn’t expect so much to break during setup, but it taught me more than any tutorial.

