This is officially my first time working with Arduino and honestly, it’s kind of funny how I began. I started with the simplest possible circuit: an LED light and a resistor, just to see something turn on. That small success was weirdly exciting. From there, I began testing each sensor individually, one by one, to understand how they work and what kind of interactions are possible.
I treated it like a kind of warm-up exercise. I wanted to get the logic behind each sensor, what it senses, how it reacts, what kind of output it gives, and how I could use that in my prototype. Here’s how the testing phase went, step by step:
1. The Doorbell (Button + Buzzer)
This was the very first interaction I tried out. A classic doorbell setup: you press the button, and the buzzer buzzes. Super simple and it worked immediately. A perfect confidence booster to start with!
2. The Door Beam Sensor
Next up was the door sensor using a KY-010 beam sensor and an RGB light. The idea was: if the beam is blocked (door closed), the light stays off; if the beam is clear (door open), the RGB light turns on. At first, it worked the other way around but that was just a logic issue, and the fix was quick. Once reversed, it worked great.
3. The Drawer Sensor (Conductive Tape + Light)
This one was really fun. I used two pieces of conductive tape inside the drawer, when they touch, it means the drawer is open and a soft yellow light turns on so you can see what’s inside. It was cute and cozy, and it worked smoothly right away.
4. The Laptop Interaction (Ultrasonic Sensor + Light)
Here I used an ultrasonic sensor. When you come close to the “laptop,” the light turns on, like you’re opening it. This interaction also worked as planned from the start, and I was pretty happy with how natural it felt.
5. Adding a Photoresistor for Sleep Mode
Finally, I added a photoresistor to control the same light as the door sensor. The idea was: the light turns on when the door opens but if you go to bed and cover the photoresistor with a blanket, the light turns off. I had some trouble with the values at first (it worked in reverse again), but I adjusted the threshold and fixed it quickly. It’s a small detail, but it adds a nice touch of realism.
Day Two: Combining It All
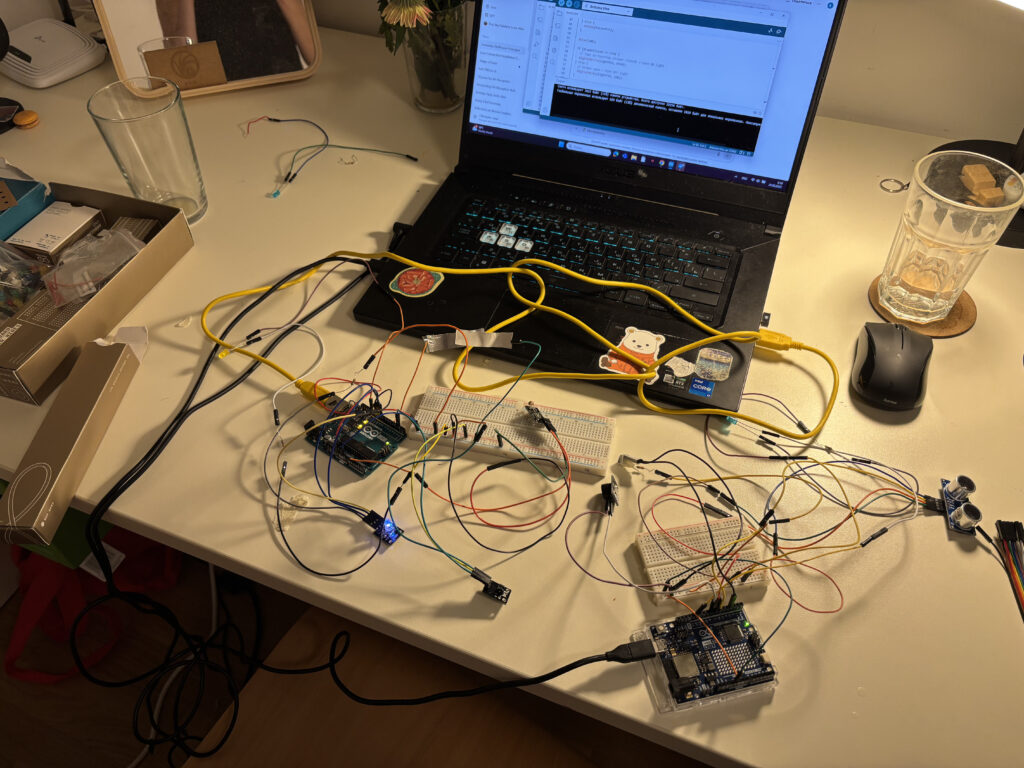
The second day was about combining all the sensors to work together. That’s when things got a bit tricky. One of the main challenges was the wiring, especially since I wanted to keep all components off the breadboard and inside my little room model. Managing all the cables without losing my mind took some time.
And then, a surprise problem appeared: the laptop interaction stopped working. No matter what I did, the ultrasonic sensor just wouldn’t respond. After lots of trial and error, I realized the issue wasn’t in the code, it was power. The Arduino couldn’t handle all the sensors at once.
The Fix: Two Arduinos Are Better Than One
To solve the power issue, I decided to connect the laptop interaction to a second Arduino board. And voilà, it worked again! I even added a little sound interaction: when you come close to the laptop, it lights up and plays a soft “turning on” sound. When you leave, the light turns off and you hear a subtle “shutting down” tone. It made the interaction feel much more alive.
Next Steps
In my next blog post, I’ll describe how I’m placing all the sensors, lights, and elements inside the mini room itself. Now that everything works, it’s time to bring the little artist’s space to life!