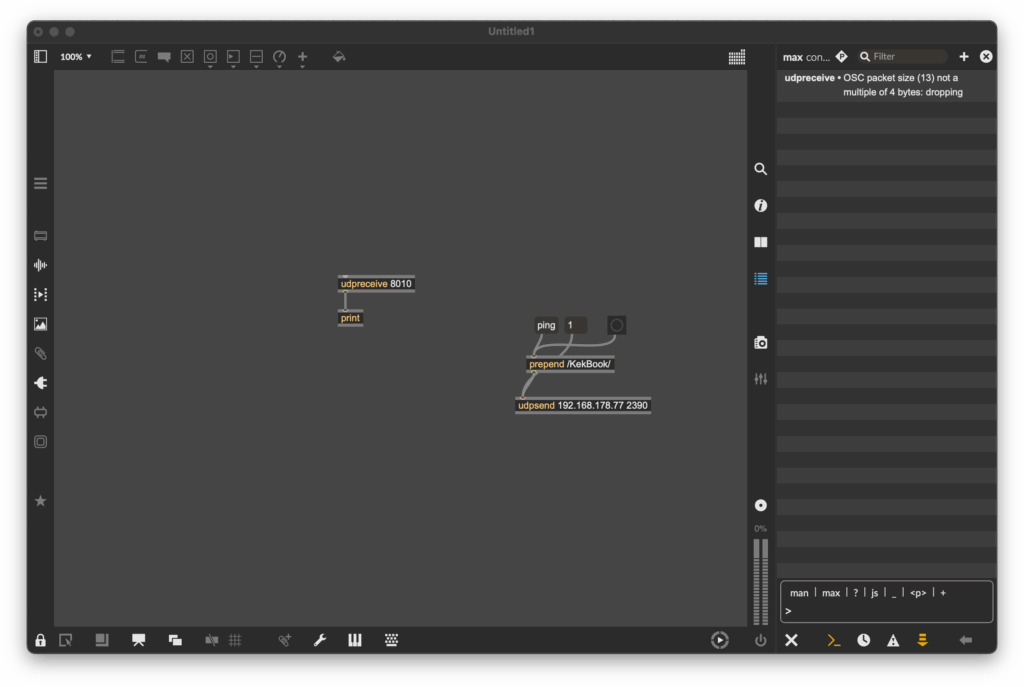
The data pipeline is structured in three different phases: acquisition, post-processing, and sonification. The first part, Acquisition includes independent capturing of audio (Zoom H4n, contact microphone), motion (x-IMU3), and video/audio (GoPro Hero 3). Then, in the next step, post-processing uses the x-IMU3 SDK to decode the recorded data. This data is then send via OSC to Pure Data and is there translated into its different parameters.
The sonification and audio transformation are carried out also using Pure Data.
This architectural structure supports a secure workflow and easy synchronization in post.
Motion data was recorded onboard the x-IMU3 device. After each session, files were extracted using the x-IMU3 GUI and decoded into CSVs. These contain accelerometer, gyroscope, and orientation values with timestamps (x-io Technologies, 2024). Python scripts parsed the data and prepared OSC messages for transmission to Pure Data. The timing issue is faced with the help of synchronizing big movements in rotation or acceleration during the long recording all devices. (Wright et al., 2001).
The Audio recorded from the contact mic is a simple mono WAV file and is Pure Data and later Davinci Resolve for the audio video final cut. Looking at the recordings, the signal primarily consisted of strong impact sounds, board vibrations, water interactions and movements of the surfer. These recordings are used directly for the sound design of the movie. During the main part of the movie, when the surfer stands on the board, this audio will also be modulated using the motion data of the sensor reflecting on the gestures and board dynamics. (Puckette, 2007; Roads, 2001).
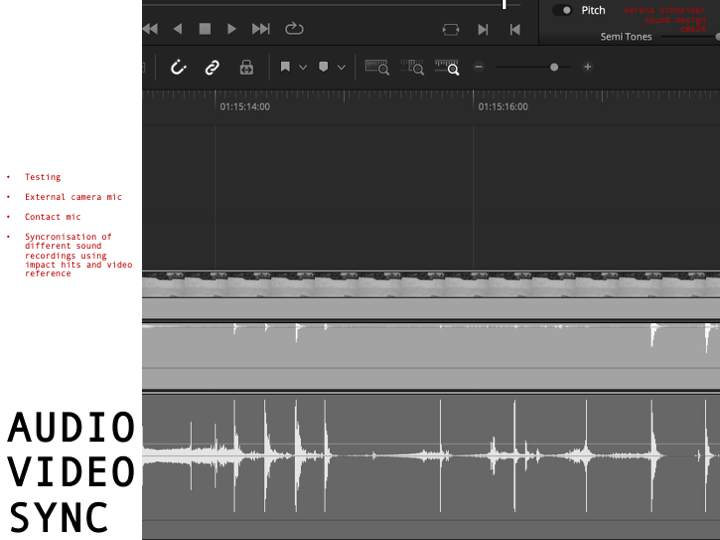
Having all this different not in synchronized time recorded data files leaves a great question of exact synchronization. Therefore, a test was conducted which will be explained in more detail in the section: 10. SURF SKATE SIMULATION AND TEST RECORDINGS. The movement of surfing was simulated using a surf skateboard, on which a contact microphone was mounted on the bottom of the deck. In addition to the microphone also the motion sensor was placed next to the microphone. Now, having the image and the two sound sources (contact microphone and audio of the Sony camera) I could synchronize both recordings in post-production using Davinci Resolve. Here the main key findings were the importance of great labeling of the tracks and clear documentation of each recording. During the final recordings on the surfboard the GoPro Hero 3 will act as an important tool to synchronize all the different files in the end. Another audio output of the GoPro acts as an additional backup for a more stable synchronization workflow. Here test runs on the skateboard are essential to be able to manage all the files in post-production later. (Watkinson, 2013).
The motion data recorded on the ximu3 sensor is replayed on the GUI of the sensor and can then send the data via OSC to Pure Data. Parameters such as pitch, roll, and vertical acceleration can then be mapped to different variables like grain density, stereo width, or filter cutoff frequency. (Puckette, 2007).
All tools are selected based on compatibility and possibility to record under this special conditions. The toolchain includes:
- x-IMU3 SDK and GUI (macOS) for sensor decoding
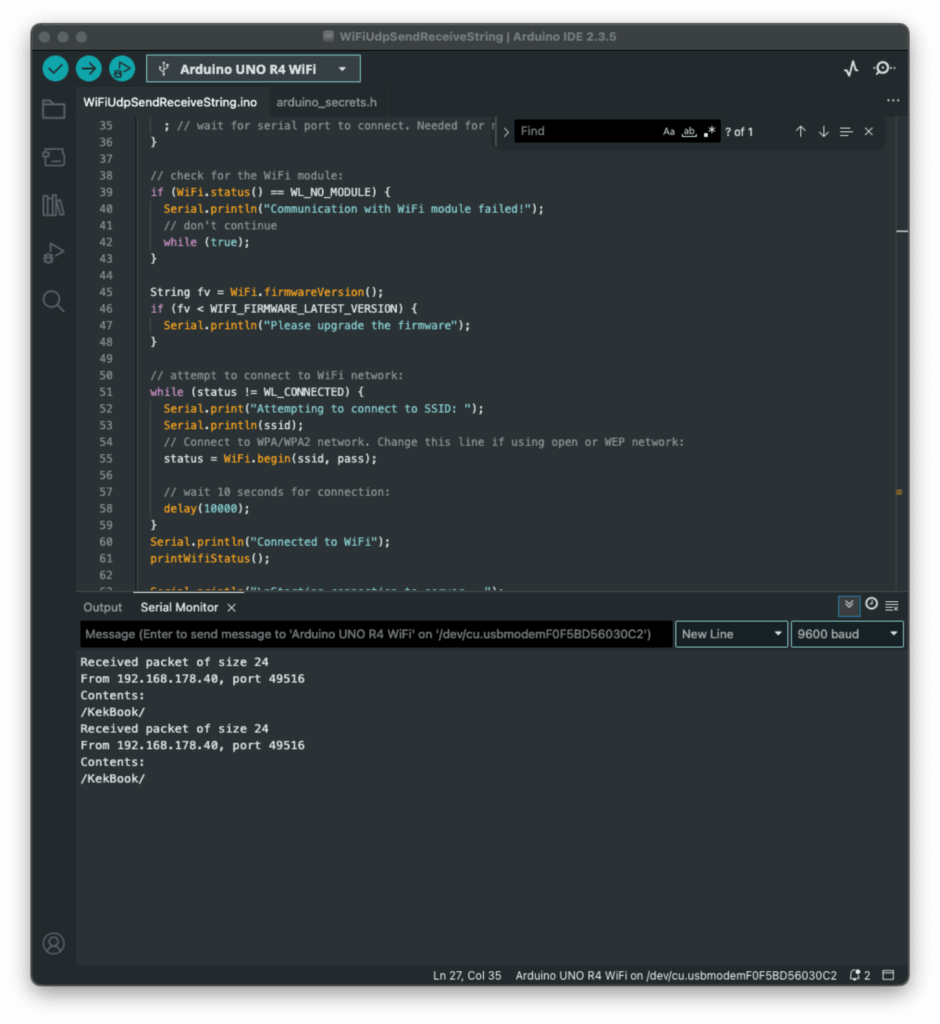
- Python 3 for OSC streaming and data parsing
- Pure Data for audio synthesis
- DaVinci Resolve for editing and timeline alignment
This architecture functions as the basic groundwork of the project setup and can still be expanded using different software’s of python code to add more individualization during different steps of the process. (McPherson & Zappi, 2015).
Looking deeper into the Synchronization part of the project, challenges arrise. Because there is no global time setting for all devices, they have to run individually and then be synchronized in post-production. Here working with good documentation and clear labels of each track helps to get a good overview. Especially the data of the motion sensor will have a lot of information and needs to be time aligned with the audio. Synchronizing audio and video, however, is for sure a smaller challenge, because of the multiple different audio sources and the GoPro footage. A big impact or a strong turn of the board can then be mapped to the audio and video timeline. The advantage of one long recording of a 30 min surf session is for sure, that the possibility for such an event increase over time. Tests with the skateboard, external video and audio from the contact microphone were already successful.
On the image the setup in Davinci Resolved shows the synchronization of the contact microphone (pink) and the external audio of the Sony Alpha 7iii (green). Here the skateboard was hit against the floor in a rhythmical pattern, creating this noticeable spikes in audio on both devices. This rhythmical movement can also be seen on the XIMU3 sensor.